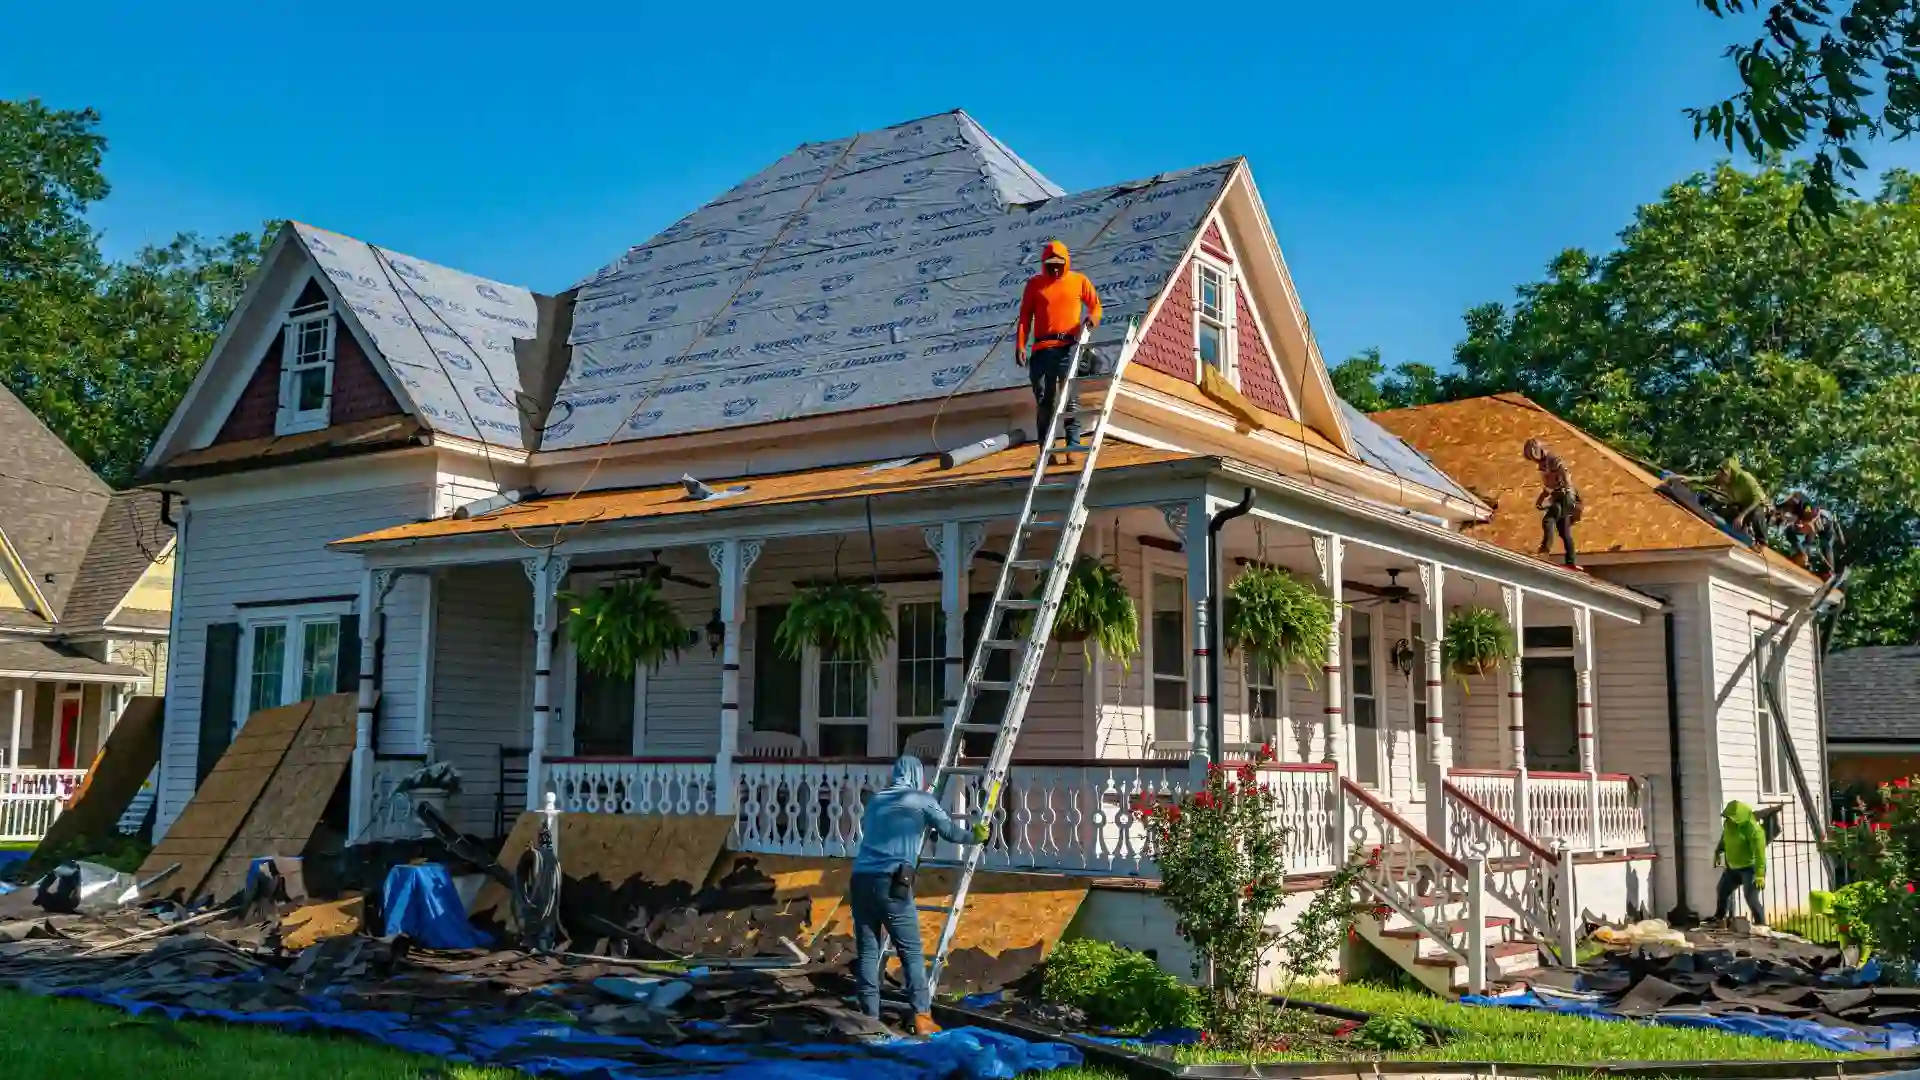
Installing a new roof is an exciting but often stressful project for homeowners. Between scheduling contractors, preparing your home, and managing daily disruptions, one of the most common questions people ask is how long the process will actually take. Knowing the timeline helps with planning work schedules, parking, pets, and even conversations with neighbors.

Homeowners want clear expectations because roofing work affects daily life. Noise, debris, and limited access to parts of the property can be inconvenient—but temporary. Understanding the timeline reduces uncertainty and prevents frustration.

The quick answer is that most residential roofs are installed in 1–2 days, but that’s only a general estimate. Roof size, material choice, weather conditions, and roof complexity can significantly change the schedule.

In this guide, we’ll break down exactly how long does it take to install a roof, what affects installation speed, how timelines vary by roofing material, and what happens before, during, and after installation. By the end, you’ll know what to expect and how to prepare for a smooth roofing project.

Quick Answer: Average Roof Installation Timeframes

For homeowners wondering how long does it take to install a roof, the answer is often shorter than expected—but it depends on home size, roof complexity, and materials.

A. Standard Residential Roof Installation Times

  • Average homes (2,000–3,000 sq ft) with asphalt shingles usually take 1–2 days to install.

  • Small homes under 1,000 sq ft can often be completed in 1 day or less.

  • Larger homes (3,500+ sq ft) typically require 2–4 days.

  • Complex roofs with premium materials or intricate designs may take 5 days to over 2 weeks.

  • Commercial roofs vary widely, often taking 1–5+ weeks, depending on size and roofing system.

These estimates assume favorable weather, an experienced crew, and no hidden structural issues.

B. Total Project Timeline vs. Installation Time

It’s crucial to distinguish between the actual installation and the overall project timeline.

  • Physical roof installation: usually 1–3 days

  • Full project timeline: often 2–3 weeks

The full timeline includes pre-installation steps like consultation, material selection, permits, scheduling, delivery, and inspections. Many homeowners asking how long does it take to install a new roof are surprised to learn that the physical work is just a fraction of the process. Proper planning and scheduling are essential to ensure a smooth installation and minimize disruptions.

Understanding this distinction helps homeowners set realistic expectations and plan for logistics, budgeting, and temporary disruptions during the roofing project.

Installation Timeline by Roofing Material

The time it takes to install a roof varies significantly depending on the material used. Here’s a breakdown of typical installation timelines for popular roofing options.

A. Asphalt Shingles (Most Common)

Asphalt shingles are the fastest to install and the most popular choice among homeowners.

  • Installation time: 1–2 days for an average 2,000–3,000 sq ft home

  • Range: 1–3 days depending on roof size and complexity

These shingles come in large bundles, and the straightforward installation process allows crews to work efficiently.

  • Lifespan: 15–30 years

  • Cost: Most affordable option

B. Architectural / Dimensional Shingles

Thicker and heavier than standard 3-tab shingles, architectural shingles take slightly longer to install.

  • Installation time: 1–3 days

  • Lifespan: 25–30 years

The extra time accounts for careful alignment and placement to ensure aesthetic appeal and durability.

C. Metal Roofing

Metal roofs require more precision during installation.

  • Installation time: 2–7 days

  • Standing seam metal: 3–7 days

  • Metal panels/shingles: 2–4 days

Homeowners often ask how long does it take to install a metal roof, as these systems last 40–70+ years, making the longer installation time worthwhile. Proper panel alignment, specialized fasteners, and tools contribute to the extended timeline.

D. Cedar Shake / Wood Shingles

Installed individually, cedar shakes require meticulous placement for proper airflow.

  • Installation time: 4–8 days

  • Lifespan: 20–40 years

  • Cost: Premium

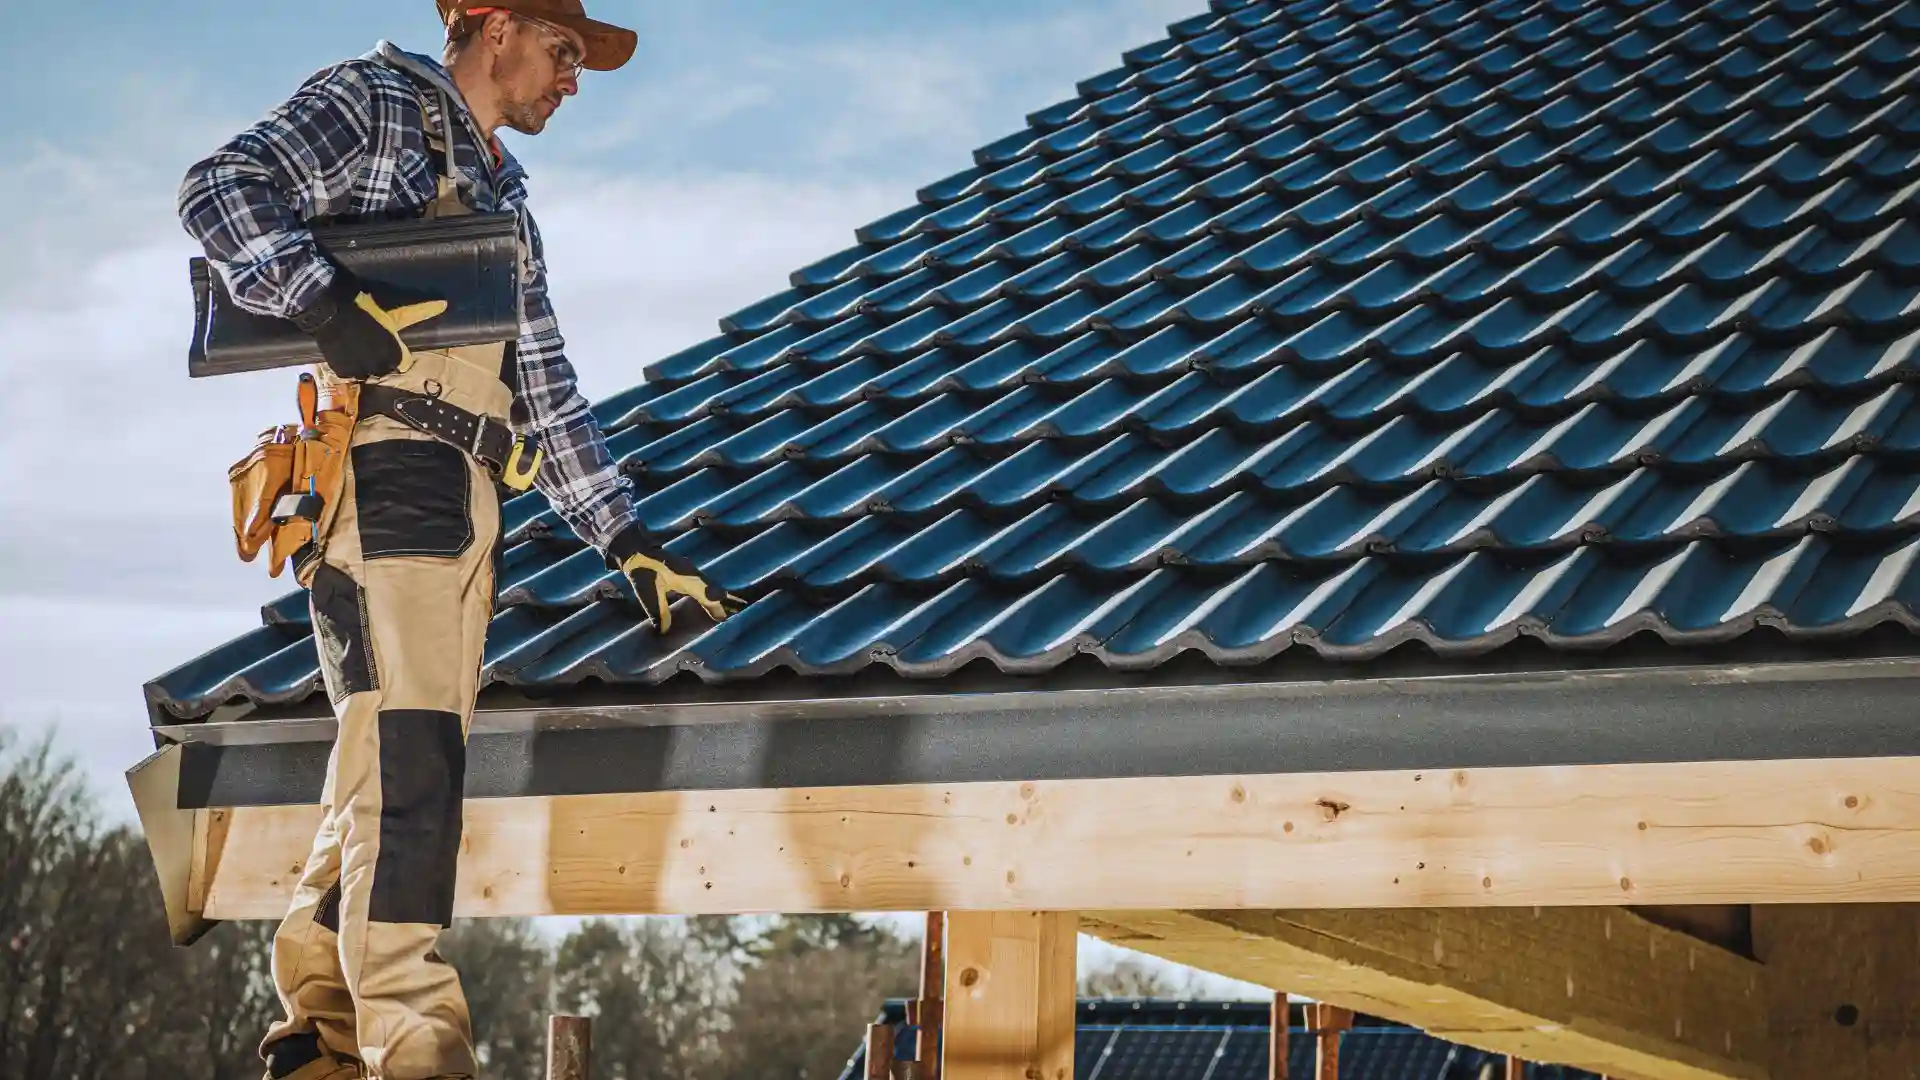
E. Slate or Tile Roofing

Heavy, fragile materials like slate or clay/concrete tiles demand precise handling and sometimes structural reinforcement.

  • Installation time: 5–10+ days (up to 2 weeks)

  • Lifespan: 50–100+ years

  • Cost: Highest

F. Synthetic / Composite Shingles

Installed similarly to cedar shakes, synthetic shingles are durable but labor-intensive.

  • Installation time: 5–7 days

  • Lifespan: 50+ years

G. Flat / Low-Slope Roofing

Common for commercial buildings or residential additions, these roofs use materials like TPO, EPDM, or modified bitumen.

  • Installation time: 2–5 days

Understanding the installation timeline for your chosen material helps homeowners plan effectively, especially when considering how long does it take to install a new roof or specialized systems like metal roofing.

Major Factors That Affect Installation Time

Several factors influence how long it takes to install a roof, and understanding them helps homeowners set realistic expectations.

A. Roof Size and Square Footage

Roofing work is measured in squares, with one square equaling 100 square feet. Naturally, the more squares your roof has, the longer it will take to install:

  • Small roofs (10–15 squares): typically 1 day

  • Average roofs (20–30 squares): 1–2 days

  • Large roofs (40+ squares): 3 or more days

It’s important to note that roof size differs from home square footage due to pitch, design complexity, and additional features like dormers.

B. Roof Pitch (Steepness)

The steepness of your roof directly affects safety and speed.

  • Low-pitch roofs (3/12 or less) are easiest to navigate and fastest to install.

  • Medium-pitch roofs (4/12–8/12) follow a standard pace.

  • Steep roofs (9/12 or greater) slow work significantly because safety equipment, harnesses, and scaffolding are required. Material transport and precise placement also take longer.

C. Roof Complexity

Complex architectural features add installation time. Valleys, hips, ridges, dormers, skylights, multiple chimneys, and multi-story designs require detailed flashing work and precise cuts, often extending timelines by hours or even full days.

D. Roof Accessibility

Limited access can slow material delivery and debris removal. Tight urban lots, dense landscaping, fencing, or narrow driveways all complicate logistics and add time.

E. Existing Roof Condition

Unexpected damage is a common delay factor:

  • Multiple old layers: adds 0.5–1 day for tear-off

  • Rotted decking: +1–3 days for repairs

  • Structural issues: variable depending on severity

F. Weather Conditions

Dry, mild conditions are ideal. Rain, high winds, extreme heat, snow, or ice can halt work or slow progress.

G. Time of Year

Longer daylight hours in spring and summer allow crews to work longer days, while shorter winter days may extend project duration.

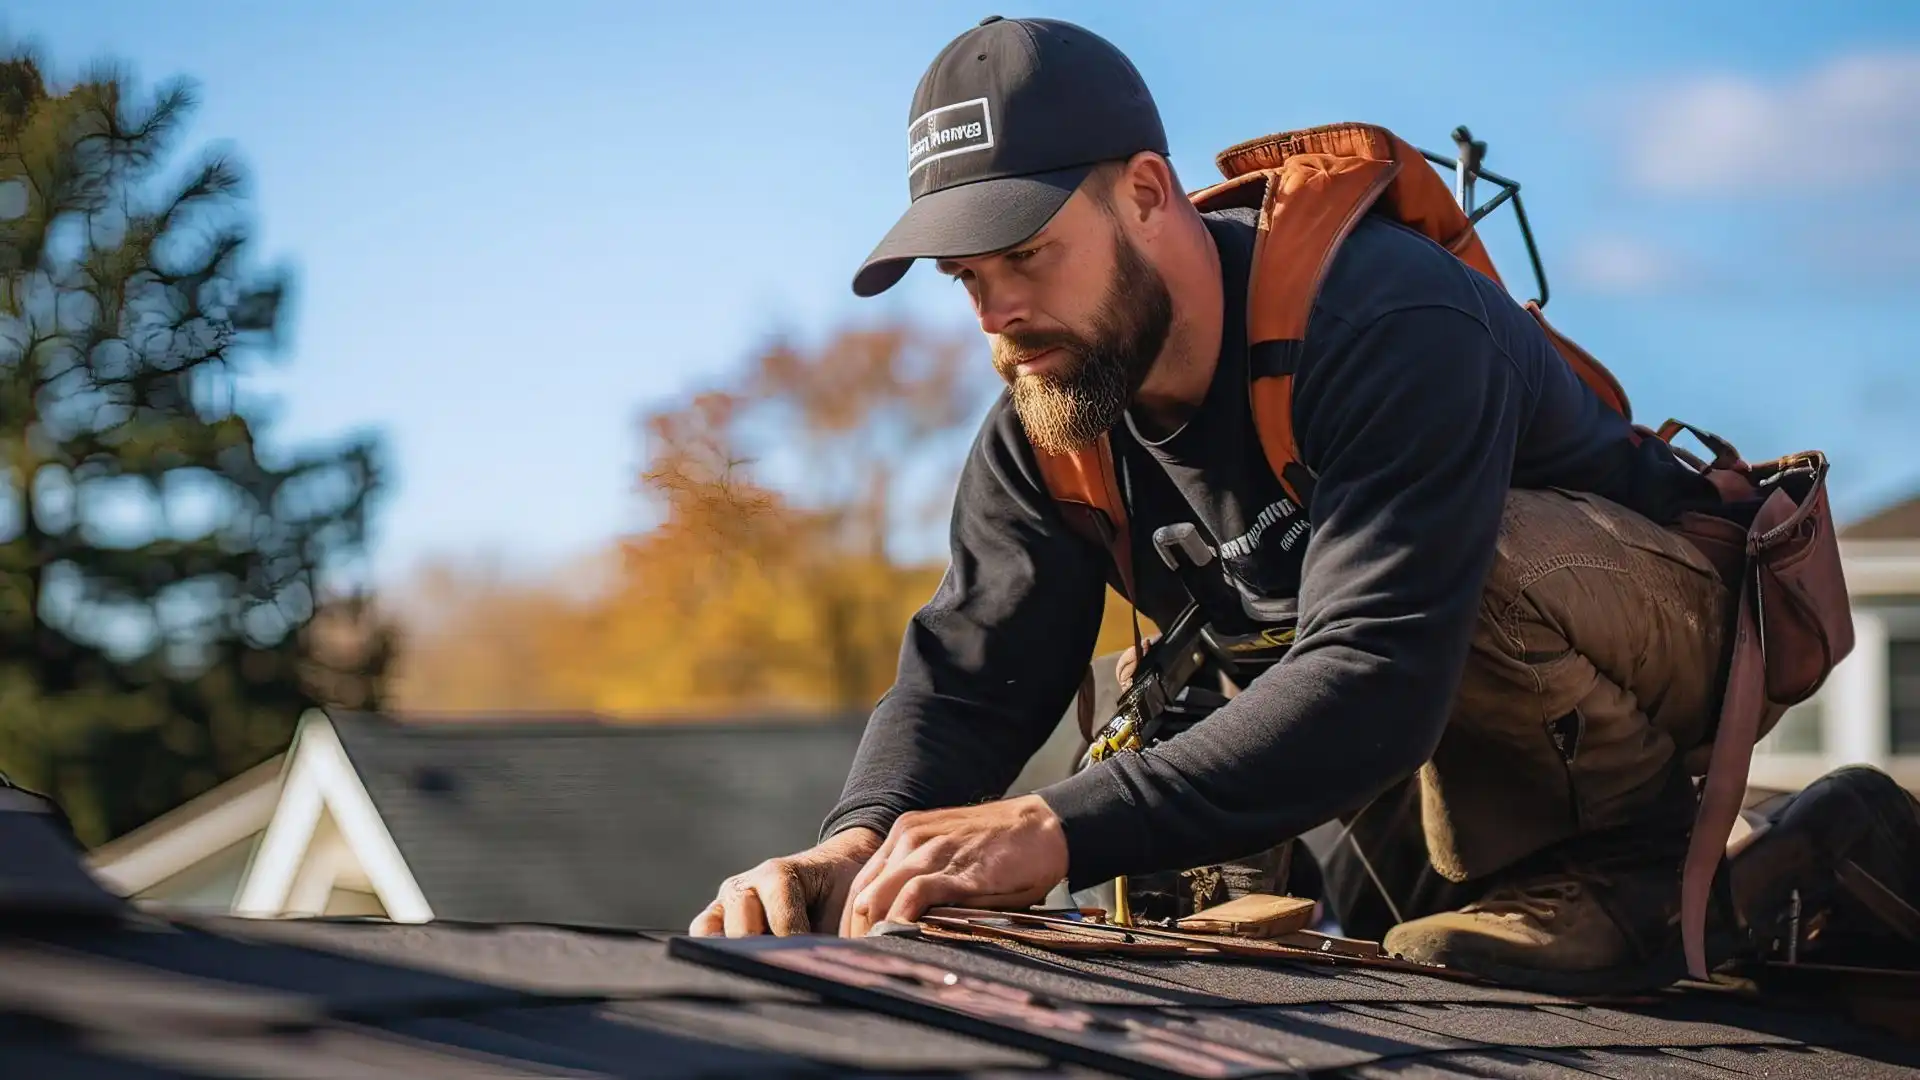
H. Crew Size and Experience

Experienced crews (4–8 workers) are efficient and minimize errors. DIY installations or understaffed teams can take weeks or months.

I. Permits and Inspections

Required building permits, HOA approvals, or historic preservation restrictions can delay the start of a project by days or weeks.

By considering these factors—size, pitch, complexity, accessibility, condition, weather, crew, and permits—homeowners gain a realistic understanding of how long it takes to install a roof.

The Complete Roof Installation Process Timeline

A successful roof installation involves more than just laying down shingles or panels. Understanding the complete timeline helps homeowners plan effectively and avoid surprises. Here’s what to expect from start to finish.

A. Pre-Installation Phase (1–2 Weeks Before)

The pre-installation phase sets the foundation for a smooth project. It includes:

  • Initial consultation and estimate: A roofing contractor evaluates your roof, discusses material options, and provides a quote.

  • Material selection: Homeowners choose shingles, metal panels, tiles, or other materials.

  • Scheduling: Contractor availability is confirmed, and start dates are established.

  • Permits: Necessary building permits are obtained, which can take 1–7 days depending on your locality.

  • Material delivery: Roofing materials are ordered and delivered to the site, often 1–2 days before work begins.

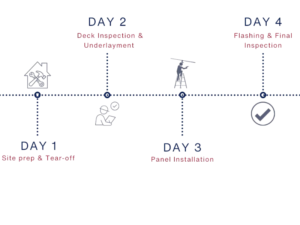
B. Day 1: Tear-Off and Preparation

The first day of physical work typically involves:

  • Crew arrival and setup: Safety measures, tarps, and ground protection are put in place.

  • Old roof removal: Existing roofing materials are stripped away.

  • Deck inspection and repairs: Roof decking is checked for rot or damage and repaired as needed.

  • Underlayment installation: Weather-resistant underlayment may be partially installed if time allows.

C. Day 2: Installation (If Needed)

This day focuses on actual roofing materials:

  • Shingles, tiles, or metal panels installation

  • Flashing installation around chimneys, vents, and valleys

  • Ridge cap and ventilation installation to ensure proper airflow

D. Final Day: Completion and Cleanup

  • Final installation touches

  • Quality inspection by the crew

  • Site cleanup and debris removal

  • Magnet sweep for nails

  • Homeowner walkthrough to review the completed roof

E. Post-Installation (1–3 Days After)

After work is finished:

  • Final building inspection (if required by local authorities)

  • Warranty registration for materials and workmanship

  • Final payment to the contractor

By understanding each phase—from pre-installation planning to post-installation inspections—homeowners can anticipate the workflow and ensure their roofing project stays on schedule.

The Complete Roof Installation Process Timeline

Potential Delays and How to Minimize Them

Even with careful planning, several factors can extend your roof installation timeline. Weather delays are the most common cause—rain, high winds, snow, or extreme heat can halt work for hours or days. Roofing crews prioritize safety and material integrity, so wet or icy conditions often mean a temporary pause.

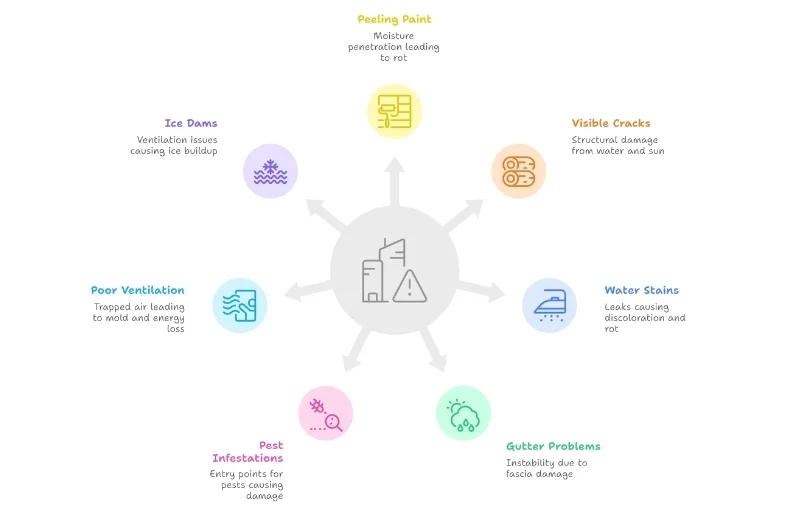
Hidden damage discovered during tear-off, such as rotted decking, water-damaged rafters, or pest infestations, can also add days to the project. While these issues are sometimes unavoidable, they can be minimized through a thorough pre-inspection of the attic and roof structure.

Material delays or shortages are another potential hurdle. Popular roofing materials can sometimes be backordered, especially in peak season, which can push your project start date back. Similarly, permit and inspection requirements—especially for historic homes or areas with strict building codes—may add days or even weeks if not obtained in advance.

To minimize delays:

  • Hire experienced, licensed contractors with a proven track record.

  • Schedule your project during favorable weather seasons in your region.

  • Confirm material availability before signing a contract.

  • Build flexibility into your timeline to accommodate unforeseen circumstances.

If work must pause mid-project, professional contractors always protect your home by tarping exposed areas and securing materials. This ensures your property stays safe and dry until work can safely resume, helping prevent additional damage or costs.

Special Considerations

Several factors can influence how long your roof installation takes beyond standard residential projects. New construction roofs are generally faster to install because there’s no old roofing to remove, no hidden damage to repair, and work can proceed in a coordinated sequence with other trades. This often shortens the timeline compared to replacement projects.

Partial roof replacements or spot repairs are typically quicker, often taking only a few hours to a single day. These smaller projects are less disruptive and involve fewer materials and less debris removal.

Commercial roofs usually require more time due to their larger size, unique materials, and complex systems such as TPO, EPDM, or metal panels. Installers may also need to work around business operations, which can extend the timeline.

Historic or landmark homes present additional challenges. These projects often require special approvals, preservation techniques, or custom materials to match the original roof. Permitting and compliance with local regulations can add days or even weeks to the schedule.

Understanding these special considerations ensures homeowners have realistic expectations and can plan accordingly for their specific roofing project.

Preparing for Your Roof Installation

Proper preparation before your roof installation helps the project run smoothly and minimizes stress for everyone involved. Start by clearing your driveway and access areas so roofing crews can park trucks, unload materials, and place dumpsters safely. Take time to protect landscaping by trimming branches and covering delicate plants near the home.

Inside your house, remove or secure wall décor, mirrors, and shelves, as vibrations from hammering can cause items to shift or fall. In the attic, cover stored belongings with plastic sheets to protect them from dust or small debris that may fall during the installation.

It’s also courteous to inform your neighbors ahead of time about the project, especially since roofing work is noisy and often starts early in the morning. If you have pets, plan to keep them indoors or off-site, as loud noises and unfamiliar workers can cause anxiety or escape risks.

Expect temporary disruption, including noise, vibrations, and debris around your home. Preparing in advance ensures a safer environment and helps the roofing project stay on schedule.

Red Flags: When Timeline Seems Too Good or Too Bad

A roofing timeline that sounds too good to be true often is. Contractors who promise extremely fast completion may rush critical steps like proper underlayment installation, flashing work, or cleanup, which can lead to long-term problems and voided warranties. Speed should never come at the cost of quality or safety.

On the other hand, an unusually long or vague timeline can also be a red flag. Excessive delays may indicate poor project planning, limited crew availability, or overbooking multiple jobs at once. This can leave your home exposed to weather damage for extended periods.

To protect yourself, always ask for a written project schedule that includes start dates, estimated completion, and contingencies for weather or material delays. A reputable contractor will provide realistic timelines, communicate clearly, and update you promptly if changes occur. Transparency and planning are key indicators of professionalism and reliability.

Questions to Ask Your Roofing Contractor

Before hiring a roofing contractor, asking the right questions can protect you from delays, hidden costs, and poor workmanship. Start by asking about crew size and experience—a larger, skilled crew often completes jobs faster and more efficiently. Clarify who will be on-site daily and whether subcontractors will be used.

Next, discuss project timelines. Ask for a written schedule that outlines start and completion dates, and how delays will be handled. Weather is a major factor in roofing, so ask about their weather contingency plan and how your home will be protected if rain or storms interrupt the job.

Hidden damage is another critical topic. Ask how they handle unexpected issues like rotten decking or damaged flashing, and whether they’ll provide photo documentation and updated estimates before proceeding.

Don’t forget to ask about warranties and guarantees. Confirm what’s covered under workmanship warranties versus manufacturer material warranties. Finally, request everything in writing—estimates, timelines, scope of work, and payment terms. A professional roofer will welcome these questions and provide clear, transparent answers, giving you confidence before work begins.

Conclusion

Most residential roofs are installed in 1–3 days, but materials, weather, and complexity matter. Understanding how long does it take to install a roof helps homeowners plan realistically and avoid stress. Quality work takes time, and experienced professionals ensure the job is done right. Get a detailed timeline from your contractor and prepare ahead for a smooth installation.

Follow us on Facebook.

FAQs

1. How long does it take to install a new roof?
Most homes take 1–3 days for installation, but the full project may span 2–3 weeks.

2. Can a roof be installed in one day?
Yes, small or simple asphalt roofs can often be completed in a single day.

3. How long does it take to install a metal roof?
Metal roofs usually take 2–7 days depending on design and roof complexity.

4. Does weather delay roof installation?
Yes. Rain, wind, heat, and cold can pause or slow roofing work.

5. Is faster roof installation always better?
No. Rushing can reduce quality. Proper installation matters more than speed.

Roof problems rarely start as disasters. They begin quietly—one loose shingle, a small crack in flashing, or a slow drip hidden in the attic. Unfortunately, many homeowners ignore these early warning signs until the damage becomes expensive and unavoidable. By then, what could have been a simple repair often turns into structural damage, mold growth, or even a full roof replacement.

Early detection is one of the most effective ways to protect your home and your budget. A well-maintained roof doesn’t just keep rain out; it preserves insulation, supports energy efficiency, and protects the structural integrity of the entire house. The sooner issues are discovered, the easier—and cheaper—they are to fix.

This guide focuses on identifying roof problems early so homeowners can take action before minor issues escalate. You’ll learn when and how to inspect your roof, what warning signs to look for inside and outside your home, common problems by roof type, and when it’s time to call a professional. Whether your roof is brand new or over 15 years old, this article will help you extend its lifespan and avoid costly surprises.

Why Early Roof Problem Detection Matters

A. The Cost of Delayed Action

Small roof issues are affordable to fix—large ones are not. Replacing a few damaged shingles or resealing flashing may cost a few hundred dollars. Waiting too long can result in repairs costing thousands or even tens of thousands due to water damage, rotted decking, mold remediation, and interior repairs.

Water intrusion escalates quickly. Once moisture enters the roof system, it can soak insulation, weaken wooden structures, and create ideal conditions for mold. These hidden issues often spread before visible signs appear inside the home. Delayed repairs also affect property value and can complicate insurance claims, especially if insurers determine the damage resulted from neglect rather than a sudden event.

Roof damage also impacts energy efficiency. Gaps, moisture, and compromised insulation allow conditioned air to escape, driving up heating and cooling costs year-round.

B. Roof Lifespan Extension

Preventive maintenance significantly extends roof life. Asphalt shingle roofs typically last 20–30 years, metal roofs 40–70 years, tile roofs 50+ years, and flat roofs 15–25 years. Regular inspections help roofs reach—or exceed—their expected lifespan.

The return on investment for inspections is high. Spending modest amounts on routine checks and minor repairs helps homeowners avoid premature roof replacement and protects long-term property value.

When to Inspect Your Roof

A consistent inspection schedule is essential. Most professionals recommend inspecting your roof at least twice a year—once in the spring and once in the fall. These seasonal checks help catch damage caused by winter storms or summer heat before it worsens.

Additional inspections should be done after major weather events such as hailstorms, high winds, hurricanes, heavy snowfall, or prolonged heat waves. These conditions stress roofing materials and often cause hidden damage.

Roof inspections are also critical before buying or selling a home. For older roofs—especially those over 10 to 15 years old—inspection frequency should increase. Aging materials are more prone to failure and benefit greatly from early intervention.

Exterior Warning Signs: What to Look for from the Ground

A. Shingle and Roofing Material Damage

From the ground, look for missing, cracked, or curling shingles. Blistered or bubbling shingles often indicate trapped moisture or UV damage. Excessive granules in gutters or downspouts suggest shingle deterioration. Bare or bald patches are signs the shingles are nearing the end of their life.

Tile roofs may show broken, cracked, or slipped tiles, while metal roofs may exhibit visible rust or discoloration—especially around fasteners and seams.

B. Structural Warning Signs

A sagging roof deck or visible dips in the roofline indicate structural issues that require immediate attention. Uneven or wavy roof planes often point to moisture damage beneath the surface. Roof valleys, which channel large volumes of water, should appear straight and intact—any damage here is a major concern.

C. Flashing and Sealant Issues

Flashing around chimneys, vents, skylights, and walls is a common failure point. Look for missing, bent, rusted, or separated flashing. Cracked or deteriorated sealant is another red flag, particularly where materials meet at angles.

D. Gutter and Drainage Problems

Overflowing or clogged gutters suggest drainage issues that can force water back under the roof edge. Sagging gutters, missing gutter aprons, rust, holes, or large amounts of granules all indicate roof wear. Proper drainage is essential for roof health.

E. Growth and Debris

Moss, algae, or mold growth traps moisture against roofing materials, accelerating deterioration. Overhanging branches scrape surfaces and drop debris. Leaves and plant growth in gutters restrict water flow and should be removed promptly.

Interior Warning Signs: Checking Your Attic and Ceilings

A. Water Damage Indicators

Inside the home, water stains on ceilings or walls—often yellow or brown—are classic warning signs. Active leaks during rainfall, damp smells, or musty odors suggest moisture intrusion. Dark streaks or spots on walls or ceilings should never be ignored.

B. Attic Inspection Red Flags

The attic is one of the most important places to inspect. Daylight visible through roof boards indicates holes or gaps. Look for water stains on rafters, trusses, or sheathing. “Shiners,” or frosted nails, drip water when condensation melts, signaling insulation or ventilation issues.

Sagging decking, mold growth, and wet or compressed insulation are serious concerns. Moist insulation loses effectiveness and promotes further damage.

C. Ventilation Issues

Poor attic ventilation leads to excessive heat and moisture buildup. Signs include condensation on surfaces, blocked soffit vents, missing baffles, or damaged air chutes. These conditions shorten roof lifespan significantly.

D. Other Interior Signs

Peeling exterior paint can indicate trapped moisture inside walls. Sudden increases in energy bills or noticeable indoor temperature fluctuations often point to roof or insulation problems.

Common Roof Problems by Type

A. Asphalt Shingle Roofs

Asphalt roofs commonly suffer from granule loss, UV degradation, curling edges, cracking, wind damage, and hail bruising. These issues reduce water resistance over time.

B. Metal Roofs

Metal roofs may experience screw backing out, rust at fastener points, panel separation, or damaged trim. These problems often develop gradually and are easier to fix when caught early.

C. Tile Roofs

Tile roofs are durable but vulnerable to broken or slipped tiles and deteriorated underlayment beneath. Damage often occurs without visible leaks at first.

D. Flat or Low-Slope Roofs

Flat roofs frequently develop ponding water, membrane blisters, seam separation, and surface cracking known as alligatoring. Standing water lasting over 48 hours is a major concern.

Problem Areas That Require Extra Attention

Certain roof areas fail more often than others. Roof penetrations—such as chimneys, skylights, plumbing vents, and HVAC units—are high-risk zones. Valleys handle heavy water flow and require close inspection.

Eaves and overhangs are vulnerable to water backup and ice dams. Kick-out flashing, where roofs meet sidewalls, is often improperly installed or missing. Plumbing vent boots commonly crack over time. Ridge vents and caps should be secure and intact to ensure proper ventilation.

DIY Roof Inspection: Safe and Effective Methods

A. Ground-Level Inspection

Use binoculars to examine shingles, flashing, and valleys without climbing. Walk around the entire home and view the roof from multiple angles. Early morning or late afternoon provides better visibility.

B. Safe Roof Access (If Comfortable)

If accessing the roof, use a stable ladder, non-slip footwear, and avoid wet, icy, or windy conditions. Always work with a partner. Avoid climbing steep roofs or roofs that are old or fragile.

C. Attic Inspection Process

Inspect the attic during or after rain or on cold nights. Bring a flashlight and camera. Move systematically and document anything suspicious.

When to Call a Professional Roofer

Call a professional if you see sagging areas, active leaks, widespread damage, or signs of structural issues. Professional inspections provide trained expertise, proper safety equipment, and documentation for insurance purposes.

Expect a thorough evaluation of roofing materials, flashing, ventilation, and drainage. Schedule professional inspections every few years—or annually for older roofs. Ask contractors about licensing, insurance, certifications, and warranties before hiring.

Preventive Maintenance to Avoid Problems

Preventive care is simple but powerful. Clean gutters at least twice a year. Trim overhanging branches. Remove debris from roof surfaces and valleys. Ensure attic ventilation is functioning correctly.

Address small issues immediately. Keep records of inspections and repairs. Consider moss prevention treatments in humid climates. Older roofs benefit greatly from annual professional inspections.

Regional Considerations

Climate affects roofing differently. Hot regions experience UV damage and thermal expansion. Cold climates face ice dams and freeze-thaw cycles. Humid areas struggle with mold and algae growth. Coastal locations deal with salt corrosion and storm damage. Storm-prone regions must watch for wind and hail impacts.

Conclusion

Roof damage doesn’t happen overnight—it builds slowly when early signs are ignored. By prioritizing regular inspections and identifying roof problems early, homeowners can prevent costly repairs, extend roof lifespan, and protect their property value. Preventive care is always more affordable than emergency fixes.

Take action today. Inspect your roof, check your attic, and address small issues before they grow. When in doubt, contact a qualified professional. A proactive approach now ensures your roof continues to protect your home for years to come.

Follow us on Facebook.

FAQs

1. How often should I inspect my roof?
Inspect twice a year and after major storms. Older roofs benefit from more frequent inspections.

2. Can small roof issues really cause major damage?
Yes. Minor leaks can lead to mold, structural rot, and expensive interior repairs.

3. Do I need to get on the roof to inspect it?
No. Many issues can be spotted from the ground or inside the attic safely.

4. What interior signs indicate roof problems?
Water stains, musty odors, mold, high energy bills, and attic moisture are common signs.

5. When should I call a professional roofer?
If you see leaks, sagging, widespread damage, or safety concerns, call a professional immediately.

You’re reviewing your first roofing estimate, and your contractor says, “Your roof is 25 squares.” Confused? You’re not alone. Many homeowners hear this term and have no idea what it means. Understanding what is a roofing square is crucial—it helps you budget accurately, communicate with contractors confidently, and avoid costly surprises.

Roofing is one of the most expensive home improvements, often ranging from $10,000 to $30,000 or more. Knowing how roofers measure your roof can make a huge difference in evaluating quotes. This article explains the basics of roofing squares, why contractors use them, how to calculate them, and how they impact your project costs. By the end, you’ll be able to “speak the language” of roofing and make informed decisions.

What Is a Roofing Square?

A roofing square is a unit of measurement equal to 100 square feet of roof surface—a 10-foot by 10-foot area. Roofers use this standard to simplify communication and material calculations across all types of roofing.

For example, if your roof measures 2,000 square feet:

2,000 ÷ 100 = 20 roofing squares

If a contractor says your roof is “30 squares,” it means the roof covers 3,000 square feet of surface.

Think of a roofing square as an abstract unit, not a physical square drawn on your roof. Similar to how a “ton” of gravel isn’t a single block, a roofing square is simply a measurement tool that standardizes how materials and labor are calculated.

Why Do Roofers Use Squares Instead of Square Feet?

The term “square” dates back to traditional calculations involving roof area and slope. Over time, it became an industry standard because it simplifies measurements, pricing, and material ordering.

Practical Reasons Roofers Prefer Squares:

  • Simplification: Saying “25 squares” is easier than “2,500 square feet.”

  • Standardized Pricing: Materials and labor are priced per square.

  • Material Ordering Efficiency: Manufacturers package shingles by squares.

  • Streamlined Estimates: Contractors quickly calculate needs and costs.

Almost every professional in the industry—from manufacturers to installers—uses squares. Knowing this term helps homeowners understand quotes and ensures clear communication.

How to Calculate Roofing Squares for Your Home

Step 1: Calculate Your Home’s Footprint
Measure the length and width of your home’s exterior walls. Multiply length × width to get the footprint. Example: 60 ft × 45 ft = 2,700 sq ft.

Step 2: Apply a Pitch and Complexity Multiplier
Roofs are rarely flat. Slopes, dormers, and valleys increase surface area. Use multipliers based on roof complexity:

Roof Type Multiplier
Simple (low pitch) 1.3
Moderate 1.4
Complex/steep 1.6

Example: 2,700 sq ft × 1.4 = 3,780 sq ft.

Step 3: Convert to Roofing Squares
Divide total roof surface by 100: 3,780 ÷ 100 = 37.8 → round up to 38 squares. Always round up to ensure enough material for waste and cuts.

Step 4: Add Waste Factor
Add 10-15% for simple roofs, 15-20% for complex designs. This ensures you don’t run short during installation.

Why You Can’t Use Your Home’s Square Footage

Many homeowners assume the roof equals their home’s square footage—but that’s a mistake. Roof pitch, dormers, eaves, and multi-story structures all increase roof area. Using only the home’s square footage can underestimate material needs by 30-50%, resulting in extra trips and costs. Always calculate based on the footprint × multiplier or hire a professional for accuracy.

Understanding Roof Pitch and Complexity

Roof Pitch = slope, expressed as rise over 12 inches (e.g., 4/12, 6/12).

Pitch Type Multiplier
Low (2/12–4/12) 1.3
Medium (5/12–8/12) 1.4
Steep (9/12–12/12+) 1.6

Complex features like valleys, hips, ridges, and dormers add to roof area and cost. A 2,000 sq ft home could range from 26 squares (low pitch) to 32 squares (steep/complex roof).

How Roofing Squares Relate to Materials

Bundles vs. Squares: Shingles are sold in bundles; typically, 3 bundles = 1 roofing square for asphalt shingles. Architectural or designer shingles may require 4–6 bundles. Other materials like metal, tile, slate, or wood vary in coverage, so knowing squares ensures proper material orders.

Waste Factor: Always include 10–20% extra for cuts, mistakes, and damaged pieces.

How Roofing Squares Impact Project Cost

Costs are often calculated per square:

  • Materials: Asphalt shingles ~$90–$250/square, metal $300–$600/square, tile $400–$1,000+, slate $1,500–$3,000+

  • Labor: $150–$350/square, varies by roof type and complexity

  • Tear-off/Disposal: $100–$150/square

  • Additional Costs: Ridge caps, nails, ventilation, underlayment

Example: 30-square roof with architectural shingles → total ~$20,000. Knowing squares helps compare quotes accurately.

Professional Measurement vs. DIY

Professional roofers use lasers, drones, and software to measure roofs safely and accurately. DIY methods are useful for rough estimates but may miss complex features. For large or steep roofs, professional measurement prevents material shortages and ensures budget accuracy.

Common Mistakes to Avoid

  1. Using home’s square footage only

  2. Forgetting the pitch/complexity multiplier

  3. Ignoring waste factor

  4. Measuring only the ground floor

  5. Forgetting garages and additions

  6. Comparing quotes without understanding squares

  7. Assuming all bundles cover the same area

  8. DIY measurements on steep or complex roofs

Conclusion

A roofing square is a 100 sq ft unit used for pricing, material calculation, and estimates. Knowing how to calculate squares—from your home’s footprint, roof pitch, and complexity—helps you budget, compare quotes, and avoid surprises. While DIY estimates are useful for rough planning, professional measurements are always recommended for accuracy. Understanding roofing squares transforms you from a confused homeowner into an informed, savvy consumer, saving time, money, and stress on your roofing project.

Follow us on Facebook.

FAQs

Q1: How many square feet is a roofing square?
A: One roofing square = 100 square feet (10 × 10).

Q2: How many bundles of shingles per square?
A: Standard asphalt shingles: 3 bundles = 1 square; designer shingles may need 4–6.

Q3: Can I use my home’s square footage for roof estimates?
A: No. Roof area depends on footprint, pitch, complexity, and overhangs.

Q4: How do I measure my roof from the ground?
A: Estimate footprint and apply multipliers, but professional measurements are more accurate.

Q5: Why do roofers measure in squares, not square feet?
A: Squares simplify pricing, materials ordering, and communication between contractors and suppliers.

Many homeowners only notice soffit vents during roof inspections or replacement projects. If you’ve ever wondered what those small perforated panels under your roof eaves are, you’re not alone. Simply put, what is a soffit vent? A soffit vent is a perforated panel installed on the underside of roof eaves that allows fresh air to flow into the attic. These vents are critical components of a complete attic ventilation system, working in tandem with ridge vents or gable vents to maintain proper airflow.

Understanding soffit vents matters because they help prevent moisture buildup, protect your roof from heat damage, extend shingle lifespan, reduce energy costs, and minimize ice dam formation. Many homeowners don’t realize they have soffit vents until problems arise, making awareness essential.

In this guide, we’ll cover what is a soffit vent, where it’s located, how it works, the different types, benefits, maintenance tips, and how to determine how many you need. By the end, you’ll have the knowledge to inspect, maintain, or install soffit vents properly.

What Is a Soffit Vent?

Basic Definition
Soffit vents are perforated or screened openings installed in the soffit—the horizontal panels under your roof eaves. Acting as intake vents, they allow cool, fresh air to enter the attic while working with exhaust vents (like ridge or gable vents) to maintain continuous airflow. Properly installed soffit vents are essential for passive ventilation and attic health.

Understanding the Soffit First
The soffit extends from the exterior wall to the roof edge, enclosing exposed rafters and giving your home a finished appearance. Soffit vents are integrated into these panels and may be nearly invisible depending on design.

Where to Find Soffit Vents
Soffit vents run along the perimeter of your roof overhangs and are usually visible when looking up from ground level. They appear as small perforations, slots, or continuous ventilation strips.

What They Look Like
Soffit vents may be continuous panels or individual units with various perforation patterns. They are typically made of vinyl, aluminum, steel, or wood and usually match the color of the soffit. Despite their small size, soffit vents play a major role in protecting your roof, insulation, and attic environment.

How Do Soffit Vents Work?

Soffit vents work by harnessing the natural principle that hot air rises. Cooler, drier air enters the attic through the soffit vents at the bottom, while hot air escapes through ridge vents or other exhaust systems at the top. This passive ventilation creates continuous airflow, reducing heat buildup and moisture accumulation.

A proper attic ventilation system balances intake and exhaust areas, typically aiming for 1 square foot of ventilation per 150 square feet of attic space, split 50/50 between soffit and exhaust vents. Air enters through soffit vents, flows along the underside of the roof deck, absorbs heat and moisture, and exits through ridge vents. This cycle repeats continuously, keeping your attic cooler in summer, reducing ice dams in winter, and maintaining consistent attic temperature.

Without soffit vents, attics trap heat and moisture, leading to mold growth, rotting wood, premature shingle deterioration, and higher energy costs. Proper soffit vent placement ensures that your attic remains healthy, your HVAC system works efficiently, and your roof lasts longer.

Types of Soffit Vents

By Ventilation Coverage

  • Continuous/Fully Vented: Runs the full length of soffit panels; maximum airflow; ideal for large attics or humid climates.

  • Center-Vented: Perforations only in the center; moderate airflow; balance between aesthetics and ventilation.

  • Individual/Circular Vents: Installed at intervals; common for retrofits; smaller airflow but easy to add.

  • Solid Soffits: Non-vented; used when ventilation is provided elsewhere.

By Material

  • Vinyl: Affordable, lightweight, moisture-resistant, low maintenance.

  • Aluminum: Durable, corrosion-resistant, ideal for coastal areas.

  • Steel/Galvanized: Strongest, rust-resistant, premium pricing.

  • Wood: Traditional look, paintable, requires maintenance.

  • Plastic/Resin: Lightweight, moisture-resistant, UV-protected, easy to install.

Benefits of Soffit Vents

  • Moisture Control: Prevents condensation, mold, mildew, and wood rot.

  • Extended Roof Lifespan: Protects shingles and roof decking, extending life by 5-10 years.

  • Ice Dam Prevention: Maintains roof temperature, prevents icicles, and reduces winter damage.

  • Energy Efficiency: Lowers attic temperatures by 10-25°F, reducing cooling costs.

  • Protects Insulation: Keeps insulation dry and effective, maintaining R-value.

  • Structural Protection: Prevents rafter and deck damage, reduces repair costs.

  • Improved Indoor Air Quality: Reduces allergens, musty smells, and mold spores in living areas.

How Many Soffit Vents Do You Need?

The 1:150 rule is a standard guideline: 1 sq ft of ventilation per 150 sq ft of attic space. Half should be soffit vents (intake), half exhaust.

Step-by-Step Calculation:

  1. Measure attic floor (length × width). Example: 50 × 30 ft = 1,500 sq ft.

  2. Divide by 150 = 10 sq ft total ventilation needed.

  3. Allocate 5 sq ft for soffit intake, 5 sq ft for ridge/gable exhaust.

  4. Adjust for Net Free Area (NFA), accounting for screens and perforations.

Additional factors: climate, roof pitch, attic insulation, and local building codes. Professional consultation is recommended for complex roofs or retrofits.

Signs Your Soffit Vents Need Attention

  • Blocked/Clogged: Leaves, dirt, insulation, spider webs, or paint.

  • Physical Damage: Cracks, rust, rot, warped panels, missing sections.

  • Performance Issues: Hot attic, ice dams, condensation, mold, or moisture.

  • Pest Intrusion: Birds, squirrels, or insects entering vents.

Maintaining Your Soffit Vents

  • Inspect twice yearly and after storms.

  • Clean from outside (soft brush, vacuum, gentle pressure wash).

  • Clear insulation obstructions inside attic; install baffles if needed.

  • Material-specific maintenance: vinyl = wash, aluminum/steel = check rust, wood = paint/stain.

  • Call a professional for extensive damage, retrofits, or safety concerns.

Soffit Vents vs. Other Attic Ventilation

  • Ridge Vents: Exhaust at roof peak; work with soffits for complete airflow.

  • Gable Vents: Intake or exhaust on end walls; less effective alone.

  • Roof/Box Vents: Exhaust only; need soffit intake.

  • Powered Fans: Active exhaust; soffits help maintain proper passive airflow.

Installation Considerations

  • Professional installation ensures proper balance, code compliance, and safety.

  • Retrofit may require cutting into existing soffits; new construction allows planning from the start.

  • Cost: $5-$30 per individual vent; continuous panels $2-$8 per linear foot; full installation $1,500-$3,500+.

  • DIY possible for individual vents but complex for full soffit replacement.

Conclusion

Soffit vents are perforated panels under roof eaves that provide critical intake ventilation for attics. Together with ridge or gable vents, they form a complete ventilation system that prevents moisture buildup, extends roof life, reduces energy costs, and prevents ice dams. Multiple types and materials exist, including vinyl, aluminum, wood, and steel, each with unique benefits. Proper maintenance—inspections, cleaning, and clearing obstructions—ensures maximum efficiency. Calculating the number of soffit vents using the 1:150 rule and considering net free area guarantees adequate airflow. While DIY inspections and calculations help with budgeting and awareness, professional installation and verification are strongly recommended for optimal performance and code compliance. Inspect your soffit vents today to protect your home and extend your roof’s lifespan—small components that make a big difference.

Follow us on Facebook.

FAQs

  1. Do all homes need soffit vents?
    Not all; homes without attics or with hot roof systems may not require soffit vents.

  2. Can too many soffit vents cause problems?
    Excess intake without balanced exhaust reduces effectiveness but is rarely harmful.

  3. Should every soffit panel be vented?
    Not always; depends on total ventilation needs and NFA requirements.

  4. Can soffit vents cause drafts inside the house?
    No, drafts usually indicate leaks in ceiling/attic floor, not soffit vents.

  5. How do I keep animals out of soffit vents?
    Use built-in screens or mesh covers; steel vent guards offer extra protection.

If you’ve ever reviewed a roofing estimate and felt confused by the term “squares,” you’re not alone. Many homeowners pause when contractors start talking in numbers that don’t match their home’s listed square footage. The most common question that follows is simple: how big is a roofing square?

Here’s the direct answer upfront: one roofing square equals 100 square feet, which is the same as a 10-foot by 10-foot area. This measurement has nothing to do with the shape of your roof and everything to do with surface area.

Understanding roofing squares matters more than you might think. It helps you read quotes accurately, compare bids from different contractors, budget realistically, and communicate clearly during your roofing project. Without this knowledge, it’s easy to misunderstand costs or assume a quote is inflated when it’s actually standard.

In this guide, you’ll learn exactly what a roofing square is, how to visualize it, how to calculate roofing squares for your own roof, how many materials each square requires, and how squares directly impact overall roofing costs. This terminology is an industry-wide standard used by contractors, suppliers, and manufacturers across the country.

What Is a Roofing Square? (The Simple Definition)

The Basic Answer

A roofing square is a unit of measurement equal to 100 square feet of roof area. Think of it as a 10-foot by 10-foot section laid flat. Roofing professionals across the industry rely on this measurement because it keeps calculations simple and consistent.

While it’s related to square footage, a roofing square is not the same thing. Square footage measures total area, while squares group that area into easy-to-manage units. For example, instead of saying a roof is 3,000 square feet, contractors say it’s 30 squares.

Why Roofing Squares Matter

Roofing squares make communication clearer between homeowners, contractors, and suppliers. Saying “30 squares” is easier than “3,000 square feet,” especially when pricing materials and labor. Roofing products—from shingles to underlayment—are sold and priced by the square, not by the individual piece.

Using squares helps prevent under-ordering or excessive waste. Accurate square counts are essential for estimates, deliveries, and project timelines.

Visual Comparison

To visualize one roofing square, imagine:

  • A large bedroom or small home office

  • A standard one-car garage floor

  • A 10×10 bedroom or shed footprint

These comparisons help make the abstract number feel more concrete.

Not Literal Squares

Despite the name, a roofing square doesn’t have to be square-shaped. A 5×20 section or a 4×25 section both equal one roofing square. It’s about total area, not geometry.

The History & Purpose of Roofing Squares

Roofing squares date back to the early days of standardized construction materials. Before modern measuring tools, working with large square-foot numbers was cumbersome. Grouping area into 100-square-foot units made planning faster and more accurate.

As roofing materials became mass-produced, manufacturers needed a consistent way to package and price products. Roofing squares solved that problem. Today, shingles, underlayment, and labor estimates are all based on this shared standard.

For contractors and suppliers, squares create uniform pricing nationwide. For homeowners, they simplify comparisons between quotes and make it easier to estimate costs independently. Understanding how big is a roofing square empowers homeowners to verify measurements instead of relying blindly on estimates.

How to Calculate Roofing Squares for Your Roof

The Basic Formula

The formula is straightforward:

Total roof square footage ÷ 100 = roofing squares

For example:

  • 2,500 sq ft ÷ 100 = 25 squares

  • 3,000 sq ft ÷ 100 = 30 squares

Step-by-Step Calculation Method

Step 1: Measure Your Home’s Footprint


Walk the perimeter and count strides. An average stride is 2.5–3 feet. Multiply length by width to estimate footprint.
Example: 50 × 60 = 3,000 sq ft.

Step 2: Measure Each Roof Section


For simple gable roofs, measure each plane separately. Multiply length by width, then add them together.
Example: Two planes at 30 × 50 = 3,000 sq ft each = 6,000 total.

Step 3: Account for Roof Pitch


Steeper roofs have more surface area. Apply a multiplier:

  • Low pitch (3/12–4/12): 1.05–1.1

  • Medium pitch (5/12–8/12): 1.15–1.3

  • Steep pitch (9/12+): 1.4–1.6

Step 4: Factor in Complexity


Dormers, valleys, hips, and overhangs add area. Add 10–15% for complex roofs.

Step 5: Divide by 100


Divide final square footage by 100 and always round up.

Important Note: DIY calculations provide rough estimates only. Professional measurements are always more accurate.

Why You Can’t Use Your Home’s Square Footage

A common mistake is assuming roof size equals home square footage. This is rarely true. Roof pitch alone can increase surface area by 30–60%. Overhangs extend beyond exterior walls, adding more area not included in livable space.

Dormers, garages, porches, and unfinished attics also require roofing but aren’t counted in home square footage. Multi-story homes complicate things further, since roof area only covers the top level.

For example, a 2,000 sq ft home with moderate pitch may have 2,600–2,800 sq ft of roof area. That equals 26–28 squares, not 20. Understanding how big is a roofing square helps avoid costly miscalculations.

Materials Needed Per Roofing Square

For standard asphalt shingles, three bundles typically equal one roofing square. Each bundle weighs 60–80 pounds, resulting in 63–87 shingles per square.

Architectural shingles usually still require three bundles, while luxury shingles may need four to six bundles per square due to thickness and weight.

Other materials vary:

  • Metal roofing: depends on panel size

  • Cedar shakes: 4–5 bundles per square

  • Slate: 4–6 bundles per square

  • Clay or concrete tiles: 80–100 tiles per square

Add additional materials like underlayment, nails, flashing, and ridge caps per square. Always include waste: 10% for simple roofs and up to 20% for complex designs.

How Roofing Squares Impact Cost

Material costs are quoted per square. Asphalt shingles range from $100–$400 per square (materials only), while slate can exceed $1,500 per square. Labor is also priced per square, often $150–$350 depending on complexity and pitch.

Installed costs typically range:

  • Budget roofs: $350–$450 per square

  • Mid-range: $450–$650 per square

  • Premium: $650–$1,200+ per square

A small miscalculation of five squares can mean a $2,000–$3,000 difference, which is why knowing how big is a roofing square directly impacts budgeting accuracy.

Different Roof Types & Square Calculations

Simple gable roofs are easiest to calculate. Hip roofs add complexity and typically 10–15% more area. Multi-plane and mansard roofs often require professional measurement due to multiple sections.

Flat and low-slope roofs are closest to home footprint but still include overhangs. Shed roofs are simple but must account for extensions or dormers.

Common Mistakes When Calculating Roofing Squares

Homeowners often forget pitch, overhangs, waste factors, or architectural features. Rounding down instead of up is another costly error. These mistakes can cause delays, extra delivery fees, and mismatched materials.

To avoid issues, measure carefully, add waste, and rely on professional estimates when ordering materials.

Professional Measurement vs. DIY Calculation

Professionals use satellite imagery, drones, and laser tools for accuracy within 1–2%. DIY calculations are helpful for budgeting and understanding quotes, but not for ordering materials.

The best approach is using DIY estimates for planning and professional measurements for final decisions. Always compare multiple quotes and question major discrepancies.

Conclusion

So, how big is a roofing square? It’s always 100 square feet, typically visualized as a 10×10 area. This measurement is essential for understanding roofing quotes, budgeting accurately, and ordering the right materials.

Home square footage can’t be used to estimate roof size because pitch, overhangs, and architectural features significantly increase surface area. Most homes fall between 15 and 30 squares, while larger or complex roofs may exceed 50.

For accurate results, professional measurement is strongly recommended. Get multiple quotes, verify square counts, and use this knowledge to communicate confidently with contractors before starting your roofing project.

Follow us on Facebook.

FAQs

Q: How many bundles of shingles are in a roofing square?
A: Usually 3 bundles for standard shingles; luxury shingles may need 4–6 bundles.

Q: Is a roofing square always 10×10 feet?
A: It’s always 100 sq ft total, but dimensions can vary.

Q: How many squares does a typical house have?
A: Most homes range from 15–30 squares, depending on size and pitch.

Q: Can I calculate roofing squares from the ground?
A: You can estimate, but professional measurement is more accurate.

Q: Why do roofers use squares instead of square feet?
A: It simplifies pricing, communication, and material ordering.

Most homeowners pay attention to shingles, windows, and walls—but the roofline often goes unnoticed. Fascias and soffits quietly protect your home every day, yet damage can progress for years before it’s obvious. These components may look decorative, but they play a vital role in shielding your house from weather, pests, and structural decay.

Fascias are the vertical boards running along the edge of your roof, while soffits are the horizontal panels tucked underneath the roof overhang. Together, they seal off vulnerable areas of your home. When they start to fail, problems like leaks, rot, and infestations can quickly follow.

This guide covers the most important warning signs homeowners should watch for, from peeling paint to gutter issues and ventilation problems. Recognizing the signs your fascias and soffits need replacing early can help you avoid costly repairs down the line. Acting early protects not just your roofline, but your entire home’s structure and long-term value.

Understanding Fascias and Soffits

The fascia is the vertical board attached to the edge of the roof, supporting the bottom row of tiles and holding the gutter system in place. It’s a key structural element that bears weight and directs water safely away from the roofline.

The soffit is the horizontal board beneath the roof overhang. Its primary role is ventilation—allowing fresh air into the attic while keeping moisture, debris, and pests out.

Together, fascias and soffits protect your roof structure, improve energy efficiency, and enhance curb appeal. With proper maintenance, they can last 20 years or more. However, once deterioration begins, damage often spreads faster than expected.

Critical Warning Signs

Critical Warning Signs

Sign #1: Peeling, Flaking, or Cracking Paint

Paint acts as the first waterproof barrier for wooden fascias and soffits. When it starts peeling or cracking, moisture can penetrate the surface. This allows water to soak into the wood, setting the stage for rot.

Initially, repainting may solve the issue. But if paint continues to fail quickly, it often means water damage underneath. Left unchecked, rot can spread into rafters, trusses, and roof decking—turning a cosmetic issue into a structural one. Persistent paint failure is one of the earliest signs your fascias and soffits need replacing.

Sign #2: Visible Cracks or Structural Damage

Cracks, splits, sagging, or warped boards indicate deeper structural problems. Fascias must remain straight and strong to support gutters and the roof edge. Damage is commonly caused by prolonged water exposure, intense sun, and age-related wear.

If these issues are visible from ground level, the damage is usually advanced. Structural compromise at the roof edge can lead to gutter failure and water intrusion inside the home.

Sign #3: Water Stains, Leaks, or Rot

Discoloration, water marks, or dark patches on fascias and soffits often point to leaks. Soft or spongy wood is a clear sign that rot has already set in. Check exterior boards, attic spaces, and interior ceilings near the roofline.

Poor installation, cracks, or blocked drainage allow water to seep in. Beyond structural damage, trapped moisture promotes mold and mildew growth, posing health risks. If the wood crumbles when touched, replacement is usually unavoidable.

Sign #4: Gutter Problems and Instability

Gutters rely on the fascia for support. Sagging, pulling away, or overflowing gutters often signal fascia damage. In many cases, clogged or cracked gutters spill water directly onto the fascia, accelerating deterioration.

This creates a damaging cycle: weakened fascia can’t support gutters, and failing gutters cause more water damage. Persistent gutter issues are strong signs your fascias and soffits need replacing rather than simple gutter repair.

Sign #5: Pest Infestations

Holes, nests, droppings, or scratching sounds in the attic are red flags. Birds, squirrels, rodents, wasps, and insects exploit even small openings in damaged fascias and soffits.

These boards are designed as your home’s first defense against attic intrusion. Once breached, pests can cause structural damage, contaminate insulation, and spread disease. Multiple entry points often mean replacement is the safest solution.

Sign #6: Poor Ventilation and Increased Energy Bills

Soffits play a crucial role in attic ventilation. When vents are blocked or damaged, hot and humid air becomes trapped. This leads to higher indoor humidity, condensation, and rising energy bills as HVAC systems work harder.

Painted-over vents, warped panels, or broken soffits restrict airflow. Poor ventilation also increases the risk of mold growth, especially in warm or humid climates.

Sign #7: Ice Dams in Winter

In colder regions, ice dams forming along the roof edge can indicate ventilation problems. Melting snow refreezes at the fascia, blocking soffit vents. Water backs up under shingles and into soffits, adding weight and moisture stress to fascia boards.

Consequences of Ignoring Damage

Ignoring roofline damage can lead to widespread structural issues. Rot can spread from fascias into rafters and roof decking, requiring major repairs. Moisture buildup encourages mold and mildew, creating health hazards and expensive remediation.

Poor water drainage may even affect your foundation. Pest infestations add further repair costs, while deteriorated fascias and soffits reduce curb appeal and property value. Addressing issues early is far less expensive than full structural replacement later.

When to Repair vs. Replace

Repairs are suitable for surface-level issues like isolated peeling paint or small cracks. Replacement becomes necessary when rot is widespread, boards are sagging, or multiple areas show damage. Severe pest activity also calls for full replacement.

The best time to replace fascias and soffits is during roof work or immediately when serious damage is discovered. Many homeowners choose to upgrade from wood to low-maintenance uPVC or aluminum for longer lifespan and improved durability.

Over time, loose or corroded fasteners can compromise the strength of a metal roof and allow water to seep inside. Knowing how to replace metal roof screws helps prevent leaks, improves roof stability, and extends the lifespan of the entire roofing system.

Conclusion

Regular roofline inspections are essential for protecting your home. Small warning signs can quickly escalate into major structural problems if ignored. By watching for the signs your fascias and soffits need replacing, homeowners can act early and avoid costly damage.

If you notice any of these issues, a professional assessment provides clarity and peace of mind. Proactive maintenance not only saves money but also preserves your home’s comfort, safety, and long-term value.

Follow us on Facebook.

FAQs

1. How often should fascias and soffits be inspected?

At least once a year, and after major storms, to catch early damage before it spreads.

2. Can damaged fascias cause roof leaks?

Yes. Water can enter through rotten fascias and spread into roof decking and rafters.

3. Are uPVC fascias better than wood?

uPVC resists rot, needs less maintenance, and often lasts longer than wood.

4. Do soffits really affect energy bills?

Yes. Poor soffit ventilation traps heat and moisture, making HVAC systems work harder.

5. Is replacement always necessary if there’s rot?

Minor rot may be repairable, but widespread or soft wood usually requires replacement.

Metal roofing has become increasingly popular due to its durability, energy efficiency, and long lifespan. When properly installed and maintained, a metal roof can protect a home or building for several decades. However, one often overlooked component plays a massive role in that longevity—the screws and fasteners holding the panels in place.

Metal roof screws do far more than simply secure panels. They create a watertight seal, allow controlled movement from temperature changes, and protect the roof structure underneath. Over time, these screws experience stress from weather exposure, UV radiation, and constant expansion and contraction of the metal panels. Replacing them is not a sign that your roof is failing—it’s a smart, proactive maintenance step.

In this guide, you’ll learn how metal roof screws work, why they fail, how to spot warning signs early, and which replacement options offer the best long-term value. We’ll also cover realistic costs, DIY versus professional replacement, and step-by-step installation best practices. If you’re planning a Metal Roof Screw Replacement, this article will give you the clarity and confidence to make informed decisions before small issues turn into costly leaks.

Understanding Metal Roof Screws and Why They Fail

A. Anatomy of a Metal Roofing Screw

A metal roofing screw consists of several critical components, each designed to perform a specific function. The screw body is typically made from galvanized steel, stainless steel, or aluminum. Galvanized steel is the most common choice due to its balance of strength and corrosion resistance, while stainless steel is preferred in coastal or highly corrosive environments.

Attached to the screw is a metal washer paired with an EPDM or neoprene rubber washer. This rubber washer compresses against the panel surface, creating a waterproof seal that prevents moisture intrusion. The metal washer distributes pressure evenly, protecting the rubber from tearing.

The tip of the screw varies based on the substrate. Self-drilling screws are designed for metal purlins, while Type 17 sharp-point screws are used for wood substrates. Choosing the correct screw type is essential for proper grip and long-term performance.

B. Common Causes of Screw Failure

Thermal expansion and contraction are the leading causes of metal roof screw failure. As panels heat and cool daily, screws gradually loosen or “back out.” UV exposure degrades rubber washers, causing them to crack, shrink, or lose elasticity. Rust and corrosion are common in humid or coastal climates, especially with lower-grade fasteners.

Improper installation accelerates failure. Over-tightened screws crush washers, while under-tightened screws allow water penetration. Angled installation compromises the seal entirely. Age also plays a role—standard screws typically last 10–20 years before degradation becomes noticeable. Finally, poor substrate conditions, such as weak OSB instead of solid wood purlins, reduce holding power and increase failure rates.

Signs Your Metal Roof Screws Need Replacement

Visible warning signs often appear long before major leaks occur. Rusted or corroded screw heads are a clear indication that protective coatings have failed. Protruding or backed-out screws are another red flag, often caused by thermal movement or weakened substrates.

Cracked, flattened, or missing rubber washers signal seal failure. When washers lose flexibility, water can seep beneath the panels, leading to attic moisture or ceiling stains. Even minor water marks should prompt immediate inspection.

Loose or lifting panels may indicate widespread fastener failure, especially after storms. Uneven panel alignment suggests that screws are no longer holding panels uniformly. Age is another factor—if your roof is 10–20 years old and still uses original fasteners, replacement should be planned.

Post-storm inspections are critical. High winds can loosen screws or expose weak points that weren’t previously visible. Catching these issues early prevents structural damage, mold growth, and insulation deterioration.

Types of Replacement Screws

A. Standard Replacement Options

Most roofs begin with #10 screws. When holes enlarge over time, #12 replacement screws provide a moderate upgrade with better grip. For severely enlarged holes, #14 oversized “rescue screws” are designed to restore holding power without replacing panels. Stitch lap screws are used specifically for panel-to-panel connections, not structural attachment.

B. Premium Options

Premium fasteners offer extended lifespan and superior sealing. ZXL Dome Cap screws fully encapsulate the washer, protecting it from UV exposure. Long-life capped fasteners provide similar benefits with extended warranties. Stainless steel screws resist corrosion in coastal areas, while bimetallic fasteners combine strength with corrosion resistance.

C. Metal-to-Wood vs. Metal-to-Steel

Type 17 sharp-point screws are ideal for wood substrates, reducing splitting and improving bite. Self-drilling screws are required for metal purlins, eliminating the need for pre-drilling and ensuring clean penetration.

Cost of Metal Roof Screw Replacement

A. DIY Material Costs

Replacement screws typically cost $5–$50 per 250-count box, depending on quality. DIY projects also require a cordless drill, proper socket bits, sealant, safety harnesses, and non-slip footwear.

B. Professional Installation Costs

Partial replacement projects usually range from $150 to $1,000. Full replacement can cost between $1,500 and $4,500. Pricing depends on roof size, pitch, accessibility, screw quantity, geographic location, fastener type, and any additional repairs needed.

Average installed costs range from $2.50–$4.50 per square foot or $0.50–$3.00 per screw, including labor.

C. Value Consideration

Preventive replacement is far less expensive than repairing water damage, insulation loss, or structural rot. Many manufacturer warranties also require timely fastener maintenance to remain valid.

DIY vs. Professional Replacement

A. When DIY Makes Sense

DIY replacement works well for small sections, low-pitch roofs, and homeowners comfortable working at heights. It offers cost savings when issues are limited.

B. When to Hire a Professional

Steep roofs, large-scale replacements, standing seam systems, safety concerns, and warranty requirements all favor professional installation. Structural damage such as rotted purlins also requires expert assessment.

C. Professional Benefits

Professionals ensure correct torque, proper alignment, faster completion, warranty protection, and reduced injury risk.

Step-by-Step Screw Replacement Process

A. Safety Preparation

Use fall protection, non-slip roofing shoes, gloves, and eye protection. Work only on dry, cool days and secure ladders properly.

B. Tools and Materials Needed

Use a cordless drill with adjustable clutch, 5/16″ socket, magnetized bit holder, replacement screws (one size larger), sealant, chalk line, and clean rags.

C. Inspection Process

Check screw spacing, identify failure zones, and work in a systematic grid to ensure full coverage.

D. Removal Process

Back screws out carefully. Remove stuck washers gently and inspect holes for damage.

E. Installation Process

Clean holes, apply sealant if needed, install screws perpendicular to the panel, tighten until the washer slightly bulges, and avoid over-compression. Always install in high ribs for corrugated panels.

F. Common Installation Mistakes to Avoid

Avoid over-tightening, under-tightening, angled placement, valley installation, and leaving metal shavings that cause rust.

Special Situations and Considerations

Widespread screw failure may indicate deeper issues such as rotted purlins or weak OSB decking. In some cases, installing new purlins is more effective than upsizing screws. Standing seam roofs use concealed fasteners and require specialized techniques. Multiple recurring failures suggest systemic problems that should be professionally evaluated.

Maintenance and Prevention

Inspect your roof annually and after major storms. Early detection minimizes costs. Quality screws can last 20–50 years, with premium options offering 40-year warranties. Keep debris off the roof and maintain proper attic ventilation to reduce thermal stress and fastener movement.

Conclusion

Metal roof screws may be small, but they play a critical role in protecting your entire roofing system. Timely replacement prevents leaks, preserves warranties, and extends roof lifespan at a fraction of replacement costs. Whether you tackle a small repair yourself or hire professionals for a full Metal Roof Screw Replacement, the key is acting early. Start with a thorough inspection, choose quality fasteners, and prioritize proper installation. Preventive maintenance today protects your investment for decades to come.

FAQs

1. How often should metal roof screws be replaced?
Most standard screws last 10–20 years, while premium fasteners can last 40+ years with proper maintenance.

2. Can I replace metal roof screws without replacing panels?
Yes. Screw replacement is common maintenance and does not require panel removal in most cases.

3. Should replacement screws be larger than original screws?
Often yes. One size larger improves grip, especially if original holes have widened.

4. Are stainless steel screws worth the extra cost?
Yes, especially in coastal or humid areas where corrosion resistance is critical.

5. Do backed-out screws always cause leaks?
Not immediately, but they significantly increase leak risk and should be addressed promptly.