Extreme temperatures are no longer rare events. Record-breaking heat waves and harsher winters are becoming more frequent, placing unprecedented stress on residential roofing systems. Whether it’s scorching summer heat or prolonged freezing conditions, temperature extremes affect roofing materials in very different and often damaging ways.

High temperatures accelerate material breakdown, while extreme cold increases brittleness and moisture-related issues. Over time, these conditions can shorten a roof’s lifespan dramatically if left unmanaged. Roofing professionals consistently report that proactive care can extend a roof’s usable life by 5 to 10 years, even in harsh climates.

This guide to roofing maintenance for extreme temperatures focuses on a dual strategy: protecting your roof during intense heat and preparing it to withstand severe cold. Backed by industry standards and best practices used by professional roofers, this article explains how temperature extremes cause damage, what maintenance steps matter most, and how homeowners can prevent costly repairs.

Understanding how your roof reacts to climate stress is the first step toward long-term protection and smarter home maintenance.

How Extreme Temperatures Affect Your Roof

Extreme Heat Damage

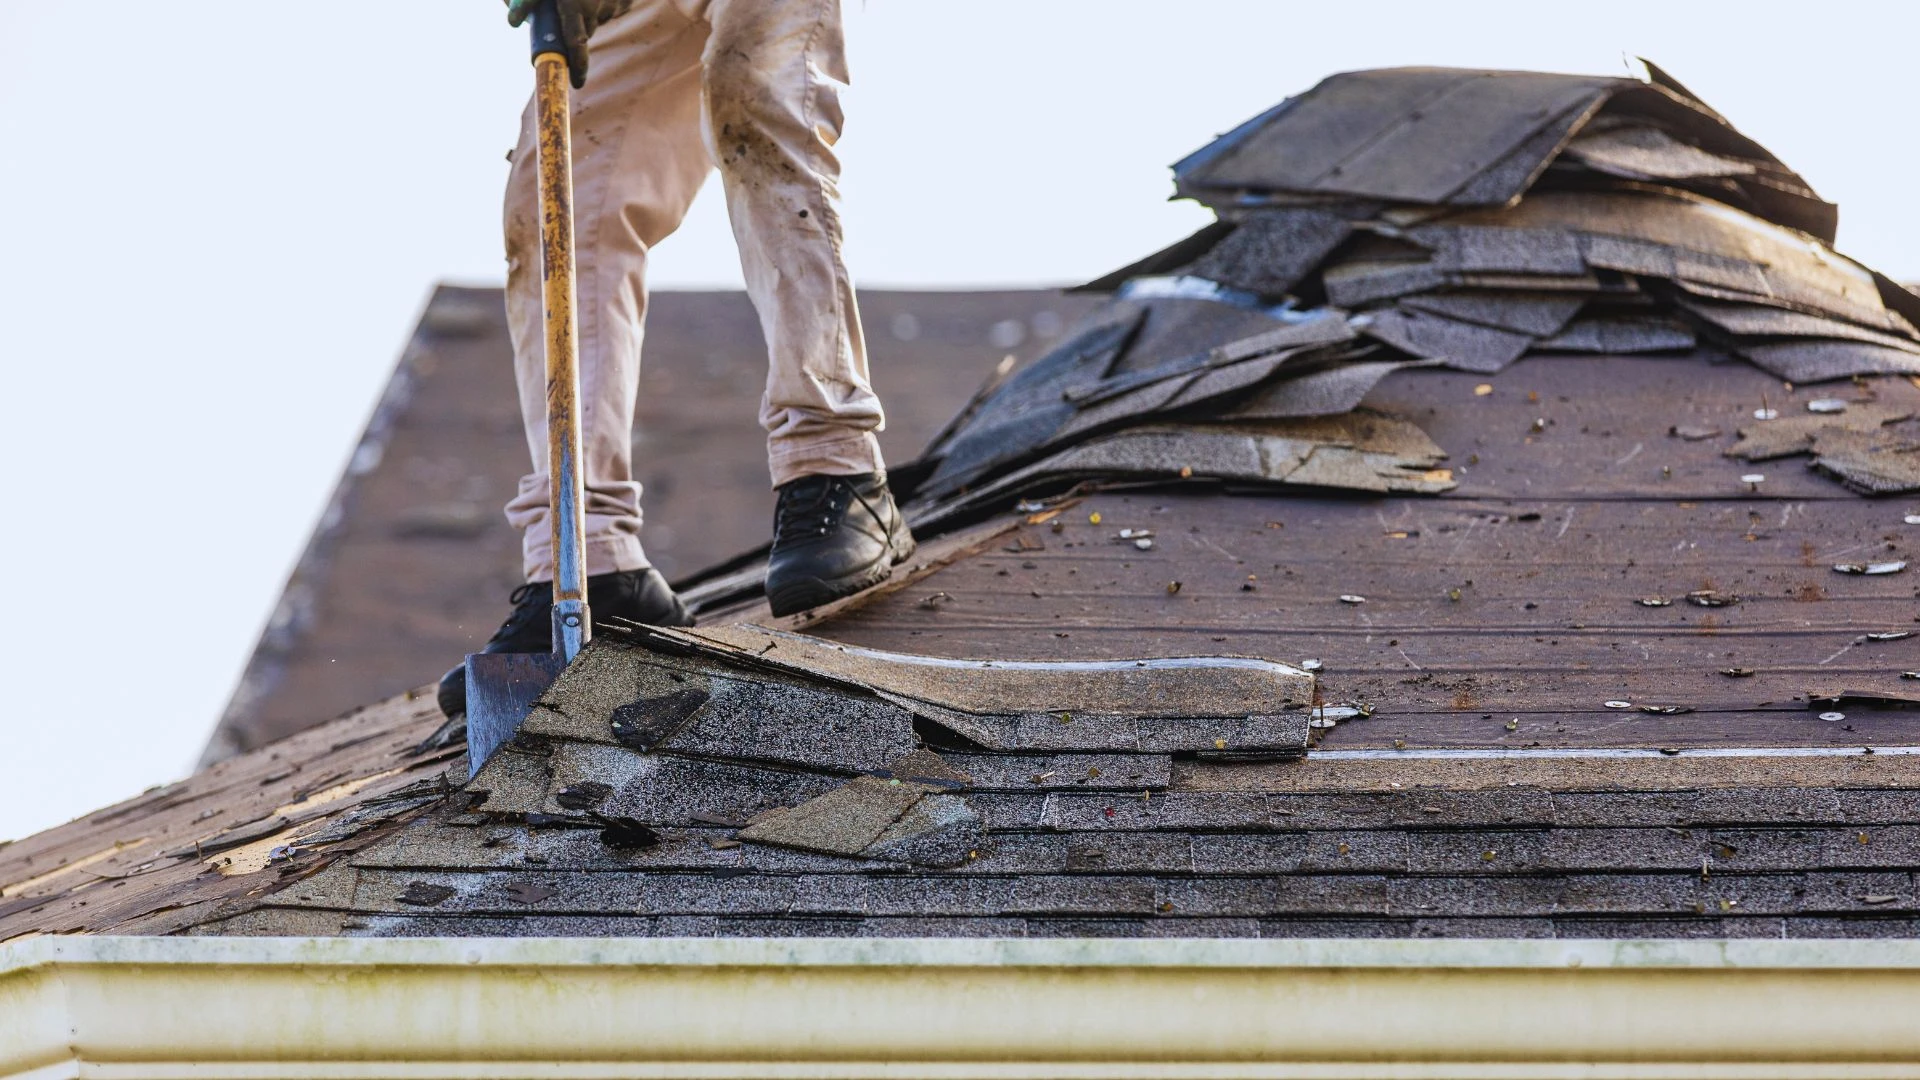
Extreme heat is one of the most aggressive enemies of roofing systems. Constant UV radiation breaks down asphalt, dries out sealants, and weakens protective coatings. Over time, shingles lose flexibility and become brittle.

Daily temperature swings—hot afternoons followed by cooler nights—cause thermal shock, forcing materials to expand and contract repeatedly. This leads to curling, buckling, and cracking. Granule loss is also common, reducing UV protection and accelerating aging.

Metal roofs face expansion challenges, where fasteners loosen and seams weaken. On flat roofs, membrane blistering and bubbling occur when trapped moisture heats up and expands beneath the surface.
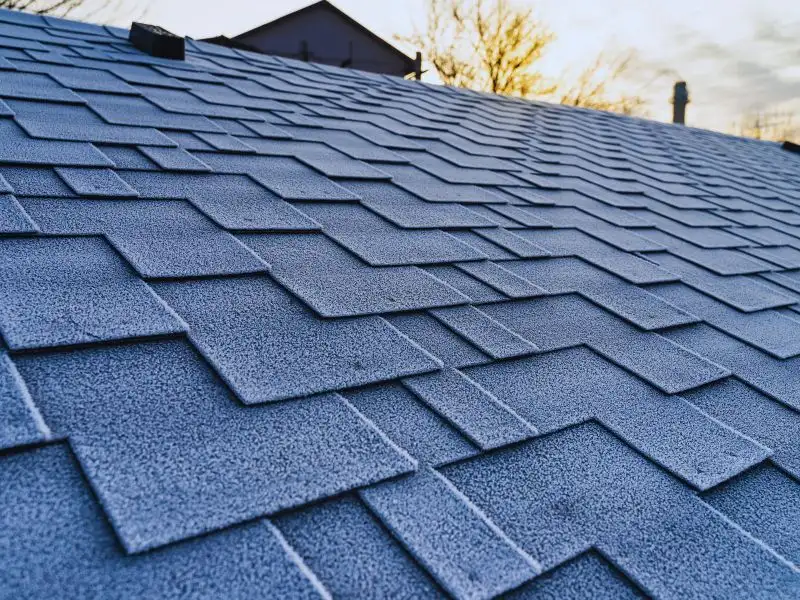
Extreme Cold Damage

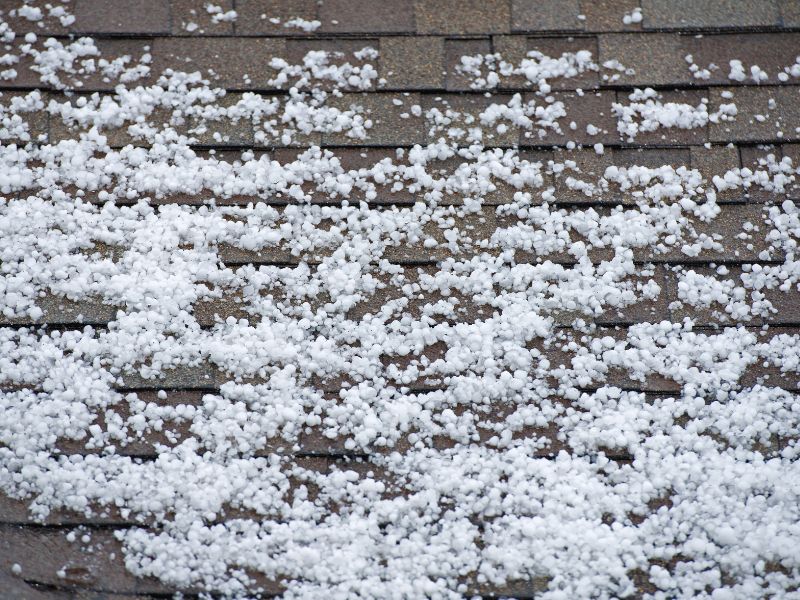
Cold weather creates a different set of problems. Roofing materials become stiff and brittle, making them more vulnerable to cracking under stress. Freeze-thaw cycles allow moisture to enter small gaps, expand when frozen, and widen those gaps further.

They block proper drainage, forcing water back under shingles and into the roof deck. Heavy snow loads add structural stress and, in severe cases, risk partial collapse.

Cold temperatures also increase wind vulnerability, as frozen materials resist flexing and tear more easily during storms.

Materials Most Vulnerable

  • Asphalt shingles (highly temperature-sensitive)

  • Flat roof membranes

  • Sealants and adhesives

  • Flashing and fasteners

Material Heat Tolerance Cold Tolerance
Asphalt shingles Moderate Low
Metal roofing High High
Clay/concrete tile High Moderate
Rubber membranes Moderate Low

How Extreme Temperatures Affect Your Roof

Essential Maintenance for Extreme Heat

Extreme heat poses serious challenges for roofing systems, accelerating material deterioration and increasing the risk of leaks, warping, and structural damage. Proactive maintenance is essential to protect your investment and extend the roof’s lifespan in hot climates.

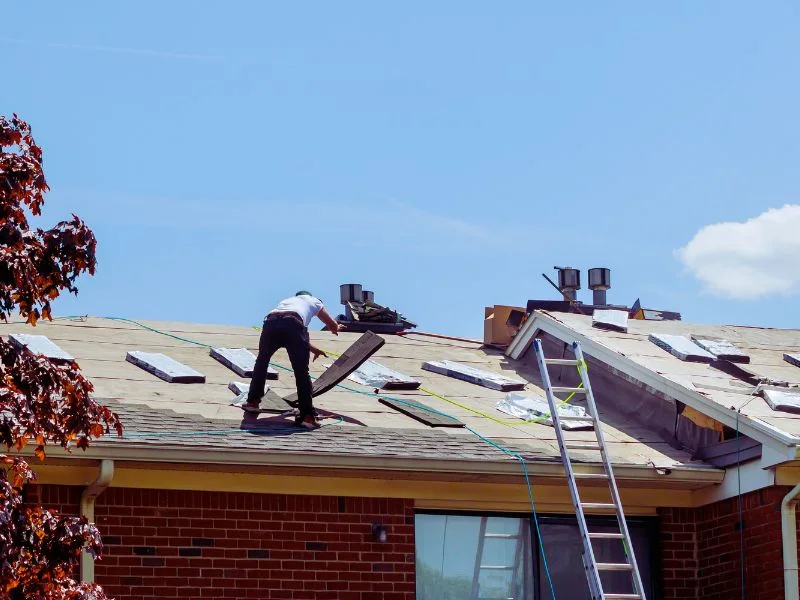
Inspection Priorities

Regular inspections are the first line of defense. Schedule at least two inspections per year—spring and fall—and additional checks after prolonged heat waves. High temperatures can exacerbate hidden problems, so early detection is key.

Homeowners and professionals should look for the following signs of heat damage:

  • Curled or cupped shingles – indicate shingles are drying out and losing flexibility.

  • Excessive granule buildup in gutters – a sign that hingles are wearing prematurely.

  • Blisters, bubbles, or cracks – common on flat or low-slope roofs exposed to intense sun.

  • Warped or sagging roof sections – may indicate underlying decking or structural stress.

Detecting these issues early prevents minor heat-related damage from becoming costly repairs or structural problems.

Attic Ventilation and Insulation

Proper attic ventilation and insulation are critical for minimizing heat stress. Poor ventilation traps hot air in the attic, raising temperatures and “baking” roofing materials from underneath. Essential components include:

  • Soffit and ridge vents for continuous airflow

  • Baffles to prevent insulation from blocking vent openings

  • Balanced intake and exhaust airflow to regulate temperature

Spray foam insulation beneath the roof decking helps reduce heat transfer, and attic temperature monitoring ensures that ventilation is effective. In particularly hot regions, powered attic fans can provide active cooling, reducing roof surface temperatures and protecting roofing materials.

Reflective Solutions

Reflective roofing options help mitigate heat buildup by reflecting sunlight away from the roof surface. Consider:

  • Cool roof coatings – applied over shingles or metal roofs to reduce heat absorption

  • Reflective shingles – specially manufactured to reflect UV rays

  • White elastomeric coatings – ideal for flat or low-slope roofs

These solutions can reduce roof temperatures by up to 50°F, improve indoor comfort, and lower cooling costs by 15–30%, providing both energy and material savings.

Protective Measures

Additional heat-prevention steps include:

  • Tree trimming – strategic shading without excessive debris accumulation

  • Regular debris removal – prevents moisture retention and heat trapping

  • Gutter maintenance – ensures proper drainage and prevents heat-related water damage

  • Flashing and sealant inspection – protects vulnerable joints from heat and UV exposure

Installing solar panels can further benefit your roof by providing shade while generating energy, reducing both temperature stress and utility costs. Combining these measures ensures your roof remains durable and energy-efficient, even under extreme heat conditions.

Essential Maintenance for Extreme Heat

Essential Maintenance for Extreme Cold

Extreme cold places intense stress on roofing systems, and many winter failures begin as small, unnoticed issues during fall. Proper preparation and consistent maintenance are the best defenses against cold-related roof damage.

Pre-Winter Inspection Checklist

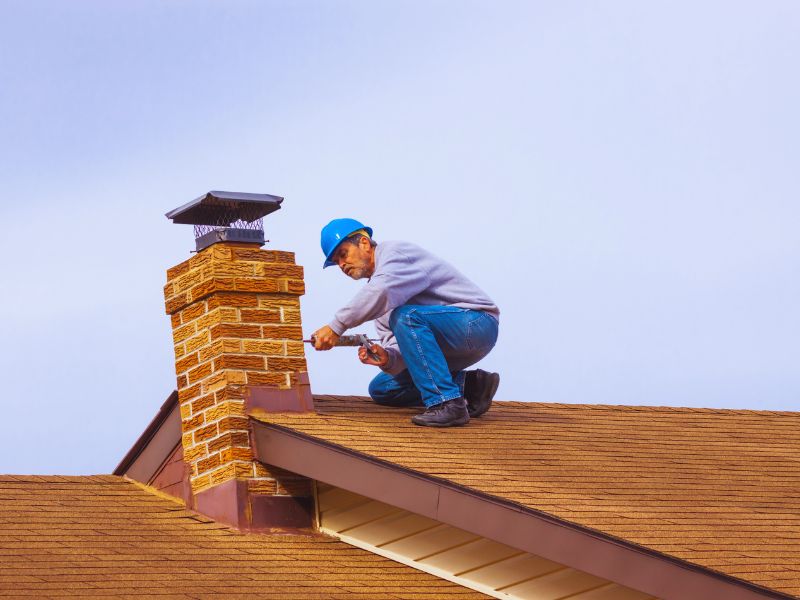
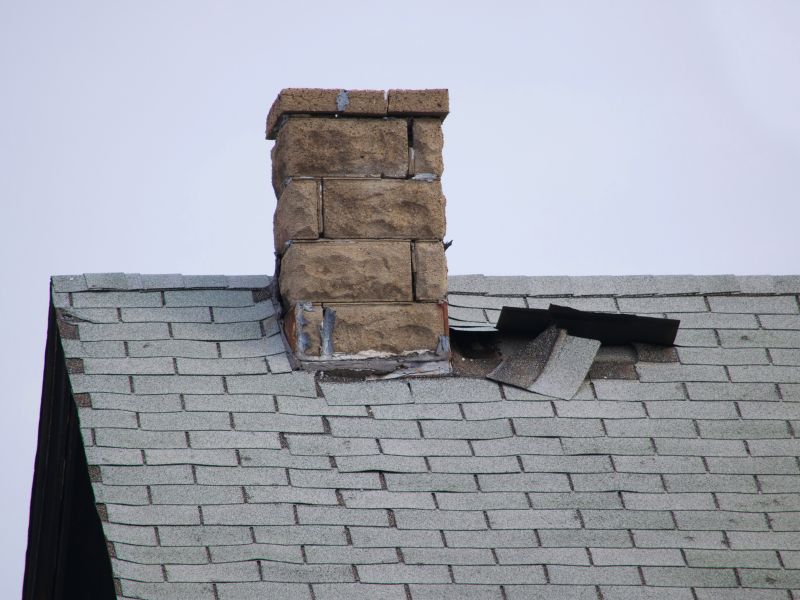
A thorough inspection should be scheduled in late fall, before the first freeze. Cold temperatures make materials brittle, so existing weaknesses worsen quickly once winter sets in. Start by checking for loose, cracked, or missing shingles, as these allow moisture to penetrate and freeze beneath the surface. Inspect flashing around chimneys, vents, skylights, and valleys, since these areas are common entry points for water.

Pay close attention to cracked seals and aging caulking, which often fail under freeze–thaw cycles. Finally, assess the roof’s overall structure for soft spots, sagging areas, or signs of water damage. Many cold-weather roofing failures originate from minor issues that could have been repaired easily before winter.

Ice Dam Prevention

Ice dams form when heat escaping from the attic melts roof snow, which then refreezes at the eaves and blocks drainage. Preventing them requires addressing the root causes—not just the symptoms. Proper attic insulation is essential, with a minimum R-49 recommended in cold climates. Insulation helps keep roof temperatures consistent and prevents uneven melting.

Consistent attic ventilation allows cold air to circulate, reducing heat buildup. Soffits must be insulated correctly without blocking airflow. Heated cables can help in chronic problem areas, but they should only supplement, not replace, proper insulation and ventilation strategies.

Snow Management

Snow removal becomes necessary when accumulation exceeds approximately 2 feet, as excessive weight can stress the roof structure. Use roof rakes from the ground and remove snow evenly to prevent imbalance. Never use metal shovels or sharp tools, which can puncture shingles or membranes.

For steep, high, or multi-story roofs, professional snow removal is safer and more effective. Professionals understand load distribution and reduce the risk of accidental damage or injury.

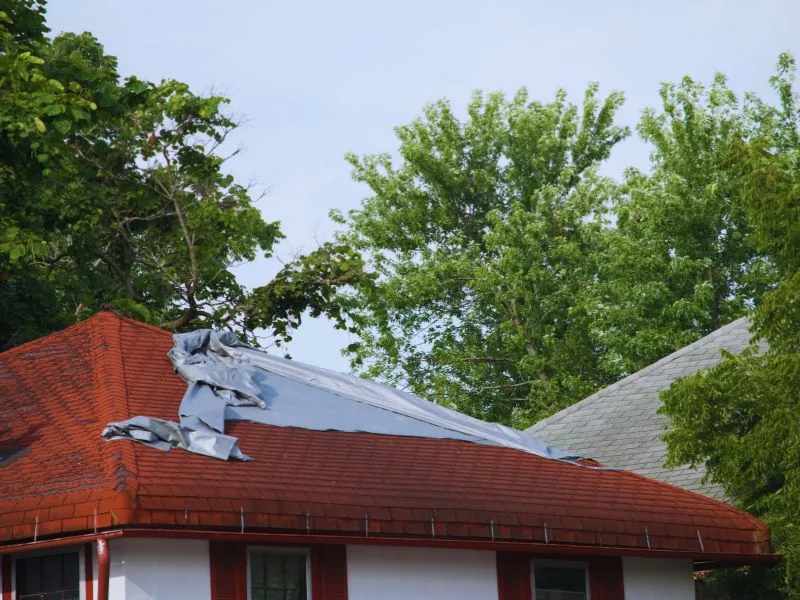
Cold-Weather Specific Tasks

Before winter, clean gutters and downspouts to ensure proper drainage when snow melts. Confirm that water flows away from the foundation to prevent ice buildup. Monitor attic spaces throughout winter for moisture, frost, or leaks, and keep emergency tarps on hand for sudden storm damage. Consistent cold-weather roofing maintenance greatly reduces the risk of unexpected winter failures.

Essential Maintenance for Extreme Cold

Year-Round Maintenance Best Practices

Regular Inspection Schedule

Biannual professional inspections are ideal, supplemented by homeowner checks after storms or seasonal transitions. Homeowners can safely inspect from the ground, while professionals handle close-up evaluations.

Preventive Maintenance Tasks

  • Keep gutters clean

  • Trim overhanging branches

  • Replace damaged shingles promptly

  • Renew sealants every 2–3 years

  • Document the roof condition with photos

These steps form the foundation of effective roofing maintenance for extreme temperatures.

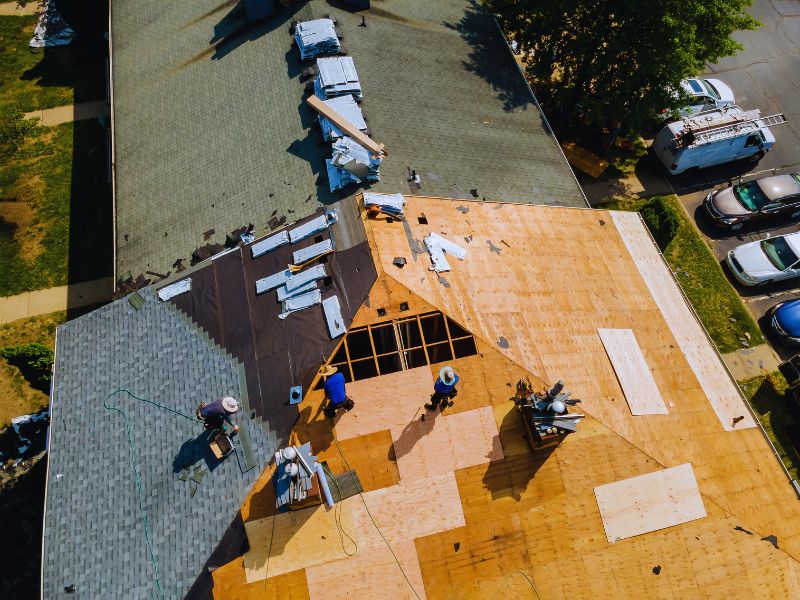
Professional vs. DIY

DIY maintenance saves money but comes with safety risks. Call professionals for steep roofs, structural concerns, or widespread damage. Preventive professional care often costs less than emergency repairs.

Climate-Specific Considerations

Regional Strategies

Climate plays a major role in how roofing systems perform over time, so maintenance strategies should match local conditions. In hot, dry climates, prolonged sun exposure and large temperature swings make UV-resistant materials and strong ventilation essential to prevent cracking and premature aging. Hot, humid climates create ideal conditions for mold and algae growth, making moisture control, mold-resistant underlayment, and proper airflow critical for roof health.

In cold, snowy regions, the primary threats are ice dams, heavy snow loads, and freeze–thaw cycles. Ice-dam prevention systems, proper insulation, and balanced attic ventilation help reduce water intrusion and structural stress. Variable climates, where temperatures fluctuate widely throughout the year, demand roofing systems that can expand and contract without cracking. Impact-resistant and flexible materials perform best in these environments.

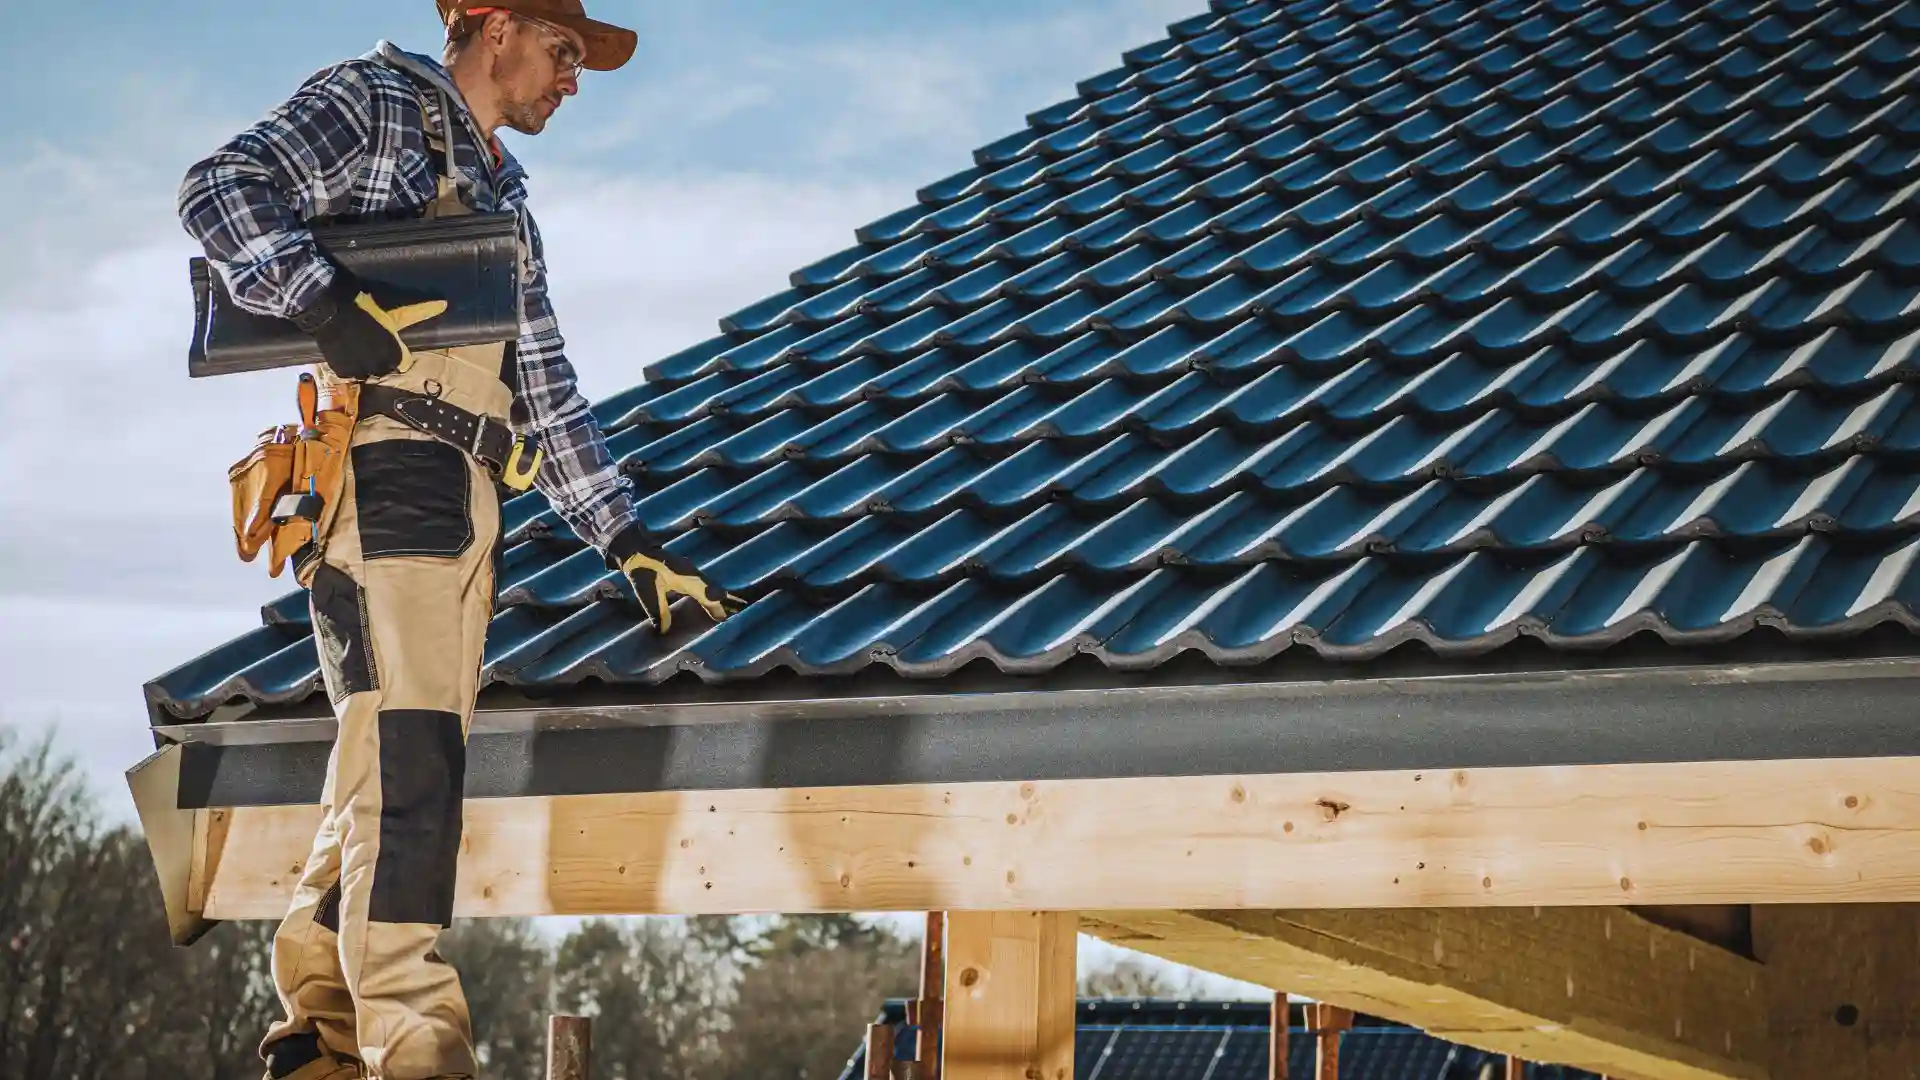
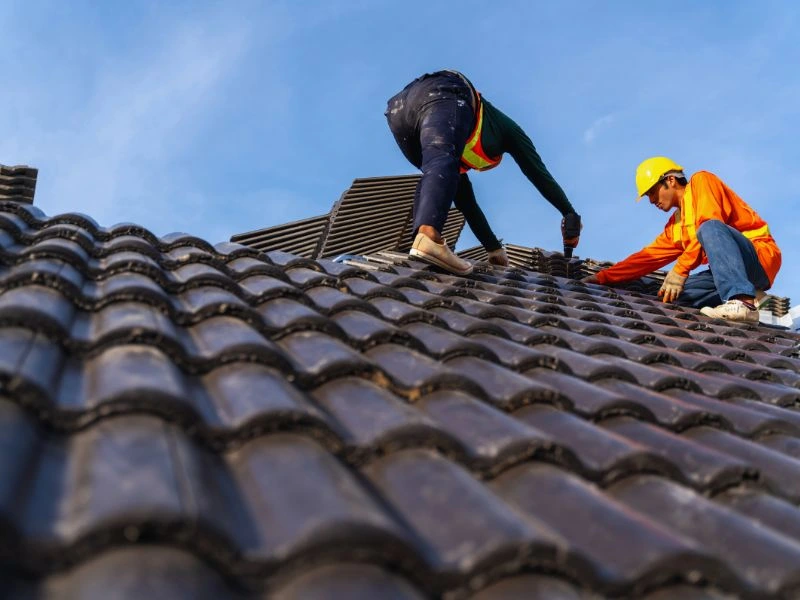
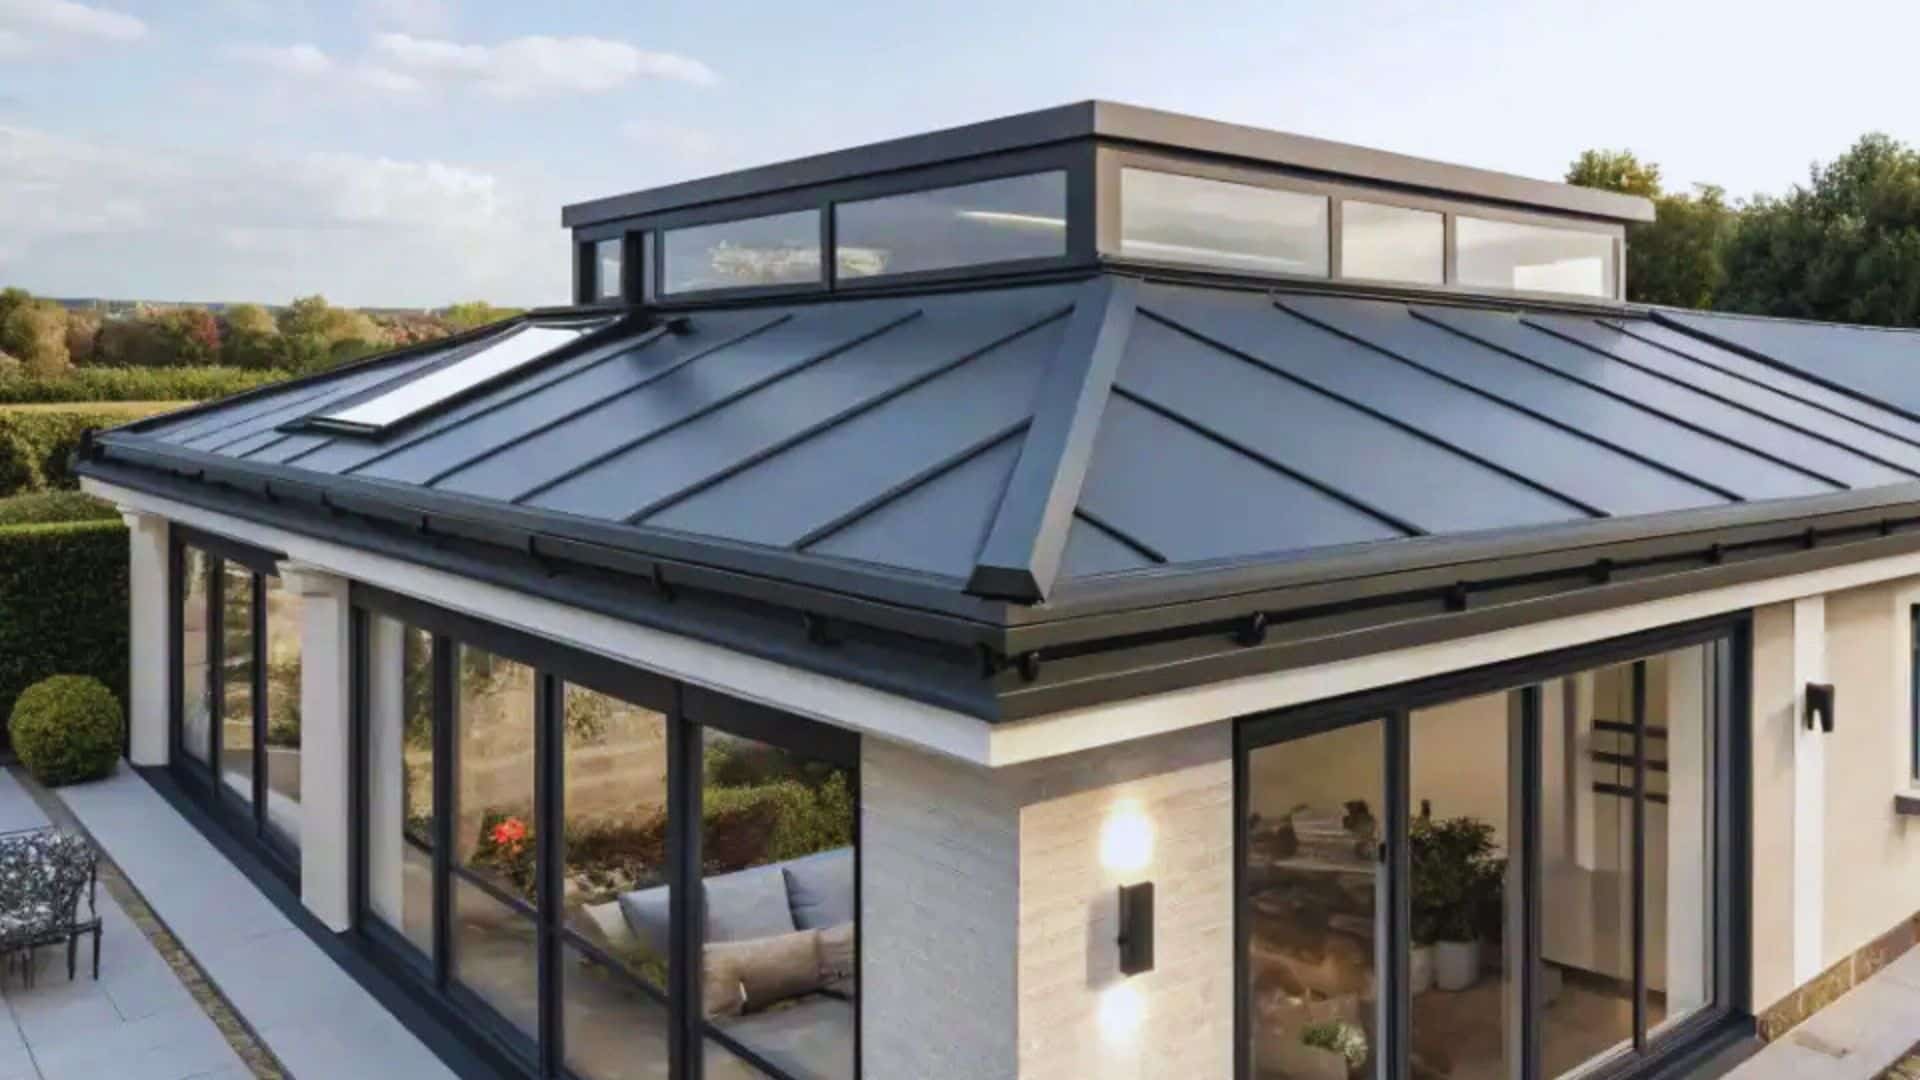
Material Selection for Your Climate

Choosing the right roofing material is just as important as maintenance. Metal roofing performs reliably across most climates due to its durability and temperature resistance. Asphalt shingles work best in moderate regions, while tile roofing excels in hot environments. Balancing upfront cost with lifespan and climate suitability is key to long-term roof maintenance success.

Warning Signs That Require Immediate Action

Certain roofing issues signal urgent problems that should never be ignored. Interior leaks or water stains on ceilings and walls often indicate water has already penetrated the roofing system, potentially damaging insulation, framing, and drywall. Sagging roof sections are especially serious, as they may point to structural weakness caused by long-term moisture exposure or excessive weight from snow or debris.

Heavy granule loss in gutters or around the home suggests shingles are deteriorating and losing their protective layer, making the roof vulnerable to UV damage and leaks. Likewise, multiple cracked or missing shingles expose the roof deck directly to the weather. In cold climates, ice dams accompanied by interior water damage require immediate attention, as they can rapidly worsen during freeze–thaw cycles.

Seeing daylight through the attic is a clear sign of holes or separation in roofing materials. Sudden spikes in energy bills may indicate compromised insulation or ventilation due to roof damage. Finally, if your roof has exceeded its material lifespan, proactive action is critical. Ignoring these warning signs often leads to extensive structural damage and significantly higher replacement costs.

Climate-Specific Considerations

Cost-Saving Maintenance Strategies

Preventive maintenance offers one of the highest returns on investment in home care by catching small issues before they turn into expensive repairs or premature replacement. Simple, safe DIY tasks such as cleaning gutters, removing debris, and performing visual inspections from the ground help prevent water buildup and hidden damage. However, professional maintenance quickly pays for itself when it identifies ventilation problems, insulation gaps, or early material failure that homeowners may miss.

Many insurance policies and manufacturer warranties require proof of regular maintenance, making documentation especially important. Skipping routine care can void coverage when you need it most. Setting aside a modest annual budget for roof upkeep spreads costs over time, reduces emergency repair expenses, and helps ensure your roofing system reaches or exceeds its expected lifespan.

Final Thoughts

Extreme heat and cold each present unique challenges that can significantly shorten a roof’s lifespan if ignored. Proactive care is far more effective—and affordable—than reactive repairs after damage occurs.

By following proper roofing maintenance for extreme temperatures, homeowners can protect materials, prevent moisture intrusion, and maintain energy efficiency year-round. Consistent inspections, climate-appropriate materials, and timely professional support can extend roof life by up to a decade.

Schedule inspections before extreme seasons arrive, and view roof maintenance as an investment—not an expense. A well-maintained roof today prevents costly replacements tomorrow.

FAQs

1. How often should I inspect my roof for temperature damage?

Inspect twice yearly and after extreme heat waves or heavy winter storms.

2. Can I perform roof maintenance myself in extreme temperatures?

Minor tasks are fine, but extreme heat or icy conditions increase safety risks.

3. What’s the ideal temperature range for roof repairs?

Most roofing work is best done between 40°F and 85°F.

4. How do I know if my attic ventilation is adequate?

High attic temperatures, ice dams, or moisture buildup indicate poor ventilation.

5. Should I remove all snow from my roof?

Only heavy accumulations—removing all snow can damage roofing materials.

If you’re searching for how much does it cost to replace a roof, the short answer is this: most homeowners spend around $9,500, with typical costs ranging from $5,800 to as high as $46,000 depending on materials, labor, and complexity.

Roof replacement isn’t just another home improvement—it’s a critical investment that protects your structure, improves energy efficiency, and preserves property value. A failing roof can lead to leaks, mold, insulation damage, and even structural issues if ignored for too long.

However, no two roofs cost the same. Factors such as roof size, material choice, labor rates, geographic location, and your roof’s current condition all play a major role in determining the final price. That’s why estimates can vary so widely between homes—and even between neighbors.

In this guide, you’ll get a clear, realistic breakdown of roof replacement costs, what influences pricing, when replacement makes sense over repair, and how to avoid overpaying. By the end, you’ll know exactly what to budget for and how to plan confidently.

Average Roof Replacement Costs

National Averages Explained

The national average roof replacement cost typically falls between $9,000 and $9,500 for a standard asphalt shingle roof on a single-family home. This figure includes materials, labor, tear-off, and basic installation components.

Why Costs Vary So Widely

Homeowners may pay as little as $5,700 for a small, low-slope roof with basic shingles—or more than $46,000 for premium materials like slate or metal on complex roof designs. Variables such as pitch, height, and accessibility can dramatically increase labor time and safety requirements.

Pricing by Measurement

  • Per square foot: $4–$11

  • Per roofing square (100 sq ft): $300–$600

Roof Cost by Size

Roof Size Estimated Cost Range
1,000 sq ft $4,000 – $11,000
1,500 sq ft $5,800 – $16,500
2,000 sq ft $8,000 – $22,000
2,500 sq ft $10,000 – $27,500
3,000 sq ft $12,000 – $33,000

Understanding these averages helps answer the question how much does it cost to replace a roof, but your final price depends on deeper cost factors covered below.

Cost Breakdown by Roofing Material

Different roofing materials have vastly different prices, lifespans, and performance benefits. Choosing the right one impacts both upfront cost and long-term value.

Material Price / Sq Ft Avg Cost (2,000 sq ft) Lifespan Best Use Case
Asphalt (3-tab) $3–$5 $6,000–$10,000 15–20 yrs Budget-friendly homes
Architectural shingles $4–$6 $8,000–$12,000 25–30 yrs Better durability & curb appeal
Metal roofing $5–$16 $10,000–$32,000 40–70 yrs Longevity & energy efficiency
Wood shakes/shingles $6–$10+ $12,000–$20,000 20–30 yrs Rustic aesthetics
Clay/concrete tile $9–$12 $18,000–$24,000 50+ yrs Hot climates
Slate $15–$30 $30,000–$60,000 75–100 yrs Premium luxury homes
Flat roof (TPO/EPDM/PVC) $4–$12 $8,000–$24,000 20–30 yrs Commercial & modern homes

Metal roofs, while expensive upfront, reduce long-term new roof costs through longevity and energy savings. Premium materials like slate offer unmatched durability but require strong structural support.

Material choice alone can double or triple your roof replacement costs, making it one of the most important decisions in the process.

Cost Breakdown by Roofing Material

Labor Costs Explained

On average, contractors charge:

Several factors influence labor pricing:

  • Roof pitch: Steeper roofs require safety equipment and slow installation

  • Design complexity: Valleys, skylights, dormers, and chimneys add time

  • Number of stories: Multi-story homes increase risk and labor hours

  • Accessibility: Limited driveway space or landscaping obstacles raise costs

  • Regional labor rates: Urban areas and high-cost states pay more

Even with identical materials, labor differences can shift the final cost to replace a roof by thousands of dollars.

Key Cost Factors That Impact Your Final Price

Roof Size and Complexity

Roofers calculate costs based on total square footage, but shape matters just as much. Steep slopes, intersecting rooflines, dormers, valleys, and skylights all increase labor time and material waste.

Geographic Location

Location significantly affects pricing:

  • Midwest & rural areas: Lower labor costs

  • Coastal states: Higher material and code requirements

  • Southern states: Heat-resistant materials increase cost

  • Urban vs rural: City projects cost more due to permits and labor

Local building codes may require upgraded underlayment, ventilation, or wind-rated materials.

Roof Structure and Condition

Hidden damage beneath shingles can raise costs unexpectedly. Common issues include:

  • Rotted decking

  • Structural sagging

  • Water damage

  • Multiple existing layers requiring removal

Each additional layer removed adds time, disposal fees, and labor expense.

Additional Project Costs

  • Removal & disposal: $1–$5 per sq ft

  • Permits: $100–$1,400

  • Roof inspection: $100–$600

  • Underlayment & flashing: Varies by quality

  • Ventilation upgrades: $300–$2,000

  • Gutter replacement: Often discounted when bundled

  • Extended warranties: $500–$5,000

All these factors influence how much does it cost to replace a roof, often more than homeowners initially expect.

Key Cost Factors That Impact Your Final Price

Roof Replacement vs. Repair: When to Choose Each

Repair Makes Sense When:

Common repairs like flashing fixes, shingle replacement, or minor leaks often cost $300–$2,000.

Replacement Is Better When:

  • Damage is widespread

  • The roof is near the end of its lifespan

  • Repairs are frequent

  • Structural issues exist

A full replacement offers a 20%–50% return on investment at resale and prevents escalating repair costs. In many cases, replacement is more economical long-term despite higher upfront roof replacement costs.

How to Save Money on Roof Replacement

  • Get 3–5 written quotes from licensed contractors

  • Schedule work in late fall or winter for discounts

  • Choose materials wisely—don’t overpay for features you don’t need

  • Understand warranties to avoid unnecessary upgrades

  • Ask about financing or payment plans

  • Check if storm damage qualifies for insurance coverage

Smart planning can significantly reduce the new roof cost without sacrificing quality.

How to Save Money on Roof Replacement

Choosing the Right Roofing Contractor

Look for contractors who offer:

  • Proper licensing and insurance

  • Strong local reviews

  • Detailed written estimates

  • Manufacturer and workmanship warranties

  • Clear timelines

Red flags

include large upfront payments, vague contracts, and pressure tactics.

Final Thoughts

Then, what is the price of replacing a roof? On average, about $9,500, but the final price depends heavily on material choice, labor quality, roof complexity, and location. Some homeowners spend under $6,000, while others invest $40,000 or more in premium systems.

A roof replacement isn’t just an expense—it’s long-term protection for your home’s structure, efficiency, and resale value. The key is planning carefully, choosing quality materials, and hiring experienced professionals.

Always compare multiple estimates and view your roof as an investment, not just a repair. The right decisions today can save tens of thousands over your home’s lifetime.

FAQs

1. How long does roof replacement take?

Most projects take 1–8 days, depending on size, weather, and complexity.

2. Is it possible to replace just a portion of my roof?

Yes, but mismatched materials and future leaks can reduce effectiveness.

3. Does homeowners’ insurance cover roof replacement?

Insurance may cover damage from storms, hail, or fire—not wear and tear.

4. How long do roofing materials last?

Asphalt lasts 20–30 years; metal lasts 40–70 years; slate lasts up to 100 years.

5. Can new shingles go over old ones?

Yes, but it shortens lifespan and may violate local codes.

Few things are as frustrating as looking up at your home and noticing roof shingles that look faded, blotchy, or mismatched from past repairs. A roof plays a major role in curb appeal, and discoloration can make an otherwise well-maintained house look neglected. Naturally, many homeowners wonder whether painting roof shingles is a practical way to refresh their roof without the expense of a full replacement.

The short answer is yes, you can paint roof shingles, but it’s not always the best solution for every roof or situation. Painting can improve appearance, extend usability, and even help with energy efficiency, but it also comes with maintenance demands and potential risks if done incorrectly.

In this guide, you’ll learn when painting makes sense, when it doesn’t, and how to do it the right way. We’ll cover the pros and cons, costs, step-by-step instructions, best paint options, and long-term maintenance expectations so you can make an informed decision before committing time or money.

Can You Paint Roof Shingles? (What You Need to Know First)

Yes, you can paint roof shingles but only under the right conditions. Asphalt shingles are the most commonly painted type, while materials like wood shakes, slate, or clay tiles are usually poor candidates due to absorption or durability issues.

Painting makes sense when shingles are structurally sound but visually worn. If your roof has no active leaks, minimal granule loss, and plenty of life left, painting can be a cosmetic upgrade. Many homeowners choose to paint roof shingles to unify color after partial repairs or to modernize the home’s exterior.

However, painting is not universally recommended by roofing professionals. Some manufacturers discourage it because paint can interfere with shingle breathability and void warranties. Others point out that paint doesn’t repair underlying damage—it only covers it.

In short, painting works best as a temporary, appearance-focused solution, not as a substitute for replacement. A professional inspection is critical before making a decision, especially if the roof is older or has a history of water problems.

Pros of Painting Roof Shingles

Cost Savings

One of the biggest advantages of painting is affordability. A full roof replacement can cost $150 to $1,500 per square (100 square feet), depending on materials and labor. In contrast, painting typically costs around $1,000 for an average-sized roof, making it a budget-friendly way to improve appearance.

For homeowners preparing to sell or looking to enhance curb appeal quickly, painting offers an immediate visual upgrade without a major financial commitment.

Extended Roof Lifespan

High-quality acrylic coatings can add a layer of protection against UV rays, wind, and moisture. UV-resistant acrylic latex coatings slow down sun damage, helping shingles maintain flexibility longer.

While paint won’t restore damaged shingles, it can reduce surface wear and delay deterioration when applied to a healthy roof. This extra layer helps shield shingles from harsh environmental exposure.

Improved Energy Efficiency

Reflective colors can significantly reduce heat absorption, especially on darker roofs. Lighter coatings reflect sunlight, lowering attic temperatures and reducing cooling costs during hot months.

This benefit is particularly noticeable in warm climates where cooling expenses are high. Energy-efficient roof shingle paint can improve comfort while easing strain on HVAC systems.

Aesthetic Customization

It’s also useful for correcting uneven coloring caused by partial shingle replacements.

From modern charcoal tones to lighter energy-saving shades, painting offers flexibility that replacement shingles may not, especially when exact color matches are unavailable.

Cons of Painting Roof Shingles

High Maintenance Requirements

Painted roofs require ongoing care. Annual inspections are necessary to catch peeling or bubbling early. Touch-ups are often needed every few years, and complete repainting may be required every 4–7 years.

Repainting usually involves stripping or cleaning old layers first, adding time and cost over the long term.

Risk of Moisture Damage

Improper paint selection or application can trap moisture beneath shingles. This trapped moisture may lead to rot, mold, or mildew over time.

Ensuring the roof is completely dry before painting—and using breathable coatings—is critical to preventing long-term damage.

Safety Hazards

Roof painting involves working at heights, often on sloped surfaces. Without proper equipment and experience, falls and injuries are real risks.

This is why many experts recommend professional help, especially for multi-story homes or steep roofs.

Not a Structural Fix

Paint does not repair cracked shingles, leaks, or decking issues. Worse, it can mask serious problems that continue to worsen beneath the surface.

Additionally, painting may void manufacturer warranties, eliminating coverage for future defects.

Cons of Painting Roof Shingles

How to Paint Roof Shingles: Step-by-Step Guide

Get a Professional Roof Inspection

A professional inspection identifies leaks, soft spots, granule loss, and ventilation problems. Inspectors determine whether the roof is a safe candidate for painting or if replacement is more appropriate.

Painting should never proceed if structural issues are present.

Make Necessary Repairs

Replace damaged or missing shingles before painting. Secure loose shingles and address flashing or decking problems.

Skipping repairs can lead to paint failure and water damage later.

Clean the Roof Thoroughly

Use low-pressure power washing to remove dirt, moss, and algae. A 50/50 bleach-water solution helps eliminate stubborn growth.

Protect nearby plants and allow the roof to dry completely—this step is critical for adhesion.

Apply Primer

Primer improves adhesion and seals porous surfaces. Use a multi-surface exterior or bonding primer designed for asphalt shingles.

Apply evenly and allow full drying before painting.

Paint Application

Choose 100% acrylic latex designed for roofing. Products like Behr Multi-Surface Roof Paint or Sherwin-Williams Resilience are commonly recommended.

Apply using a sprayer for even coverage or a roller for control. Work top to bottom in thin coats. Two to three coats are typical, with 24–48 hours of drying between layers.

Inspection and Touch-ups

After drying, inspect for thin spots or missed areas. Address imperfections immediately to ensure uniform coverage.

How to Paint Roof Shingles: Step-by-Step Guide

Best Paint for Roof Shingles

Choosing the right paint is critical to the success and longevity of a painted roof. These paints are designed to be breathable, allowing trapped moisture to escape while still forming a protective barrier against rain and humidity. Breathability is essential to prevent rot, mold, and premature shingle deterioration.

Strong UV resistance is another must-have feature. Roofs receive constant sun exposure, and without UV-resistant pigments, paint will fade, chalk, and break down quickly. High-quality acrylic roof paints help reduce surface temperature, slow aging, and maintain color consistency over time. In regions with extreme heat, heavy rainfall, or wide temperature swings, elastomeric coatings are often recommended. These flexible coatings expand and contract with the roof, reducing cracking and extending durability.

Certain products should always be avoided. Oil-based paints, standard exterior house paints, and spray paints are not designed for roofing materials. They tend to crack under temperature changes, trap moisture beneath the shingles, and fail much sooner than roof-specific coatings.

Trusted manufacturers include Behr and Sherwin-Williams, both of which offer roof-approved acrylic coatings. Specialized elastomeric roof paints designed for asphalt shingles are also excellent options when climate conditions demand added protection.

Cost to Paint Roof Shingles

The cost to paint roof shingles varies based on whether you take a DIY approach or hire a professional, as well as the size and condition of the roof. For homeowners who choose to do the work themselves, expenses include paint, primer, roof cleaners, safety gear, and equipment rentals such as paint sprayers. Material costs alone typically range from $300 to $800, depending on paint quality and roof square footage. While DIY painting reduces labor costs, it does require a significant time investment and assumes the risk of mistakes or safety issues.

Professional roof painting costs generally fall between $1,000 and $3,000 for an average home. Prices increase for steep slopes, multi-story roofs, extensive surface preparation, or roofs in poor condition. Geographic location also plays a role, as labor rates vary by region. Professional services usually include cleaning, minor repairs, priming, paint application, and post-job inspection, which adds value and durability.

When compared to full roof replacement—which can cost tens of thousands of dollars—painting offers noticeable short-term savings. However, it’s important to factor in ongoing maintenance expenses such as touch-ups and eventual repainting every few years. Over time, these recurring costs may narrow the price gap between painting and replacement, especially for aging roofs.

Cost to Paint Roof Shingles

When NOT to Paint Your Roof Shingles

Painting is not always the right solution, and in some cases, it can make existing problems worse. You should not paint your roof if shingles are curling, cracking, loose, or missing. These conditions indicate structural deterioration that paint cannot fix. Extensive granule loss is another major red flag, as granules protect shingles from UV damage; once they are gone, the shingles are already failing.

Active leaks or signs of water damage, such as stains in the attic, soft decking, or mold growth, automatically disqualify a roof from painting. Applying paint over moisture-related problems can trap water beneath the shingles, accelerating rot, mildew, and long-term structural damage.

Age is another critical factor. If an asphalt roof is nearing the end of its expected lifespan, typically around 15–20 years, painting is usually a poor investment. At this stage, replacement provides better long-term value and eliminates the risk of hidden issues worsening under a painted surface.

Severe storm damage from hail, high winds, or fallen debris also makes painting inappropriate until full repairs or replacement are completed. Additionally, some homeowner’s associations (HOAs) restrict roof color changes, and local building codes or manufacturer warranties may prohibit painting altogether. Always verify regulations and roof condition before proceeding.

Maintenance for Painted Roof Shingles

Proper maintenance is essential to preserve the appearance and performance of painted roof shingles. At a minimum, homeowners should inspect the roof once a year, ideally in spring or fall, to look for early signs of wear such as peeling, bubbling, cracking, or chipping. Catching these issues early allows for small touch-ups instead of costly repairs later.

Climate plays a major role in how long painted shingles last. Extreme heat, heavy rainfall, snow, and high humidity can all accelerate paint breakdown. In hot or humid regions, UV exposure and moisture can cause fading and adhesion loss more quickly, making more frequent inspections necessary.

Touch-ups are commonly needed every two to three years, especially in high-exposure areas such as roof ridges and slopes that receive direct sunlight. A full repaint is typically required every four to seven years, depending on paint quality, application method, and local weather conditions.

Shaded sections of the roof deserve extra attention, as they tend to retain moisture longer and are more prone to algae, mildew, and premature paint failure. Keeping gutters clear, trimming overhanging branches, and ensuring proper roof ventilation can significantly extend the life of a painted roof and reduce maintenance demands.

Maintenance for Painted Roof Shingles

Painting Roof Shingles: DIY vs. Hiring a Professional

Factor DIY Painting Roof Shingles Hiring a Professional
Upfront Cost Lower labor costs but higher personal time investment Higher initial cost, labor included
Safety Requires ladders, harnesses, stabilizers, and experience working at heights Trained crews with professional safety systems
Skill Level Steep learning curve; mistakes are common Expertise in roof materials, coatings, and techniques
Time Commitment Several days, including prep, drying, and cleanup Typically completed faster and more efficiently
Equipment Needed Paint sprayers, ladders, safety gear, and cleaning tools Commercial-grade equipment provided
Quality of Finish Varies; uneven coats or peeling are more likely Even coverage with proper adhesion
Risk of Damage Higher risk of moisture trapping or shingle damage Lower risk due to correct product use and application
Best For Small, low-slope roofs with experienced DIYers Steep, tall, complex, or aging roofs
Long-Term Results Shorter lifespan if errors occur Longer-lasting, more durable finish
Peace of Mind Limited—homeowner assumes all risk Highly licensed, insured professionals handle the work

Final Thoughts

Painting roof shingles is possible, but it requires careful evaluation and realistic expectations. It’s a temporary solution best suited for structurally sound roofs that need a visual refresh—not a substitute for replacement.

Using proper materials, thorough preparation, and correct techniques is essential for success. Before making a decision, schedule a professional inspection to determine whether painting or replacement is the smarter long-term investment for your home.

FAQs

1. Can you paint asphalt roof shingles?

Yes, if they’re in good condition and properly cleaned, primed, and painted with breathable acrylic coatings.

2. How long do painted roof shingles last?

Typically 4–7 years with proper prep, quality paint, and regular maintenance.

3. Does painting a roof cause leaks?

It can if moisture is trapped or damaged shingles are painted over.

4. What color roof paint is best for energy savings?

Light, reflective colors reduce heat absorption and cooling costs.

5. Will painting shingles void the warranty?

Often yes. Always check the manufacturer’s warranty terms before painting.

Black streaks running down roof shingles are one of the most common concerns homeowners notice as their roof ages. At first glance, many people assume these stains are dirt or mold, but in most cases, they are caused by algae growth. While these streaks may look alarming and make your home appear older than it is, the good news is that they are usually manageable with the right approach. Learning how to remove algae from roof shingles can help restore your roof’s appearance and protect its long-term performance.

In this guide, you’ll learn the complete process—from identifying what type of growth is on your roof to choosing the safest and most effective cleaning method. We’ll also cover prevention strategies to slow regrowth and explain when it’s best to call a professional. With proper safety precautions and proven techniques, roof algae removal is an achievable DIY task for many homeowners. By understanding the causes and solutions, you can make confident decisions that protect both your roof and your investment.

Understanding Roof Algae

What is Roof Algae?

Roof algae is most commonly caused by a cyanobacterium called Gloeocapsa magma. Although it’s technically not a plant, it behaves like one by spreading across surfaces where moisture is present. This organism appears as dark brown or black streaks on asphalt shingles because it feeds on the limestone filler used in many shingle products.

Algae thrives in warm, humid climates, which is why homes in coastal or southern regions often experience black streaks sooner than those in dry, cooler areas. However, even temperate climates can see algae growth when shade and moisture persist.

Difference Between Algae, Moss, and Mold

Correct identification is essential before starting roof algae removal.

  • Algae appears as flat, dark streaks and is mostly cosmetic.

  • Moss is green, fuzzy, and raised, often growing between shingles and retaining moisture.

  • Mold looks slimy and can pose health risks if spores spread indoors.

Each requires a slightly different treatment approach.

Why Algae Forms on Shingles

Algae feeds on the limestone filler in asphalt shingles and needs moisture and shade to survive. Roofs with limited sunlight exposure or nearby trees are especially vulnerable. Wind and animals can carry spores from one roof to another, allowing algae to spread quickly through neighborhoods.

Does Algae Damage Roof Shingles?

In most cases, algae is a cosmetic issue. However, it can reduce roof reflectivity, causing higher attic temperatures. Over time, moisture retention may contribute to premature aging of shingles if left untreated.

Safety Precautions Before Starting

Working at height always carries risk, so preparation matters. Use a sturdy ladder placed on level ground and maintain three-point contact at all times. Never lean too far to one side, and reposition the ladder as needed.

Wear personal protective equipment, including gloves, safety glasses, and non-slip shoes. Roof surfaces can be slippery, especially when wet or treated with cleaning solutions. Choose a calm, overcast day to avoid rapid evaporation and reduce slip hazards.

Fall protection, such as a safety harness, is recommended for higher roofs. If your roof is steep, has extensive algae coverage, or if you have health conditions that limit balance or strength, do not attempt DIY cleaning.

Safety Precautions Before Starting

Method 1: Bleach and Water Solution

Materials Needed

To remove algae effectively using a bleach solution, gather the following:

  • Chlorine bleach (standard laundry strength)

  • Water

  • Optional: Trisodium phosphate (TSP)

  • Garden or pump sprayer

  • Garden hose with spray nozzle

  • Tarps or plastic sheeting to protect plants

Step-by-Step Process

Start by protecting your landscaping. Cover nearby plants with tarps and thoroughly wet them with clean water. This helps dilute any runoff.

Mix your solution using a 50/50 ratio of bleach to water for heavy staining. For lighter treatment, a 1:3 ratio can be effective. Add a small amount of TSP if desired to improve cleaning power.

Allow it to dwell for 15–20 minutes, but do not let it dry completely. Gently rinse using low-pressure water only. Avoid aggressive spraying, as this can dislodge shingle granules.

After treatment, some algae may remain visible. Over the next few weeks, rain will continue to wash away residue, improving results.

Important Warnings

Never use a pressure washer, as it can permanently damage shingles. Avoid spraying metal surfaces like copper flashing, and be mindful of environmental impact by controlling runoff.

Method 2: Commercial Roof Cleaners

Product Types

Commercial roof cleaners come in several forms, including oxygen bleach-based formulas and eco-friendly options such as “Spray & Forget” or “Wet & Forget.” Some manufacturers also produce cleaners designed specifically for their shingle products.

Application Process

Always follow the manufacturer’s instructions carefully. Many products are applied and left to work over time, sometimes taking three to six months to fully remove stains. This approach requires less physical labor and reduces roof traffic.

Pros and Cons

Aspect Pros Cons
Ease of Use Simple application with spray-on formulas; no mixing required Some products require patience for results
Environmental Impact Safer for plants, soil, and runoff compared to chlorine bleach Eco-friendly formulas may work more slowly
Shingle Safety Low risk of granule loss or surface damage when used correctly Less effective on heavy or long-term staining
Labor Required Minimal roof traffic and physical effort Results depend on the weather and rainfall
Speed of Results Gradual, controlled cleaning over time Can take weeks to months for full stain removal
Cost Convenient all-in-one solution Higher upfront cost than DIY bleach methods
Best Use Case Ongoing maintenance and prevention Not ideal for severe algae buildup

Commercial Roof Cleaners

Method 3: Vinegar Solution (Natural Alternative)

For homeowners who prefer a chemical-free or eco-conscious approach, a vinegar solution offers a natural way to address light algae growth on roof shingles. White vinegar contains acetic acid, which breaks down algae at the surface level without introducing harsh chemicals into the environment. While it is not as fast-acting as bleach-based treatments, it can be an effective option for mild staining.

Vinegar Cleaning Recipe

To prepare the solution, mix two gallons of water with 1.5 to 3.5 cups of white vinegar. Use the lower amount for very light staining and the higher concentration for slightly heavier algae buildup. Always mix the solution in a garden or pump sprayer for even application and better control.

Application Process

Apply the vinegar solution using the same technique as other low-pressure roof cleaning methods. Start at the bottom of the roof and work upward to prevent streaking. Ensure the shingles are evenly coated, especially in shaded or moisture-prone areas where algae tends to form.

Allow the solution to dwell on the shingles for approximately 45 minutes. Avoid applying on hot or sunny days, as rapid evaporation reduces effectiveness. After the dwell time, gently rinse the roof with low-pressure water. Do not scrub aggressively or use pressure washing, as this can damage shingle granules.

Effectiveness and Limitations

Vinegar is significantly gentler on surrounding plants, landscaping, and local water systems compared to bleach. However, because it is milder, it often requires multiple applications to fully remove visible staining. Results may appear gradual, with rain helping wash away dead algae over the following weeks.

This method works best for light algae growth or as a maintenance treatment after a deeper cleaning. For heavy staining or widespread black streaks, stronger solutions or professional cleaning may be necessary.

When Vinegar Is the Right Choice

The vinegar method is ideal for homeowners who:

  • Prefer natural or environmentally friendly solutions

  • Have minimal algae staining

  • Want to maintain a recently cleaned roof

  • Are concerned about plant or soil sensitivity

Used correctly, vinegar can be a safe, sustainable option for keeping algae under control without harsh chemicals.

When to Call a Professional

Professional roof cleaning is recommended when algae coverage is extensive, the roof is steep or high, or moss removal is required. Moss is labor-intensive and often damages shingles if removed improperly. If you suspect mold or structural damage, or if safety is a concern, hiring a professional is the wisest choice.

Preventing Algae Regrowth

Once you’ve cleaned your roof, prevention becomes just as important as removal. Algae spores are airborne and can return quickly if conditions remain favorable. The strategies below focus on long-term solutions that limit moisture, shade, and nutrients algae need to survive.

Zinc or Copper Strips

Zinc and copper strips are one of the most effective long-term solutions for preventing algae regrowth. These metals naturally inhibit algae and bacterial growth. When rainwater flows over the strips, it carries microscopic metal ions down the roof surface, creating an environment where algae cannot easily take hold.

For best results, strips should be installed just below the roof ridge, where rainwater begins its downward path. Six-inch-wide strips are typically sufficient and can protect large roof sections for more than ten years. While professional installation is recommended for steep roofs, many homeowners can install them during routine roof maintenance. This method works continuously without chemicals, making it a low-maintenance and environmentally friendly option.

Tree and Vegetation Management

Overhanging trees are a major contributor to roof algae problems. Shade prevents shingles from drying quickly after rain or morning dew, creating the damp conditions algae thrives in. Leaves, pine needles, and organic debris also trap moisture and provide nutrients for growth.

Regularly trimming branches away from the roof increases sunlight exposure and airflow. This allows shingles to dry faster and reduces the likelihood of algae returning. As a bonus, tree maintenance also minimizes debris buildup in gutters, lowering the risk of water backup and roof edge damage.

Improve Roof Ventilation

Poor roof ventilation can trap heat and moisture in the attic, which indirectly contributes to algae growth on shingles. When warm, moist air accumulates beneath the roof, it increases condensation and keeps the roof surface damp for longer periods.

Proper ventilation—using ridge vents, soffit vents, or attic fans—helps regulate temperature and moisture levels. A well-ventilated roof dries more efficiently after rain, making it less hospitable to algae. Improving ventilation can also extend shingle life and reduce cooling costs, providing benefits beyond algae prevention.

Regular Maintenance

Consistent roof maintenance is one of the simplest and most effective ways to prevent algae regrowth. Schedule an annual roof inspection to check for early signs of staining, moisture issues, or debris buildup. Clearing leaves, branches, and dirt from the roof and gutters prevents water retention that encourages algae.

Pay attention to areas where water tends to linger, such as valleys and shaded sections. Addressing minor problems early helps avoid larger cleaning jobs later and reduces the need for frequent chemical treatments.

Algae-Resistant Shingles

If your roof is due for replacement, algae-resistant shingles are worth considering. These shingles contain copper or zinc-infused granules that actively prevent algae growth over time. While they typically cost more than standard asphalt shingles, the long-term savings on cleaning and maintenance often justify the investment.

Algae-resistant shingles are especially beneficial in humid or wooded areas where algae growth is persistent. They help maintain curb appeal, improve roof longevity, and reduce the frequency of manual cleaning, making them a smart choice for homeowners focused on long-term protection.

Final Thoughts

Removing algae from your roof may seem intimidating, but with the right knowledge and precautions, it’s a manageable task. Understanding the cause, choosing the appropriate cleaning method, and focusing on prevention can dramatically improve your roof’s appearance and longevity. Safety should always come first, and regular maintenance goes a long way in preventing regrowth. By applying what you’ve learned about how to remove algae from roof shingles, you can protect your home, extend your roof’s life, and maintain curb appeal for years to come.

FAQs

1. How long does it take to remove algae from roof shingles?

Active cleaning takes 2–4 hours, but full visual improvement may take weeks with rainfall.

2. Will bleach damage my shingles?

No, when properly diluted and rinsed, bleach is safe for asphalt shingles.

3. How often should I clean algae from my roof?

Every 2–3 years in humid climates, or as needed.

4. Can I use a pressure washer?

Never. Pressure washing removes protective granules and shortens roof life.

5. Is roof algae harmful to my health?

Algae itself isn’t, but it can encourage mold growth if ignored.

Hailstorms cause over $1 billion in property damage annually in the United States, and your roof often bears the brunt. Imagine waking up after a hailstorm to find scattered debris, dented gutters, and unsure if your shingles were impacted. For homeowners, the uncertainty of hail damage on roof surfaces can be overwhelming.

Understanding hail damage is crucial for protecting your home, filing insurance claims, and preventing long-term issues. In this comprehensive guide, you’ll learn how to identify hail damage from the ground, what to look for on various roofing materials, when to call a professional, the insurance claims process, and proactive steps to minimize future damage. Early detection not only prevents costly repairs but also ensures your roof maintains its structural integrity. Whether it’s a minor cosmetic issue or severe structural damage, knowing what to do after hail strikes can save you thousands.

Understanding Hail and How It Damages Roofs

Hail forms during thunderstorms when strong updrafts lift water droplets into freezing layers of the atmosphere. These droplets accumulate layers of ice as they circulate, growing heavier until gravity pulls them to the ground. Hailstones vary in size, density, and shape—factors that determine the severity of roof damage.

The extent of damage depends on:

Hail Characteristics

Pea-sized hail may cause minor shingle granule loss, while golf ball-sized or larger hail can crack windows and puncture roofing materials. Irregular shapes and hard surfaces inflict more damage.

Storm Conditions

High wind speeds, storm duration, and hail concentration influence how severely your roof is impacted.

Property Factors

The type of roofing material, its age, slope, and nearby structures or trees can mitigate or worsen damage.

Hail damage matters because it compromises roof integrity without immediate leaks, accelerates aging, exposes underlayment, and may void manufacturer warranties if ignored. Texas, known for frequent hailstorms, experienced 688 significant hail events in 2021 alone, highlighting the importance of vigilance.

Hail Size and Damage Correlation

Hail size is directly related to potential roof damage:

Hail Size Common Name Typical Damage Notes
¾ inch Pea-sized Dislodges granules from asphalt shingles, dents metal fascia, and damages vinyl siding Often overlooked by homeowners
1 inch Quarter-sized Visible shingle bruising, gutter, and siding damage Critical threshold: the first size at which damage is easily identifiable
1¼ inch Half Dollar Significant damage; shingles may resemble “Swiss cheese.” Damage occurs even without wind
1¾ inch Golf Ball Severe property damage; can crack windows, tear siding Severity depends on duration and wind
2+ inches Tennis Ball to Softball Penetrates ridge caps and vents, may require full roof replacement, can destroy siding and metal fixtures Most destructive; combined with wind can cause major structural issues

How to Identify Hail Damage: Ground-Level Inspection

Starting from the ground ensures safety and helps identify areas needing professional attention.

Check Gutters and Downspouts: Look for dents and granule accumulation; black, sandpaper-like residue indicates shingle damage.

Siding and Exterior Walls: Dents, splatter marks, chipped paint, or punctures on vinyl or aluminum siding indicate impact.

Windows and Doors: Inspect for cracked glass, dents, damaged caulking, or chipped frames.

Outdoor Equipment: AC units, satellite dishes, mailboxes, and outdoor furniture often show hail dents first.

Roof Penetrations Visible From Ground: Look for dents on metal vents, skylights, and chimney flashing.

Landscape Indicators: Broken branches and shredded foliage indicate hail size and intensity. Binoculars can help assess your roof safely.

Identifying Hail Damage by Roofing Material

Hail damage appears differently depending on the type of roofing material. Recognizing these signs early can save homeowners from costly repairs and help ensure insurance claims are handled correctly.

Asphalt Shingles

Asphalt shingles, used on about 75% of U.S. homes, are highly susceptible to hail damage. Look for:

Black spots or bruises: Dark areas on shingles indicate granules have been knocked off, exposing the asphalt mat beneath.

Shiny exposed mats: This often looks like a small, reflective spot where the protective layer has worn away.

Soft “bruise” areas: Press gently; hail-damaged spots feel softer than the surrounding areas.

Granule loss: Excessive granules in gutters or downspouts signal impact.

Circular cracks and weakened seal strips: Hail can compromise the adhesive that holds shingles in place, leading to potential leaks.

Older shingles or lower-quality materials show damage more readily, so check carefully after storms.

Wood Shakes and Shingles

Wood roofs exhibit damage differently:

Splits with sharp edges: Hail often causes small cracks along the grain. Fresh splits reveal brown or orange wood inside.

Splintering and dislodged shakes: Impact may loosen shingles or cause them to partially detach.

Aging vs. hail damage: Old damage appears gray and weathered, whereas hail damage is abrupt and shows fresh color.

Metal Roofing

Metal roofing is highly durable but not impervious:

Dents and dings: Most common indicator; hail creates rounded indentations without creases.

Warping from larger hail: Significant hailstones can bend or warp panels.

Durability note: Thicker metal resists damage better, but all metal roofs should be inspected after major hailstorms.

Clay and Concrete Tiles

Tile roofs require careful attention:

Chipped corners or cracked tiles: Hail can break tiles like pottery.

Shattered tiles or missing sections: Severe storms may dislodge or shatter multiple tiles.

Exposed underlayment or decking: Where tiles are missing, protective layers beneath may be exposed.

Professional inspection recommended: Walking on tiles can cause additional damage, so always hire a pro.

Flat or Low-Slope Roofs

These roofs can hide damage:

Membrane cracks or punctures

Hail may tear or bruise roofing membranes.

Blistering or water accumulation points

Damage can create areas where water pools, increasing leak risk.

Careful observation needed

Damage may not be obvious without a thorough inspection.

Common Mistakes to Avoid

Not every roof blemish is hail damage. Watch out for blistering from age, algae streaks or discoloration, granule loss due to normal wear and tear, and mechanical damage such as foot traffic or ladder marks.

Key Point

Hail damage occurs suddenly and randomly, unlike gradual aging or mechanical wear, which follows patterns. Correctly identifying the type of damage ensures proper repair and avoids insurance claim issues.

Identifying Hail Damage by Roofing Material

Professional Roof Inspection for Hail Damage

Section Details
When to Call a Professional – Ground-level indicators suggest damage (dents in gutters, siding, AC units, broken windows).- Hailstones exceeded 1 inch (larger hail can cause hidden damage).- Roof characteristics make DIY unsafe (steep slopes, tile/slate, older roofs).- Insurance claim planning requires professional documentation.
What Professionals Inspect Entire roof surface: shingles, tiles, and metal panels for dents, bruising, and missing granules.- Roof penetrations: vents, chimneys, skylights, flashing.- Ridge caps & valleys: loosened or fractured components.- Gutters, downspouts, soffits, fascia: dents, blocked drainage.- Interior inspection: attic for leaks or compromised underlayment.- Documentation: photos and detailed notes for insurance.
Insurance Adjuster Methods Test square method: 10×10 ft areas in the most damaged zones.- Functional damage threshold: 8+ hail strikes per square may qualify the roof/slope for replacement.- Contractors provide professional assessments, photos, and estimates.
Choosing a Roofing Contractor Avoid: door-to-door storm chasers, extremely low estimates, and upfront full payment requests. Look for: licensed/insured local companies, experience with hail claims, written estimates, good references, and clear communication.
Key Takeaway Professional inspections identify hidden damage, protect your investment, and support insurance claims. Choosing a reputable contractor ensures informed repair/replacement decisions.

Filing an Insurance Claim for Hail Damage

Coverage Types

ACV (Actual Cash Value)

Pays depreciated value; may leave out-of-pocket costs.

RCV (Replacement Cost Value)

Pays to replace with equivalent new materials; initial ACV payment, balance after completion.

Claim Process:

  • Document all damage (photos, video, weather reports).
  • Make temporary repairs to prevent further damage.
  • Contact your insurance company promptly.
  • Schedule a professional inspection.
  • Meet adjuster; review estimate.
  • Complete repairs; keep receipts.

Average Costs: Minor repairs $375-$1,500, moderate $1,500-$4,250, severe $4,250-$7,500+. National average ~$4,250.

What to Do After Discovering Hail Damage

Discovering hail damage on your roof can be stressful, but acting quickly and methodically can prevent further damage, simplify insurance claims, and protect your home in the long term.

Immediate Actions (First 24–48 Hours)

Ensure Safety

Before anything else, check for immediate hazards. Look for active leaks and place buckets to catch water. Move valuable items away from affected areas. Do not walk on a damaged roof—even small hail dents can create weak spots that are unsafe to step on.

Document Thoroughly

Accurate documentation is critical for insurance claims:

Accurate documentation is critical for insurance claims. Take comprehensive photos and videos of all damage, including the roof, gutters, siding, windows, outdoor equipment, and landscaping.

Date-stamp every image and create written notes describing the extent of damage. Keep weather reports showing the hailstorm occurred in your area.

Prevent Further Damage

Mitigate immediate risks

Apply temporary tarps over damaged areas if safe, clear gutters of debris to ensure proper drainage, cover broken windows or vents, and keep receipts for all materials used, as these may be reimbursable by your insurer.

Contact Your Insurance Company

File your claim as soon as possible, ideally within 24–48 hours, provide your initial documentation, and ask about emergency temporary repair coverage.

Short-Term Actions (First Week)

Schedule a Professional Roof Inspection

Get 2–3 estimates from reputable roofing contractors, choose one who will work closely with your insurance claim, and schedule inspections before the insurance adjuster’s visit, if possible.

Prepare for Adjuster Visit

Compile all documentation and be present during the inspection, have your contractor available to answer technical questions, and take notes while asking clarifying questions about coverage and repair requirements.

Review Estimates and Settlement Offers

Compare the adjuster’s scope of work with contractor estimates, ensure all damaged areas are accounted for, and clarify any discrepancies before signing a settlement.

Long-Term Considerations

Complete Repairs Promptly

Don’t delay repairs once your claim is approved.

Hail damage can worsen over time, leading to leaks, rot, or structural issues.

Timely repairs preserve your home’s value and prevent compounded costs.

Consider Impact-Resistant Shingles

UL 2218 Class 4 shingles provide the highest level of hail protection.

Some insurers offer discounts for installing impact-resistant materials.

Upgrading helps reduce future damage and can qualify for long-term premium savings.

Upgrade for Future Protection

Install protective measures like hail guards on skylights or AC units.

Prune overhanging trees and maintain landscape buffers.

Consider stronger roofing materials, such as metal or stone-coated options, especially in high-risk hail areas.

Key Takeaway

Acting quickly after hail damage protects your home and your wallet. Safety, documentation, professional inspections, and thoughtful repairs ensure the storm’s impact doesn’t turn into a long-term problem.

What to Do After Discovering Hail Damage

Preventing and Minimizing Future Hail Damage

While hailstorms can’t be stopped, homeowners can take proactive steps to reduce damage to their roofs and property. Following a combination of maintenance, upgrades, and protective strategies ensures your home is better prepared for the next storm.

Regular Roof Inspections

Annual and Post-Storm Checks

Schedule a professional roof inspection at least once a year, ideally before storm season.

After any significant hailstorm, even if no damage is visible from the ground, have a roofer check for subtle damage that could worsen over time.

Early detection of small issues, such as loosened shingles or minor dents, prevents costly repairs later.

What Inspectors Look For

Inspectors check for shingle granule loss or bruising on asphalt roofs, dents on metal panels, cracks in tile or slate roofing, and assess the integrity of flashing and roof penetrations, including vents, chimneys, and skylights.

Keeping a baseline of your roof’s condition through documentation and photos helps compare pre- and post-storm conditions, aiding both maintenance and insurance claims.

Roof and Property Maintenance

Simple maintenance can reduce hail impact

Clean gutters and downspouts to prevent water accumulation and structural stress.

Trim overhanging branches to prevent broken limbs from striking the roof.

Remove dead or weak trees and branches near your home.

Repair minor issues promptly, such as cracked shingles or small leaks.

Ensure attic ventilation is functioning properly, which prevents heat buildup that can accelerate shingle wear.

Regular maintenance not only minimizes hail damage but also prolongs the overall life of your roof.

Upgrade Roofing Materials

Impact-resistant materials are your best defense

Class 4 UL 2218 shingles

Withstand up to 2-inch hail, rated highest for hail resistance.

Metal roofing

Durable and resistant to dents, standing seam metal offers extra protection.

Concrete or stone-coated tiles

More resistant than clay; provides long-term durability.

Architectural shingles

Better than 3-tab shingles for resisting impact.

Insurance Benefits

Many insurers offer premium discounts of 15–35% for homes with Class 4 shingles or other impact-resistant roofs. While installation costs are higher, the long-term savings and reduced risk of damage make it a worthwhile investment.

Protect Property Beyond the Roof

Additional steps protect outdoor assets:

Install hail guards on AC units and outdoor equipment.

Consider impact-resistant skylights or protective coverings for glass.

Use storm shutters or protective window films to reduce damage to windows.

Maintain a safe landscape buffer—pruned trees and sturdy plants reduce debris thrown by hail.

Taking a holistic approach to property protection ensures that even if hail strikes, collateral damage is minimized, reducing repair costs and insurance claims.

Location-Specific Considerations

High-Risk Areas:

States in Hail Alley (Texas, Oklahoma, Kansas, Nebraska, Colorado, Wyoming) and parts of the Midwest experience frequent hail events.

Homes in these regions should prioritize impact-resistant upgrades, professional inspections, and routine maintenance.

Even outside high-risk areas, severe thunderstorms can still cause damage, so preparation is worthwhile everywhere.

Common Mistakes Homeowners Make

  • Delaying inspection

  • Permanent repairs before claim

  • Poor documentation

  • Accepting the first estimate without review

  • Hiring storm chasers

  • Ignoring minor damage

  • Misunderstanding coverage

Conclusion

Hail damage on roof is a costly and common weather-related issue. Early ground-level inspections, professional assessment, thorough documentation, and timely insurance claims are essential to prevent minor damage from turning into major repairs. Upgrading to impact-resistant materials not only protects your home but may lower future insurance premiums. Don’t wait for leaks to appear—take action immediately after hail strikes and work with professionals to preserve your home’s integrity.

FAQs

  1. Will hail damage cause immediate roof leaks?

Not usually; it weakens protective layers, potentially leading to leaks over time.

2. How long do I have to file a claim?

Usually up to one year, but filing within days or weeks is best.

3. Can I repair damaged shingles instead of full replacement?

Depends on damage extent. Widespread damage may require full slope replacement.

4. Do all hail-damaged roofs need professional inspection?

Any suspected damage or hail >1 inch warrants professional assessment.

5. How much does hail damage repair typically cost?

Minor repairs $375-$1,500, major replacements $4,250-$7,500+, depending on roof type and material.

You step outside after a violent storm and notice bricks scattered near your chimney. Or maybe winter sets in and you hear cracking sounds, followed by water stains creeping across the ceiling near the fireplace. Chimney damage has a way of showing up suddenly—and the repair costs can be shocking. Depending on severity, chimney repairs can range from $160 to well over $10,000, leaving many homeowners asking the same urgent question: Will homeowners insurance cover chimney repair?

It’s a fair concern. Chimneys are exposed to wind, rain, ice, heat, and falling debris year-round, making them vulnerable to damage. Naturally, homeowners hope insurance will help absorb the cost. The honest answer is: it depends. But the good news is there’s a clear framework insurers use to decide what’s covered and what’s not.

In this guide, you’ll learn exactly when homeowners insurance covers chimney repairs, when it doesn’t, and how maintenance and documentation affect your claim. By the end, you’ll understand how to protect both your chimney and your wallet.

THE QUICK ANSWER

YES—homeowners’ insurance typically covers chimney repairs when the damage is caused by a covered peril (a sudden, unexpected event).
❌ NO—damage from wear and tear, neglect, or poor maintenance is not covered.

Covered scenarios include:

Covered scenarios include lightning strikes, which can cause immediate structural and electrical damage; fire damage, whether from wildfires or accidental ignition; fallen trees or storm debris that impact the roof during severe weather; and sudden collapse from external forces, such as extreme wind pressure or heavy impact events beyond normal wear and tear.

Not covered scenarios include:

Not covered scenarios include age-related deterioration that occurs naturally over time, gradual water leaks caused by long-term wear or poor maintenance, structural defects resulting from design flaws or improper construction, and creosote buildup damage that develops due to inadequate chimney cleaning or routine neglect.

The key rule insurers follow is simple: insurance covers sudden and unexpected damage, not gradual or preventable problems. Understanding this distinction is critical when deciding whether to file a claim. Let’s break it down in detail.

UNDERSTANDING DWELLING COVERAGE AND CHIMNEY PROTECTION

How Homeowners Insurance Covers Your Chimney

What Is Dwelling Coverage?

Dwelling coverage is one of the six core protections in a standard homeowners insurance policy. It covers the physical structure of your home, including walls, roof, and yes, the chimney. Because a chimney is considered a permanent structural component, chimney repair or rebuilding may be covered when damage meets policy requirements.

The “Covered Peril” Requirement

Coverage only applies when damage is caused by a covered peril—an event listed in your policy, such as fire or windstorm. These events must be sudden and unexpected. Problems caused by neglect or long-term deterioration fall under exclusions.

What This Means for Chimney Damage

  • Lightning strike cracks chimney → Covered

  • Tree falls on chimney → Covered

  • Bricks crumble after decades of exposure → Not covered

  • Chimney leans from foundation settling → Likely not covered

Important: Even with a covered peril, insurers may deny claims if poor maintenance contributed to the damage.

UNDERSTANDING DWELLING COVERAGE AND CHIMNEY PROTECTION

CHIMNEY DAMAGE THAT IS COVERED BY INSURANCE

When Homeowners Insurance WILL Cover Chimney Repair

Lightning Strikes and Fire Damage

Lightning is a standard covered peril. Damage such as cracked masonry, dislodged bricks, or fire damage caused by a strike is typically covered. Resulting damage to the roof or interior also falls under coverage.

Fallen Trees and Storm Debris

If a healthy tree falls during a storm and damages your chimney, insurance generally covers both removal and repairs. Sudden storm damage to chimney flashing or caps may also qualify.

Chimney Fires (With Caveats)

Chimney fires are usually covered as sudden events. Repairs to flue liners, masonry, and surrounding structures are included—unless the fire resulted from excessive creosote buildup due to neglected cleaning.

Weather-Related Sudden Damage

Tornadoes, hurricanes, hail, or heavy snow loads that cause sudden chimney damage may be covered. Some regions require separate wind or hurricane deductibles.

Vandalism or Impact

Intentional damage by third parties, or rare events like vehicle impact, are also covered under standard policies.

Key takeaway: If damage comes from an external, unpreventable force, homeowners’ insurance chimney repair coverage is likely, especially with good documentation.

CHIMNEY DAMAGE THAT IS NOT COVERED

When Homeowners Insurance WON’T Cover Chimney Repair

Normal Wear and Tear

Normal Wear and Tear covers aging mortar, spalling bricks, rusted dampers, and cracked chimney crowns, all of which are considered routine maintenance issues rather than insurable events.

Maintenance-Related Problems

Maintenance-related problems include leaks caused by worn flashing, missing chimney caps, or blocked flues, which are usually denied because insurance policies assume homeowners handle routine upkeep and preventive maintenance.

Pre-Existing Structural Issues

Pre-Existing Structural Issues include poor original construction, gradual settling, or a chimney that has been leaning for years, and these conditions are typically not covered by standard homeowners’ insurance policies.

Gradual Water Damage

Gradual Water Damage refers to slow, ongoing leaks that lead to issues like mold or rot, which are typically excluded from coverage; only leaks caused by sudden storm events may qualify for insurance claims.

Flood Damage

Flood Damage is entirely excluded from standard homeowners’ insurance policies, meaning any damage caused by flooding is not covered unless a separate flood insurance policy is in place.

Neglect

Neglect refers to situations where obvious warning signs were ignored over time, and in these cases, insurers may deny coverage—even if the damage ultimately results in a sudden failure.

CHIMNEY DAMAGE THAT IS NOT COVERED

THE CRITICAL ROLE OF MAINTENANCE

Why Regular Chimney Maintenance Protects Your Insurance Coverage

Annual inspections and cleanings are more than safety measures—they protect your eligibility for coverage. Insurers expect reasonable upkeep. Documentation from certified chimney professionals can make or break a claim.

Maintenance costs ($125–$300 annually) are minimal compared to major repairs. More importantly, they help prove that any damage wasn’t caused by neglect—strengthening your case if you ever ask, will homeowners insurance cover chimney repair after a disaster?

COMMON CHIMNEY PROBLEMS: COVERED OR NOT?

Real-World Chimney Issues: Will Insurance Cover Them?

  • Storm-damaged flashing leak: ✅ Likely covered

  • Leaning chimney ignored for months: ❌ Not covered

  • Chimney fire with cleaning records: ✅ Covered

  • Crumbling mortar from age: ❌ Not covered

  • Lightning strike damage: ✅ Covered

These scenarios show how cause—not cost—determines coverage.

HOW TO FILE A CHIMNEY INSURANCE CLAIM

Step-by-Step: Filing a Successful Chimney Insurance Claim

Document damage immediately with photos and video. Prevent further damage with temporary fixes. Contact your insurer promptly, hire a certified chimney inspector, gather maintenance records, and obtain multiple repair estimates. Be present during the adjuster’s inspection and review settlement offers carefully.

COST BREAKDOWN: WHAT TO EXPECT

How Much Do Chimney Repairs Cost?

Common Repair Costs (2024-2025 Range)

Create a cost table:

Repair Type Cost Range Insurance Coverage Likelihood
Minor repairs (pointing/sealing) $160-$750 Unlikely (maintenance)
Chimney cap replacement $200-$500 Depends on the cause
Flashing repair $300-$1,500 Covered in case of storm damage
Crown repair $500-$2,000 Depends on the cause
Chimney liner replacement $1,500-$7,000 Covered if fire damaged
Partial rebuild $1,000-$3,500 Covered if sudden damage
Full chimney replacement $4,000-$15,000 Covered if destroyed by covered peril
Tuckpointing/repointing $500-$2,500 Rarely covered (maintenance)

Many minor repairs won’t exceed your deductible, making insurance claims impractical.

 SPECIAL INSURANCE SITUATIONS

Special Coverage Scenarios to Understand

Special Coverage Scenarios to Understand are important because not all risks are automatically included in a standard homeowners insurance policy.

For example, wind damage from hurricanes or tornadoes may require a separate windstorm endorsement, while flood damage is typically excluded and always requires a dedicated flood insurance policy.

Mold remediation and related water damage often have limited coverage, so checking for specific endorsements is crucial.

Masonry coverage, such as for brick chimneys, may be limited or require additional riders to protect against cracking, spalling, or collapse.

Additionally, if you live in a community with a Homeowners Association (HOA), the HOA’s master insurance policy can affect whether certain repairs or liabilities fall on you or the association.

To avoid surprises, always review policy exclusions and endorsements carefully, ensuring you understand what is and isn’t covered before disaster strikes.

MAXIMIZING YOUR COVERAGE: EXPERT TIPS

How to Protect Your Investment and Insurance Coverage

Involves several key steps. First, schedule regular inspections of your chimney and roof to identify early signs of damage, deterioration, or potential hazards before they escalate.

Second, maintain proper documentation by keeping records of inspections, repairs, receipts, photos, and maintenance work—this evidence can be crucial when filing a claim.

Third, take the time to understand your insurance policy, including covered perils, exclusions, and limits, so there are no surprises during a claim.

Finally, practice proactive maintenance, such as cleaning chimneys, repairing minor cracks, replacing worn components, and removing debris, to prevent damage that could be denied by insurers.

Together, these steps help protect both your home and your ability to successfully claim coverage in the event of a covered disaster.

MAXIMIZING YOUR COVERAGE: EXPERT TIPS

WHAT TO DO IF YOUR CLAIM IS DENIED

Handling a Denied Chimney Insurance Claim

Starts with requesting a written explanation from your insurer so you clearly understand the reason for the denial and the specific policy language being cited.

Next, gather additional evidence such as inspection reports, contractor assessments, photos, maintenance records, and weather data that support your claim.

If the denial appears incorrect or incomplete, file a formal appeal within the insurer’s stated deadline, addressing each reason for denial point by point.

When the claim involves significant damage or complex policy interpretation, consulting a licensed public adjuster or an insurance attorney can help you negotiate more effectively or pursue further legal remedies if necessary.

Final Thoughts

So, will homeowners insurance cover chimney repair? Yes—when damage is sudden, unexpected, and unavoidable. No, when age, neglect, or poor maintenance are the cause. The difference lies in preparation.

Annual inspections, proper documentation, and understanding your policy ensure you’re protected when disaster strikes. Insurance is a safety net, not a maintenance plan. The best defense is prevention, backed by records that prove you’ve done your part.

Take action now: schedule an inspection, review your coverage, and document your chimney’s condition. When the unexpected happens, you’ll be ready.

 FAQS

  1. Will homeowners insurance cover chimney repair?

    Yes for sudden, covered perils; no for wear, age, or neglect.

2. How much does chimney repair cost?

$160–$15,000 depending on damage severity.

3. Are chimney leaks covered?

Only if caused by sudden storm damage.

4. Are chimney fires covered?

Usually, yes, unless caused by maintenance neglect.

5. Does insurance cover a leaning chimney?

Generally, no, unless a sudden external force caused it.

Picture this: You’re standing on a ladder, tape measure in hand, trying to determine if your roof shingles extend far enough beyond the edge of your gutters. Or perhaps you’ve noticed water dripping behind your gutters after a heavy rainstorm. For many homeowners, the question how far should shingles overhang drip edge” can be confusing—but it’s more important than you might think.

Incorrect overhang can lead to water damage, fascia rot, and even voided warranties. Yet, the right measurement is surprisingly small. The quick answer is that shingles should overhang the drip edge between 1/4 and 3/4 of an inch, depending on whether you’re at the eaves or rakes.

In this guide, you’ll learn proper overhang measurements, why they matter, risks of incorrect installation, and step-by-step instructions for both DIY and professional setups. By the end, you’ll understand how a small difference in inches can protect your roof, extend its lifespan, and prevent costly repairs.

The Quick Answer: Proper Shingle Overhang Measurements

Here’s a clear, quick reference for shingle overhang with and without a drip edge:

Location With Drip Edge Without Drip Edge
Eaves 1/4″ – 3/4″ 1/2″ – 3/4″
Rakes 1/4″ – 3/8″ 1/2″ – 3/4″

Industry Standards

Major roofing manufacturers such as GAF, Owens Corning, and CertainTeed all recommend installing shingles with a drip edge and following these overhang ranges. The consensus is clear: always use a drip edge to protect the roof deck and fascia.

Building Code Requirements

Most modern building codes require drip edge installation for both eaves and rakes. This protects your home from wind-driven rain, water infiltration, and structural damage.

Pro Tip

Using a drip edge is never optional. Even if your shingles extend slightly beyond the recommended range, the metal edge provides a critical barrier that prevents water from seeping under the roof deck and causing long-term damage.

Understanding What Drip Edge Is and Why It Matters

A drip edge is a preformed metal flashing installed at the edges of the roof. It’s not just decorative; it plays a crucial role in protecting your home.

Three Main Functions

Protects roof deck edges during wind-driven rain

A drip edge protects roof deck edges during wind-driven rain, preventing water from wicking under the shingles and helping to maintain the roof’s structural integrity over time.

Directs water into gutters

A drip edge directs water into gutters, minimizing pooling and reducing the risk of fascia damage, which helps protect both the roof structure and the home’s exterior.

Provides a clean aesthetic finish

A drip edge provides a clean aesthetic finish, giving the roof a polished, professional appearance while also enhancing its overall durability and functionality.

Materials Used

Aluminum

Aluminum drip edge is the most common choice due to its rust-resistant properties, durability, and low maintenance requirements, making it a reliable option for long-lasting roof protection.

Galvanized steel

Galvanized steel drip edge is strong and durable, but requires painting to prevent corrosion, ensuring long-term protection for the roof while maintaining its structural integrity.

Copper

Copper drip edge is a premium option that is long-lasting, highly durable, and visually striking, adding both functionality and an elegant appearance to the roof.

Types/Profiles

Type C (L-Style)

Type C (L-Style) drip edge is ideal for re-roofing projects, providing effective edge protection and a straightforward installation method that helps guide water into gutters while safeguarding the roof deck.

Type D (T-Style)

Type D (T-Style) drip edge is the most commonly used profile for new construction, offering effective edge protection, proper water diversion, and a neat, professional finish for roofs.

Type F

Type F drip edge features an extended profile designed for specialized applications and is often used in high-wind areas to provide extra protection against water infiltration and wind uplift.

Understanding What Drip Edge Is and Why It Matters

Why Overhang Distance Is Critical

The proper overhang isn’t arbitrary; it’s based on physics and water behavior.

The Science of Water Behavior

Water tends to cling to surfaces due to surface tension, known as the “teapot effect.” Without enough overhang, water can run back along the roof deck instead of dripping into the gutter, potentially causing damage.

Too Short = Water Damage

Too short an overhang can lead to water damage, as water wicks back under the shingles, causing fascia and soffit wood to rot.

Paint may peel, and pests can find entry points, while even minor gaps accelerate deterioration over time.

Too Long = Wind Damage

When shingles extend too far, they act like an unsupported diving board, making them vulnerable to wind uplift during storms, which can crack, sag, or tear them off.

Excessive overhang can also trigger the “zipper effect,” where an entire section of the roof becomes compromised.

According to the Insurance Institute for Business & Home Safety (IBHS), roof edge failures are common during high-wind events when overhangs are too long.

Correct overhang balances these risks, ensuring water drains properly while minimizing wind damage potential.

The Difference Between Eaves and Rakes

Understanding the distinction between eaves and rakes is key to proper installation.

Eaves

Eaves are the horizontal edges of the roof where gutters are installed, and proper shingle overhang ensures that water flows directly into the gutters, preventing water damage to the fascia and underlying roof structure.

Rakes

Rakes are the sloped sides of gable roofs, which typically do not have gutters. Proper overhang on rakes is essential to prevent wind-driven rain from infiltrating the roof edge and causing water damage.

Proper measurements are critical for both locations. While eaves benefit from a slightly larger overhang, rakes require more precision due to the lack of gutters and increased wind exposure.

Common Mistakes and Their Consequences

No Drip Edge Installation

No drip edge installation can lead to fascia and wood damage, void manufacturer warranties, and fail to meet modern building code requirements, leaving the roof vulnerable to water infiltration and long-term structural issues.

Eyeballing the Measurement

Eyeballing the measurement often results in an inconsistent overhang across the roof, making it difficult to achieve professional-grade quality, which relies on precise, uniform placement of shingles for both performance and aesthetic purposes.

Using the Wrong Overhang Length

Using the wrong overhang length can cause serious issues: too short, and it may lead to water damage, fascia rot, and leaks; too long, and shingles are at risk of wind uplift, breakage, and other structural problems.

Improper Starter Strip Installation

Improper starter strip installation occurs when the protective starter strip for the first row of shingles is installed incorrectly, which can compromise edge protection and reduce the overall effectiveness of the roof’s water-shedding capabilities.

Real-World Consequences

Real-world consequences of improper shingle overhang include repair costs that far exceed the expense of correct installation, potential denial of insurance claims for water damage caused by improper installation, and a significantly reduced roof lifespan due to accelerated wear and damage.

Common Mistakes and Their Consequences

Step-by-Step Installation Guidelines

When to Install

New construction

For new construction, install the drip edge before laying the underlayment to provide proper edge protection, guide water into gutters, and ensure a durable, code-compliant roofing system.

Re-roofing

For re-roofing projects, it’s important to replace or retrofit the drip edge as needed to ensure proper edge protection, maintain correct water drainage, and comply with current building standards.

Tools Needed

  • Chalk lines

  • Measuring tape

  • Tin snips

  • Hammer or nail gun

Professional Installation Process

  • Install drip edge on eaves before underlayment.
  • Apply underlayment over the roof deck.
  • Install drip edge on rakes over the underlayment.
  • Measure and mark the correct overhang distance.
  • Install starter strip.
  • Lay the first course of shingles with proper overhang.

Quality Control Checks

Quality control checks involve ensuring that the shingle overhang is consistent along both the eaves and rakes, verifying that all shingles align properly with the drip edge, and calling a professional if there is any uncertainty, as precision is essential for maintaining warranty protection and long-term roof performance.

How to Inspect Your Existing Roof

Signs of Incorrect Overhang

Signs of incorrect overhang include water stains on fascia boards, shingles curling into gutters, missing shingle edges after storms, and visible daylight beneath the shingles, all of which indicate improper installation and potential water damage.

DIY Inspection Tips

For DIY inspection tips, use binoculars from the ground to safely examine your roof without climbing. It’s also helpful to check your roof after heavy rain to observe water flow patterns and identify any potential overhang or drainage issues.

Professional Inspection

Professional inspection involves a licensed roofer carefully evaluating your roof to identify hidden damage and recommend necessary repairs. During the assessment, they will check the alignment and condition of the fascia, soffit, and gutters to ensure the roof edge functions properly and any issues are addressed before they worsen.

Conclusion

In summary, when asking “how far should shingles overhang drip edge,” the standard is 1/4 to 3/4 inch, depending on location. Small differences in inches can prevent fascia rot, water damage, and costly repairs.

Proper installation, along with drip edge use, ensures your roof functions as designed, protecting your home for decades. If you’re unsure about measurements, calling a professional is a small investment that saves money and stress in the long run. Remember: a few precise inches today prevent big headaches tomorrow.

FAQs

  1. Can I install shingles without a drip edge?

Building codes and manufacturers require a drip edge for edge protection. Skipping it risks water damage and voids warranties.

2. What if my old roof has no drip edge?

Retrofits are possible. Install drip edge over existing decking or underlayment for proper protection.

3. Does shingle type affect overhang requirements?

Yes. Architectural or designer shingles may require a slightly different overhang than standard 3-tab shingles.

4. How does climate impact the overhang needs?

Wind zones, ice dam regions, and heavy rain areas may require precise measurement adjustments.

5. Will an incorrect overhang void my warranty?

Yes. Manufacturers require compliance with overhang standards and proper drip edge installation.

One of the most common questions homeowners, builders, and renovators ask during construction is: How far apart are roof trusses supposed to be? Whether you’re building a new home, replacing a roof, or planning an addition, truss spacing plays a critical role in how well your roof performs over time.

Roof trusses may look simple, but their placement determines how weight is distributed across the structure. Improper spacing can lead to sagging roof decks, higher energy bills, and even structural failure under heavy loads. On the other hand, correct spacing ensures strength, durability, and cost efficiency.

Standard spacing isn’t universal. It varies depending on building type, roofing material, climate, and local building codes. Residential homes, commercial structures, and agricultural buildings all follow different spacing rules based on engineering requirements.

In this guide, you’ll learn exactly how far apart are roof trusses in different construction scenarios, why spacing matters, what factors influence it, and how to calculate the number of trusses needed for your project. By the end, you’ll have a clear understanding of proper spacing and how it protects your investment.

Understanding Roof Trusses

What Are Roof Trusses?

Roof trusses are engineered structural frameworks designed to support the weight of a roof and transfer loads safely to the building’s walls. Unlike traditional rafters, which are assembled piece by piece on site, trusses are typically manufactured off-site and delivered as complete units.

Their triangular shape provides exceptional strength while using less material than stick-built rafters. This design allows trusses to span longer distances without interior load-bearing walls, making them highly efficient and cost-effective.

Most residential trusses are made from wood and connected with metal connector plates. Metal trusses, often used in commercial or agricultural buildings, offer increased strength and resistance to moisture, pests, and fire.

The Role of Truss Spacing

Truss spacing refers to the distance between trusses, measured from the center of one truss to the center of the next, commonly called “on center” (O.C.). This spacing directly affects roof performance, load distribution, and material compatibility.

Proper roof truss spacing ensures that loads such as snow, wind, and roofing materials are evenly distributed. Incorrect spacing can overstress the roof deck and compromise long-term durability.

Standard Roof Truss Spacing by Building Type

Residential Buildings

In residential construction, the most common spacing is 24 inches on center. This measurement has become the industry norm because it balances material efficiency, structural strength, and cost.

Alternative options include 16 inches and 19.2 inches on center. Sixteen-inch spacing provides additional strength for heavy roofing materials, while 19.2 inches aligns efficiently with certain engineered lumber products.

The International Residential Code (IRC R802.10–R802.11) generally limits truss spacing to a maximum of 24 inches on center unless engineered otherwise. This standard truss spacing works well with common roof sheathing sizes and typical residential loads.

Commercial Buildings

Commercial buildings often use wider truss spacing, commonly 24 inches but sometimes extending to 48 inches on center. These wider spacings are possible because commercial trusses are fully engineered and designed to carry heavier loads.

Factors such as roof span, HVAC equipment, and occupancy classification influence spacing decisions. Engineering approval is mandatory in commercial applications.

Agricultural / Pole Barn Buildings

Agricultural structures have the widest spacing range. Trusses are commonly spaced 4 feet to 12 feet, with some pole barns reaching 16 feet on center.

Eight- to twelve-foot spacing is most common, with purlins installed between trusses to support the roof panels. Metal trusses are often preferred for durability, though wood trusses remain popular due to lower upfront cost.

Floor Trusses (Open-Web Trusses)

Floor trusses are typically spaced at 16 inches, 19.2 inches, or 24 inches O.C. Closer spacing does not always reduce floor vibration; stiffness often depends more on truss depth and design than spacing alone.

Standard Roof Truss Spacing by Building Type

Critical Factors That Determine Truss Spacing

Roof Load Requirements

Roof loads are divided into dead loads and live loads. Dead loads include roofing materials, insulation, and the trusses themselves. Live loads include snow, wind, and maintenance activity.

Regions with heavy snowfall require closer spacing or stronger trusses. Wind loads also influence spacing, especially in coastal and hurricane-prone zones.

Roofing Material Weight

Lightweight materials like asphalt shingles and metal roofing usually perform well with 24-inch spacing. Medium-weight materials such as wood shakes may require additional evaluation. Heavy materials like tile or slate often demand closer spacing.

Roof Design and Pitch

Roof design and pitch directly influence truss spacing, as steeper slopes increase load forces on the structure. Gable roofs generally perform well with standard 24-inch spacing, while hip roofs, with their more complex geometry and additional load distribution requirements, often necessitate closer spacing of around 16 inches to maintain structural integrity and prevent deflection.

Local Building Codes and Climate

Local building codes establish minimum truss spacing requirements that account for regional climate risks and safety standards. Areas prone to heavy snow, high winds, or seismic activity often require stricter spacing or enhanced structural design to ensure roofs can withstand environmental loads and remain compliant with local regulations.

Span Length

Longer span lengths place greater stress on each truss, increasing the demands on the roof structure. As the span increases, either truss spacing must be reduced, or the trusses themselves must be engineered with greater strength to safely handle the additional loads without excessive deflection or structural risk.

Sheathing and Decking Materials

Standard 4’×8’ OSB or plywood sheathing panels align perfectly with 24-inch truss spacing, making installation faster and more efficient. This alignment reduces the need for excessive cutting, improves fastening consistency, and minimizes material waste while maintaining proper structural support across the roof deck.

Spacing Requirements for Different Roofing Materials

Metal Roofing

Metal roofing panels typically perform best when installed over trusses spaced at 24 inches on center, providing adequate support and cost efficiency. However, panel profile, gauge, and fastening systems can influence structural requirements, and in high-wind or exposed areas, closer spacing may be necessary to improve wind uplift resistance and overall roof stability.

Asphalt Shingles

Asphalt shingles are the most common residential roofing material and are well-suited to standard truss spacing at 24 inches on center. This spacing provides reliable structural support for the roof deck while allowing for efficient installation, material compatibility, and long-term performance under typical residential loads.

Tile Roofing (Clay and Concrete)

Tile roofing made from clay or concrete is both heavy and brittle, placing higher demands on the roof structure. To safely support this added weight, truss spacing is often reduced to between 16 and 20 inches on center.

Proper load calculations are essential to ensure the roof can handle dead loads, live loads, and environmental stresses without cracking tiles or compromising structural integrity.

Slate Roofing

Slate roofing is among the heaviest roofing materials available, requiring exceptional structural support. Depending on slate thickness, roof span, and overall load requirements, truss spacing may need to be reduced to as close as 12 inches on center to ensure adequate strength, prevent deflection, and maintain long-term roof stability.

Wood Shake

Wood shake roofing can perform well with standard 24-inch truss spacing when treated materials are used, as treatment improves durability and resistance to moisture.

However, untreated wood shakes are more vulnerable to warping and deterioration, often requiring closer truss placement to provide additional support and maintain consistent roof performance over time.

Spacing Requirements for Different Roofing Materials

Consequences of Improper Truss Spacing

Spacing Too Wide

Excessive spacing between trusses can lead to roof deck sagging, visible dips, and water pooling, all of which accelerate material deterioration. Uneven load distribution places additional stress on roofing components, increasing the risk of leaks and premature wear over time.

In extreme load conditions, such as heavy snow or wind, this weakness can escalate into serious structural failure. Wide spacing can also negatively affect insulation performance and reduce ventilation efficiency, making the building less energy-efficient and more prone to moisture problems.

Spacing Too Close

Spacing trusses too close together can create unnecessary drawbacks rather than added strength. Overly tight spacing increases both material and labor costs without delivering proportional structural benefits. It can also complicate sheathing installation, as more framing members mean additional cuts, fasteners, and alignment challenges. In many cases, closer spacing does not significantly improve overall structural performance, making it an inefficient choice when standard spacing already meets load and code requirements.

How to Calculate the Number of Trusses Needed

Calculating the correct number of roof trusses is essential for proper structural support and smooth installation. While truss manufacturers provide final layouts, understanding the basic calculation helps with planning and estimating costs.

Measure the Building Length in Feet

Start by measuring the total length of the building along the wall where the trusses will sit. This is typically the length of the exterior load-bearing wall. Be precise, as even small measurement errors can affect spacing accuracy.

Convert Feet to Inches

Since truss spacing is measured in inches, convert the total building length from feet to inches by multiplying by 12.
For example, a 40-foot building equals 480 inches.

Divide by the Chosen Truss Spacing

Divide the total length in inches by your selected spacing, commonly 16 inches or 24 inches on center.
Example:
480 ÷ 24 = 20

Round Up to the Nearest Whole Number

Always round up, not down. Rounding down can result in spacing that exceeds code limits or weakens load distribution.

Add One Truss for the End

Finally, add one additional truss to account for the end truss at the starting point of the layout.
Using the example above:
20 + 1 = 21 total trusses

For buildings with multiple roof sections, offsets, or complex designs, each section should be calculated separately. Keep in mind that this method provides an estimated final truss count should always be confirmed by a truss manufacturer or structural engineer to ensure code compliance and structural safety.

Example:
A 40-foot building equals 480 inches.
480 ÷ 24 = 20 trusses
Add one end truss = 21 total trusses

Complex roof designs may require separate calculations. Always consult a professional for final verification.

How to Calculate the Number of Trusses Needed

Cost Considerations

Truss costs depend on span, slope, material, and spacing. Closer spacing increases upfront costs but may reduce long-term repairs. Wider spacing lowers material cost but may require stronger, more expensive trusses.

Balancing spacing with structural needs is essential. Poor spacing decisions often lead to higher lifetime expenses.

Best Practices and Professional Recommendations

Always Follow Local Building Codes

Always follow local building codes, as they are designed to ensure safety and maintain structural integrity. Obtaining the proper permits and undergoing inspections helps verify that construction meets these standards, reducing the risk of failures and ensuring long-lasting, compliant roofing.

Work With Professionals

Work with professionals, such as structural engineers and licensed truss manufacturers, who can provide engineer-sealed drawings specifically tailored to your project. Their expertise ensures proper load calculations, correct spacing, and overall roof safety, reducing the risk of structural issues and ensuring code compliance.

Consider Future Needs

Consider future needs when designing your roof, including potential attic storage, the addition of solar panels, or the installation of heavier roofing materials. Planning ahead allows for appropriate truss spacing and structural support, ensuring the roof can accommodate future upgrades without compromising safety or performance.

Quality Materials Matter

Quality materials matter, as using high-grade lumber and advanced metal connector plates enhances both the performance and longevity of your roof structure. Superior materials provide greater strength, reduce the risk of deformation or failure, and contribute to a durable, long-lasting roofing system.

Final Thoughts

So, how far apart are roof trusses typically placed? For most homes, 24 inches on center is standard, while pole barns range from 4 to 12 feet, and specialized roofs vary between 16 and 24 inches.

Spacing depends on loads, materials, climate, and design. Understanding these factors ensures safety, efficiency, and durability. Proper spacing is not guesswork; it’s engineering.

For any project, consult a qualified truss manufacturer or structural engineer. Remember, how far apart are roof trusses are isn’t just a measurement, it’s the foundation of a strong, long-lasting roof system.

FAQs

1. How far apart are roof trusses in most homes?

Most residential roof trusses are spaced 24 inches on center under standard building codes.

2. Can roof trusses be spaced 16 inches apart?

Yes, 16-inch spacing is used for heavy roofing materials or higher load requirements.

3. Is wider truss spacing cheaper?

Wider spacing lowers material count but may require stronger, more expensive trusses.

4. Do snow zones affect truss spacing?

Yes, heavy snow regions often require closer spacing or engineered trusses.

5. Should I calculate truss spacing myself?

Basic estimates are possible, but final spacing should always be approved by a professional.

If you’ve ever searched for what is PitchFactor Flex, you’re probably a guitarist, bassist, or producer curious about the PitchFlex algorithm on Eventide’s PitchFactor pedal. Unlike Logic Pro’s Flex Pitch, this is a hardware-based real-time pitch-shifting system. PitchFlex is one of ten algorithms in the PitchFactor pedal, designed specifically for expression pedal control, allowing whammy-style effects, dynamic pitch bending, and dual-voice harmonies.

Many musicians are drawn to PitchFlex for its flexibility in live performance and studio settings. Whether you want subtle pitch shifts, octave jumps, or dramatic dive-bombs, PitchFlex provides precise control over your sound. In this guide, we’ll cover exactly what PitchFlex is, how it works, its settings, presets, and why it’s a game-changer for guitarists, bassists, and other musicians exploring advanced pitch effects.

Understanding the Eventide PitchFactor Pedal

What Is the PitchFactor?

The PitchFactor is a professional-grade harmonizer pedal from Eventide Audio. Part of the renowned Factor series—which also includes TimeFactor, ModFactor, and Space—this stompbox brings studio-quality pitch shifting and delay to your pedalboard. It contains ten pitch-shifting algorithms and leverages Eventide’s legendary pitch technology, trusted in studios worldwide. With its rugged metal design, the PitchFactor is built to handle live performance and demanding rehearsal environments.

The 10 PitchFactor Algorithms

The pedal includes ten algorithms: Diatonic, which provides smart harmonies based on key and scale; PitchFlex, offering expression pedal-controlled pitch bending; Quadravox, a 4-voice harmonizer; Octaver, which adds octave down and sub-octave effects; HarModulator, combining pitch shifting with modulation; Crystals, for reverse pitch shifts with reverb; MicroPitch, delivering subtle pitch detuning and chorus effects; HarPeggiator, an arpeggiating harmonizer with sequencer; H910/H949, classic Eventide harmonizer emulations; and Synthonizer, producing synth-style pitch textures. Among these, PitchFlex stands out for real-time control via an expression pedal, enabling highly dynamic musical expression.

What Is PitchFlex? (Core Definition)

PitchFlex Definition

PitchFlex is a real-time pitch-shifting algorithm on the PitchFactor pedal, optimized for expression pedal or Flex footswitch control. It’s designed for “whammy” style effects similar to the Digitech Whammy pedal, allowing smooth transitions between intervals. PitchFlex supports two independent pitch voices (A and B), each with its own settings.

Key Characteristics

PitchFlex offers several standout features: Diatonic Intelligence allows pitches to snap to musical scales, while Heel and Toe Positions let you set different pitch intervals at each end of the expression pedal. Glide Time Control adjusts the speed of pitch transitions, Dual Voice enables blending of two pitch shifts simultaneously, and Delay Integration provides up to 1.5 seconds of stereo delay per voice.

How It Differs From Other Algorithms

Compared to other PitchFactor options, PitchFlex allows real-time pedal morphing unlike Diatonic, delivers modern tones with less vintage coloration than H910/H949, provides a wider pitch range than MicroPitch (beyond ±50 cents), and emphasizes direct control over modulation compared to HarModulator.

The “Flex” Naming

The “Flex” refers to flexible real-time bending. The Performance Switch can act as a “Flex” button to instantly double pitch shift amounts for expressive playing.

How PitchFlex Works

Heel & Toe System

The Heel & Toe System sets the pedal’s pitch control: the Heel Position (pedal fully back) establishes the base pitch, while the Toe Position (pedal fully forward) determines the target pitch. As you rock the pedal, smooth interpolation occurs between these positions, and the system can also be set to OFF for gating effects.

Core Parameters

Core parameters include Pitch A/B Heel & Toe (AH, BH, AT, BT), which define interval settings for both voices. Glide Time (H-T, T-H) controls transition speeds between pedal positions from 0.01 to 2.00 seconds. Mix & Shape allow balancing of dry/wet signals, blending of voices, and adjustment of tonal character. Additionally, Delay A/B provides independent delay per voice for creating rhythmic patterns.

Expression Pedal Integration

Supports standard TRS expression pedals, MIDI expression, and the Flex footswitch for instant switching. Calibration ensures precise control with different pedal types.

Common PitchFlex Settings & Presets

Factory Presets

Factory presets include Pitch Flex -4th for drop tuning and bass-style sounds, Pitch Flex Unison & +5th +2nd +6th which provides rich harmonies with pedal morphing, and Pitch Flex -2nd for bluesy, tension-building effects.

Popular User Settings

Popular user settings feature Whammy Up/Down for octave jumps with instant glides, Pedal Steel Simulation for smooth major 3rd bends, and Tom Morello Dive Bombs for extreme pitch shifts fully wet.

Creative Applications

Creative applications of PitchFlex include freeze/sample effects, time-warp delays, dual harmony setups, and sequenced pitch changes to create interesting rhythmic textures.

PitchFlex vs. Other Pitch Effects

Compared to other pitch effects, PitchFlex offers several advantages. Against the Digitech Whammy, it provides dual independent voices, diatonic intelligence, and integrated delay. Compared to the Boss PS-6, PitchFlex delivers more sophisticated algorithms and better tracking. When measured against the EHX POG, PitchFlex excels at smooth pitch bends and expression pedal control. Among other PitchFactor algorithms, choose PitchFlex for real-time expression pedal morphing, while Diatonic is better suited for fixed harmonies.

Setting Up PitchFlex

To set up PitchFlex, first connect your expression pedal to the Exp Pedal jack. Next, select the PitchFlex algorithm using the rotary encoder on the pedal. Calibrate your pedal and set the desired heel and toe pitch values, then adjust glide times and mix to taste. Optionally, you can use MIDI CC for preset recall and tempo synchronization to integrate PitchFlex seamlessly into your setup.

Tips for Getting the Best Sound

To get the best sound from PitchFlex, ensure your input signal is clean, as this improves tracking; using compression can further enhance responsiveness. Adjust the Shape and glide settings to minimize artifacts and create smooth pitch sweeps. For a wider soundstage, use stereo mode to separate voices A and B, while mono sums both voices. Typical signal chain placement is Guitar → Compressor → PitchFactor → Amp/Effects, though creative placements in effects loops or parallel chains can yield unique textures.

Common Issues and Solutions

Common PitchFlex issues include the dry signal sounding different when set to UNISON, which can be resolved by using True Bypass or setting one position to OFF. If you experience insufficient pitch range, ensure the Flex switch doubling is enabled and the correct algorithm is selected. Tracking problems often occur with fast or polyphonic passages, so try playing monophonic lines or slightly slower notes. If the expression pedal isn’t responding, check the TRS connection, calibrate the pedal, and confirm it’s correctly assigned in the settings.

Who Uses PitchFlex?

PitchFlex is used by artists such as St. Vincent, Young the Giant, Dave Weiner, and Tenacious D. It spans genres including progressive rock and metal, experimental music, pop, ambient, and electronic. Musicians commonly apply it for lead guitar solos, thickening rhythm parts, bass octave effects, and processing keyboards or synths.

PitchFactor Hardware Specs & Pricing

The PitchFactor pedal measures 4.8” H × 7.5” W × 2.12” D and weighs 2.15 lbs, featuring a rugged design. It offers connectivity for mono or stereo operation, USB, MIDI In/Out/Thru, an expression pedal input, and an aux switch. Pricing is set at an MSRP of $499, with used units typically ranging from $300–$400, and all Factor algorithms are also accessible via the H9 pedal.

Alternatives: H9 Pedal & Software

The H9 Pedal offers a compact solution that includes all Factor algorithms, including PitchFlex. The H9 Control App enables preset management and deep editing of parameters, while plugin versions allow DAW integration with low-latency pitch shifting for studio use.

Conclusion

PitchFlex is a powerful, expression-pedal-controlled pitch-shifting algorithm for PitchFactor users. Ideal for whammy effects, octave jumps, and expressive musical textures, it offers dual voices, diatonic intelligence, and delay integration. For $499, it’s a professional-grade tool with Eventide’s legacy of studio-quality sound. Explore factory presets, try in-store demos, or experiment with creative settings for maximum versatility.

FAQs

What is the difference between PitchFactor and PitchFlex?

PitchFactor is the pedal; PitchFlex is one of its 10 algorithms for expression pedal control.

Can PitchFlex do whammy effects like Digitech Whammy?

Yes, with added features like dual voices, delay, and diatonic intelligence.

Do I need an expression pedal to use PitchFlex?

Recommended for full control, but the Flex footswitch allows instant switching.

What’s the pitch range of PitchFlex?

Approximately -2 octaves to +2 octaves; much wider than MicroPitch.

Can PitchFlex track chords or only single notes?

Best with monophonic input; chords may be slightly smeary due to tracking limits.

People usually search this topic for two very practical reasons. The first is dumpster sizing during a roof tear-off, where weight limits can mean the difference between a smooth project and expensive overage fees. The second is transporting new shingles, whether loading them into a pickup truck or carrying bundles up a ladder safely. In both cases, knowing the exact weight matters more than most people realize.

Here’s the quick answer upfront: most architectural shingles weigh between 60 and 80 pounds per bundle, while traditional 3-tab shingles usually weigh 50 to 65 pounds per bundle. However, the real numbers can change depending on shingle type, brand, moisture content, and even how old the shingles are.

This guide breaks everything down clearly. You’ll find weight charts by shingle type, simple calculation methods, and real-world examples for disposal and transport. Understanding how much does a bundle of shingles weigh can also help you avoid related issues, such as water damage near chimneys that later leads to chimney flashing repair. By the end, you’ll know exactly how to plan your roofing project with confidence.

Quick Answer: Bundle Weight by Shingle Type

While bundle weight varies by manufacturer, roofing material, and design, most shingles fall within predictable ranges. A standard bundle typically covers about 33 square feet, meaning three bundles usually equal one roofing square (100 square feet).

Shingle Weight Comparison Table

Shingle Type Weight per Bundle Weight per Square Bundles per Square
3-Tab Asphalt 50–65 lbs 230–250 lbs 3
Architectural / Dimensional 60–80 lbs 400–430 lbs 3
Premium / Designer 65–90+ lbs 450–480 lbs 3–4
Wood Shingles 60–75 lbs 350–400 lbs 3
Wood Shakes 75–90 lbs 450–500 lbs 3
Slate 300+ lbs 800–1,000 lbs 3
Clay / Concrete Tile 250–350 lbs 900–1,200 lbs Varies

Key points to remember:

  • One bundle covers roughly 33 square feet

  • Three bundles typically equal one roofing square

  • Weight varies by brand and product line

Knowing these numbers helps with everything from delivery planning to avoiding underestimated chimney flashing repair cost caused by rushed installations.

Understanding Roofing Measurements

What Is a Bundle?

A bundle is a packaged unit of shingles designed for easier transport and handling. Most bundles cover about 33.3 square feet. The number of shingles inside varies by type—3-tab shingles usually have more individual pieces per bundle than architectural shingles.

What Is a Square?

A roofing square is an industry-standard measurement equal to 100 square feet of roof coverage. Contractors prefer squares because they make estimating materials, labor, and disposal weight easier and more consistent.

The 3-Bundle Rule

Most standard asphalt shingles are packaged so that three bundles equal one square. However, premium and designer shingles may require four or more bundles per square.

Examples:

GAF Timberline HD: 3 bundles per square

CertainTeed Landmark: 3 bundles per square

Premium designer shingles: 4–5 bundles per square

This distinction is critical when calculating total roof weight and planning dumpster capacity.

Understanding Roofing Measurements

Detailed Weight Breakdown by Shingle Type

3-Tab Asphalt Shingles

3-tab shingles weigh 50–65 pounds per bundle. They are lighter because they use a single asphalt layer and thinner construction. Each bundle usually contains 26–29 shingles. These are best for budget-friendly projects and simple roof designs.

Architectural / Dimensional Shingles

Architectural shingles are heavier, ranging from 60–80 pounds per bundle due to multi-layer construction. Bundles typically contain 20–22 shingles.

Popular examples:

GAF Timberline HDZ: ~67 lbs per bundle

Owens Corning Duration: ~68 lbs per bundle

CertainTeed Landmark: ~65 lbs per bundle

This is the most common residential choice today.

Premium / Designer Shingles

Premium shingles can weigh 65–90+ pounds per bundle and often require four or more bundles per square. Their added thickness improves durability and wind resistance.

Wood Shingles & Shakes

Wood shingles weigh 60–75 pounds per bundle, while shakes range from 75–90 pounds. Weight varies by wood species, such as cedar or redwood.

Slate Shingles

Slate is extremely heavy, often 300 pounds or more per bundle, and requires structural reinforcement. Its long lifespan offsets its weight.

Tile Roofing (Clay / Concrete)

Concrete tiles weigh 250–300 pounds per bundle, while clay tiles can reach 350 pounds. Coverage varies widely, making careful calculation essential.

Factors That Affect Shingle Weight

Several variables influence how much a bundle actually weighs.

Material composition matters—fiberglass mat shingles weigh less than organic-based ones. Shingle thickness also plays a role, with laminated shingles being heavier than single-layer designs. Size and shape can add weight, especially with designer cuts.

Manufacturing differences between brands can change bundle weight even for similar shingles. Age and condition matter too: old shingles often weigh 10–15% less due to granule loss. However, moisture can reverse this—water-soaked shingles can weigh 15–20% more, which significantly affects disposal planning and can increase chimney flashing repair near me costs if drainage problems are ignored.

Affect Shingle Weight

Why You Need to Know Shingle Weight

Dumpster Sizing for Tear-Offs

This is the number-one reason people search how much does a bundle of shingles weigh. Dumpster overage fees often range from $75–$150 per ton.

Example calculation:

Roof size: 1,600 sq ft = 16 squares

Shingle type: Architectural (240 lbs per square)

Base weight: 16 × 240 = 3,840 lbs

Two layers: 7,680 lbs

Add 10% waste: 8,448 lbs (≈4.2 tons)

Recommended dumpster: 20-yard

Transporting New Shingles

Bundle weight affects vehicle payload limits and safe ladder carrying. Overloading trucks or carrying heavy bundles improperly can cause injuries or damage materials.

Structural Considerations

Heavier materials increase roof load. Switching from asphalt to tile or slate may require structural upgrades to meet building codes.

How to Calculate Total Roof Weight

Method 1: From Roof Size

Start by measuring the total roof square footage. Divide this number by 100 to determine the number of roofing squares. Multiply the number of squares by the weight per square for your shingle type, then add 5–10% to account for waste.

Method 2: From Bundles

Estimate the total number of bundles needed for the roof. Multiply this number by the average weight per bundle, and be sure to account for multiple layers if present.

Method 3: From Individual Shingles

Check the weight of a single shingle, then multiply by the number of shingles per bundle. Finally, multiply by the total number of bundles required for the roof.

Using these methods helps ensure accurate weight calculations and prevents mistakes that could lead to unexpected costs, such as flashing chimney repair, during or after roofing projects.

How to Calculate Total Roof Weight

Choosing the Right Dumpster Size

Dumpster Size Typical Capacity
10-Yard 10–15 squares
20-Yard 20–30 squares
30-Yard 30–40 squares
40-Yard 40+ squares or heavy materials

Weight limits matter more than volume. Moisture, multiple layers, and mixed debris can push loads over limits quickly.

Pallet Information

Shingle pallets typically hold 20–50 bundles. Asphalt shingle pallets weigh 1,500–3,000 pounds, while slate or tile pallets may exceed 5,000 pounds. Delivery often requires forklifts or cranes and stable ground surfaces.

Safe Handling and Transportation Tips

Always lift bundles using your legs, not your back. Two-person carries are recommended for bundles over 80 pounds. When transporting, check vehicle payload capacity and secure loads properly. On roofs, distribute weight evenly to avoid deck stress and reduce risks around vulnerable areas like chimneys that may later need flashing chimney repair.

Brand-Specific Weight Examples

GAF offers Timberline HD at 240 lbs per square, Timberline HDZ at 245 lbs per square, and the heavier Grand Sequoia at 340 lbs per square. CertainTeed provides Landmark shingles weighing 235–240 lbs per square, Landmark Pro at 250 lbs per square, and the premium Grand Manor at 390 lbs per square. Owens Corning shingles include Duration at 240 lbs per square and Oakridge at 235 lbs per square. It is important to always verify current specifications, as formulations and weights can change over time.

Common Mistakes to Avoid

Many homeowners underestimate moisture weight, forget multiple layers, or ignore waste factors. Assuming all bundles weigh the same across brands is another costly mistake. Ordering a dumpster too small often leads to overage fees, while failing to check vehicle payload limits can cause safety issues. Mixing old and new weight estimates also leads to miscalculations that affect disposal and planning.

Cost Implications

Heavier shingles increase material, transport, and disposal costs. Larger dumpsters, possible structural reinforcement, and added labor all affect budgets.

Typical costs per bundle:

  • 3-tab: $20–35

  • Architectural: $30–50

  • Premium: $50–80+

  • Specialty materials: $100–300+

Conclusion

Most homeowners will work with bundles weighing 60–80 pounds for architectural shingles and 50–65 pounds for 3-tab shingles. Accurate calculations are essential for transport, disposal, and safety. Always verify manufacturer specifications, account for moisture and waste, and consult professionals when unsure. Knowing these details prevents costly mistakes and protects your project from unnecessary delays.

FAQs

How much does a bundle of shingles weigh on average?

Most architectural shingles weigh 60–80 lbs per bundle, while 3-tab shingles weigh 50–65 lbs.

How many shingles are in a bundle?

3-tab bundles usually contain 26–29 shingles, while architectural bundles contain about 20–22.

How many bundles of shingles do I need?

Divide roof square footage by 33, then add about 10% extra for waste.

What is a square of shingles?

A roofing square equals 100 square feet of coverage and typically requires three bundles.

Does moisture affect shingle weight?

Yes. Water-soaked shingles can weigh 15–20% more than dry shingles, especially during tear-offs.