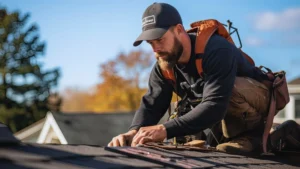

Picture this: You’re standing on a ladder, tape measure in hand, trying to determine if your roof shingles extend far enough beyond the edge of your gutters. Or perhaps you’ve noticed water dripping behind your gutters after a heavy rainstorm. For many homeowners, the question “how far should shingles overhang drip edge” can be confusing—but it’s more important than you might think.
Incorrect overhang can lead to water damage, fascia rot, and even voided warranties. Yet, the right measurement is surprisingly small. The quick answer is that shingles should overhang the drip edge between 1/4 and 3/4 of an inch, depending on whether you’re at the eaves or rakes.
In this guide, you’ll learn proper overhang measurements, why they matter, risks of incorrect installation, and step-by-step instructions for both DIY and professional setups. By the end, you’ll understand how a small difference in inches can protect your roof, extend its lifespan, and prevent costly repairs.
The Quick Answer: Proper Shingle Overhang Measurements
Here’s a clear, quick reference for shingle overhang with and without a drip edge:
| Location | With Drip Edge | Without Drip Edge |
|---|---|---|
| Eaves | 1/4″ – 3/4″ | 1/2″ – 3/4″ |
| Rakes | 1/4″ – 3/8″ | 1/2″ – 3/4″ |
Industry Standards
Major roofing manufacturers such as GAF, Owens Corning, and CertainTeed all recommend installing shingles with a drip edge and following these overhang ranges. The consensus is clear: always use a drip edge to protect the roof deck and fascia.
Building Code Requirements
Most modern building codes require drip edge installation for both eaves and rakes. This protects your home from wind-driven rain, water infiltration, and structural damage.
Pro Tip
Using a drip edge is never optional. Even if your shingles extend slightly beyond the recommended range, the metal edge provides a critical barrier that prevents water from seeping under the roof deck and causing long-term damage.
Understanding What Drip Edge Is and Why It Matters
A drip edge is a preformed metal flashing installed at the edges of the roof. It’s not just decorative; it plays a crucial role in protecting your home.
Three Main Functions
Protects roof deck edges during wind-driven rain
A drip edge protects roof deck edges during wind-driven rain, preventing water from wicking under the shingles and helping to maintain the roof’s structural integrity over time.
Directs water into gutters
A drip edge directs water into gutters, minimizing pooling and reducing the risk of fascia damage, which helps protect both the roof structure and the home’s exterior.
Provides a clean aesthetic finish
A drip edge provides a clean aesthetic finish, giving the roof a polished, professional appearance while also enhancing its overall durability and functionality.
Materials Used
Aluminum
Aluminum drip edge is the most common choice due to its rust-resistant properties, durability, and low maintenance requirements, making it a reliable option for long-lasting roof protection.
Galvanized steel
Galvanized steel drip edge is strong and durable, but requires painting to prevent corrosion, ensuring long-term protection for the roof while maintaining its structural integrity.
Copper
Copper drip edge is a premium option that is long-lasting, highly durable, and visually striking, adding both functionality and an elegant appearance to the roof.
Types/Profiles
Type C (L-Style)
Type C (L-Style) drip edge is ideal for re-roofing projects, providing effective edge protection and a straightforward installation method that helps guide water into gutters while safeguarding the roof deck.
Type D (T-Style)
Type D (T-Style) drip edge is the most commonly used profile for new construction, offering effective edge protection, proper water diversion, and a neat, professional finish for roofs.
Type F
Type F drip edge features an extended profile designed for specialized applications and is often used in high-wind areas to provide extra protection against water infiltration and wind uplift.

Why Overhang Distance Is Critical
The proper overhang isn’t arbitrary; it’s based on physics and water behavior.
The Science of Water Behavior
Water tends to cling to surfaces due to surface tension, known as the “teapot effect.” Without enough overhang, water can run back along the roof deck instead of dripping into the gutter, potentially causing damage.
Too Short = Water Damage
Too short an overhang can lead to water damage, as water wicks back under the shingles, causing fascia and soffit wood to rot.
Paint may peel, and pests can find entry points, while even minor gaps accelerate deterioration over time.
Too Long = Wind Damage
When shingles extend too far, they act like an unsupported diving board, making them vulnerable to wind uplift during storms, which can crack, sag, or tear them off.
Excessive overhang can also trigger the “zipper effect,” where an entire section of the roof becomes compromised.
According to the Insurance Institute for Business & Home Safety (IBHS), roof edge failures are common during high-wind events when overhangs are too long.
Correct overhang balances these risks, ensuring water drains properly while minimizing wind damage potential.
The Difference Between Eaves and Rakes
Understanding the distinction between eaves and rakes is key to proper installation.
Eaves
Eaves are the horizontal edges of the roof where gutters are installed, and proper shingle overhang ensures that water flows directly into the gutters, preventing water damage to the fascia and underlying roof structure.
Rakes
Rakes are the sloped sides of gable roofs, which typically do not have gutters. Proper overhang on rakes is essential to prevent wind-driven rain from infiltrating the roof edge and causing water damage.
Proper measurements are critical for both locations. While eaves benefit from a slightly larger overhang, rakes require more precision due to the lack of gutters and increased wind exposure.
Common Mistakes and Their Consequences
No Drip Edge Installation
No drip edge installation can lead to fascia and wood damage, void manufacturer warranties, and fail to meet modern building code requirements, leaving the roof vulnerable to water infiltration and long-term structural issues.
Eyeballing the Measurement
Eyeballing the measurement often results in an inconsistent overhang across the roof, making it difficult to achieve professional-grade quality, which relies on precise, uniform placement of shingles for both performance and aesthetic purposes.
Using the Wrong Overhang Length
Using the wrong overhang length can cause serious issues: too short, and it may lead to water damage, fascia rot, and leaks; too long, and shingles are at risk of wind uplift, breakage, and other structural problems.
Improper Starter Strip Installation
Improper starter strip installation occurs when the protective starter strip for the first row of shingles is installed incorrectly, which can compromise edge protection and reduce the overall effectiveness of the roof’s water-shedding capabilities.
Real-World Consequences
Real-world consequences of improper shingle overhang include repair costs that far exceed the expense of correct installation, potential denial of insurance claims for water damage caused by improper installation, and a significantly reduced roof lifespan due to accelerated wear and damage.

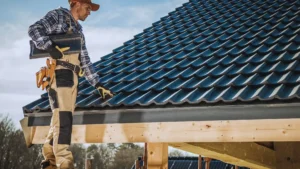
Step-by-Step Installation Guidelines
When to Install
New construction
For new construction, install the drip edge before laying the underlayment to provide proper edge protection, guide water into gutters, and ensure a durable, code-compliant roofing system.
Re-roofing
For re-roofing projects, it’s important to replace or retrofit the drip edge as needed to ensure proper edge protection, maintain correct water drainage, and comply with current building standards.
Tools Needed
-
Chalk lines
-
Measuring tape
-
Tin snips
-
Hammer or nail gun
Professional Installation Process
- Install drip edge on eaves before underlayment.
- Apply underlayment over the roof deck.
- Install drip edge on rakes over the underlayment.
- Measure and mark the correct overhang distance.
- Install starter strip.
- Lay the first course of shingles with proper overhang.
Quality Control Checks
Quality control checks involve ensuring that the shingle overhang is consistent along both the eaves and rakes, verifying that all shingles align properly with the drip edge, and calling a professional if there is any uncertainty, as precision is essential for maintaining warranty protection and long-term roof performance.
How to Inspect Your Existing Roof
Signs of Incorrect Overhang
Signs of incorrect overhang include water stains on fascia boards, shingles curling into gutters, missing shingle edges after storms, and visible daylight beneath the shingles, all of which indicate improper installation and potential water damage.
DIY Inspection Tips
For DIY inspection tips, use binoculars from the ground to safely examine your roof without climbing. It’s also helpful to check your roof after heavy rain to observe water flow patterns and identify any potential overhang or drainage issues.
Professional Inspection
Professional inspection involves a licensed roofer carefully evaluating your roof to identify hidden damage and recommend necessary repairs. During the assessment, they will check the alignment and condition of the fascia, soffit, and gutters to ensure the roof edge functions properly and any issues are addressed before they worsen.
Conclusion
In summary, when asking “how far should shingles overhang drip edge,” the standard is 1/4 to 3/4 inch, depending on location. Small differences in inches can prevent fascia rot, water damage, and costly repairs.
Proper installation, along with drip edge use, ensures your roof functions as designed, protecting your home for decades. If you’re unsure about measurements, calling a professional is a small investment that saves money and stress in the long run. Remember: a few precise inches today prevent big headaches tomorrow.
FAQs
-
Can I install shingles without a drip edge?
Building codes and manufacturers require a drip edge for edge protection. Skipping it risks water damage and voids warranties.
2. What if my old roof has no drip edge?
Retrofits are possible. Install drip edge over existing decking or underlayment for proper protection.
3. Does shingle type affect overhang requirements?
Yes. Architectural or designer shingles may require a slightly different overhang than standard 3-tab shingles.
4. How does climate impact the overhang needs?
Wind zones, ice dam regions, and heavy rain areas may require precise measurement adjustments.
5. Will an incorrect overhang void my warranty?
Yes. Manufacturers require compliance with overhang standards and proper drip edge installation.